Quantcast
Channel: Asia Farming
Viewing all 615 articles
Browse latest View live

Bottle Gourd Cultivation Information Guide

$
0
0

Bottle Gourd Cultivation Guide:

Round Shaped Bottle Gourd

Introduction of Bottle Gourd Cultivation:- Bottle gourd is one of the popular vegetable crops cultivated in south East Asia. This vegetable is extensively grown in India and fruits are available throughout the year. Bottle gourd plant is a vigorous, annual and climbing vine with large leaves and a lush appearance. Bottle gourd usually comes to harvesting in 3 months and its flowers are solitary, chalky white in colour and open at night. Bottle gourd fruits are fleshy and vary in shape and size. The name “bottle gourd” is due to its bottle like shape. Bottle gourd belongs to the family of “Cucurbitaceae” and genus of “Lagenaria”. Bottle gourd is also known as “calabash” and “lauki”. Bottle gourd is originated from tropical Africa and spread across the world. Bottle gourd vegetables at early (tender) stage are used in cooking’s for preparing various dishes. Mature fruits are used as water jugs, domestic utensils, floats for fishing nets. The big advantage of this crop is, bottle gourd will start flowering 2 months after sowing. Though, this crop is cultivated under rainfed conditions, one can plan for multiple crops throughout the year provided there is enough irrigation facility. Bottle gourd leaves also have some good medicinal properties and a decoction made out of leaf is used for curing jaundice. One can get decent profits from commercial cultivation of bottle gourd with proper crop management practices.

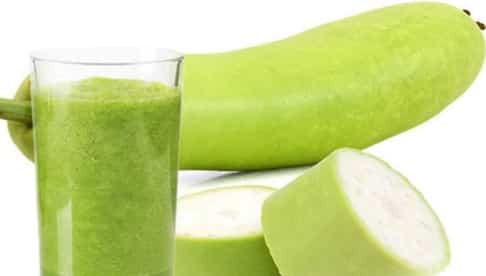
Health Benefits of Bottle Gourd:- The following are some of the health benefits of Bottle Gourd.

Health Benefits of Bottle Gourd
  • Bottle gourd is good for digestion.
  • Bottle gourd has cooling properties.
  • Bottle gourd is good for diabetic patients.
  • Bottle gourd juice helps in weight management.
  • Bottle gourd helps in reducing the blood sugar levels.
  • Bottle gourd helps inflammations in the liver and kidneys.
  • Bottle gourd helps to reduce the constipation.
  • Bottle gourd is good remedy for the insomnia.
  • Bottle gourd is good remedy for urinary infections.

Local Names of Bottle Gourd in Other Parts of the World:- Flaschenkürbis (German), Lauki (Urdu),Κολοκύθι δοχείου (Greek), Holibyeongbag (Korean), Lauka (Nepali), botella de calabaza (Spanish),زجاجة القرع           (Arabic), Бутилка кратуна (Bulgarian), 葫芦瓶 (Chinese), upo (Filipino),Lagenaria siceraria (Italian), น้ำเต้า (Thai),bầu (Vietnamese), 夕顔 (Japanese), Tigva vasului (Romanian), දිය ලබු,, Diyalabu (Sinhalese, Sri lanka), ឃ្លោក (Cambodian), Gourde (French),sukabağı (Turkish), Pokok Labu Parang (Malay), کدو بطری (Persian).

Local Names of Bottle Gourd in India:- Bottle Gourd (English), Ghia / Lauki (Hindi), Sorekai / Chorakkai (Tamil),  Sorekai, ചുരക്ക (Malayalam), Sorakaya / Anapa Kaya (Telugu), Sorekai (Kannada), Lau (Bengali), Dudhi (Gujarati),  Gardudde / Boblen (Konkani), Pandharabhopla / Dudya Bhopal,  Laau (Bengali), Doodhi Bhopla  (Marathi), Lau (Oriaya),  Ghia Da Sag (Punjabi), Turae (Tulu),  Zeeth (Kashmiri), Khongdrum (Manipuri), lau (Oriya), Lau (Assamese).

Bottle Gourd Varieties:- There are many varieties locally developed for commercial purpose. It is better to find out the high yielding seed variety in your local area. Information about commercial varieties of bottle gourd can be obtained from any local horticulture  department or agriculture department or agriculture universities Choosing the quality  and disease resistant seed will check many pests and diseases .

Long type Bottle Gourd

Climate Required for Bottle Gourd Cultivation:- Bottle gourd thrives best in hot and moist climatic conditions. This crop tolerates cool climate better than musk melon and water melon. However, bottle gourd cannot tolerate frost.

Soil Requirement for Bottle Gourd Cultivation:- Bottle gourd can be cultivated on wide range of soils. However, sandy loamy soils rich in organic matter with good drainage are best suited for high quality and yield. If you are planning large scale production of bottle gourd, it is better to go for soil test. The optimum soil pH in bottle gourd cultivation is from 6.5 to 8.0. Bottle gourd crop is quite suitable for river bed cultivation because of its deep tap root system which supports vines for a longer period.

Bottle Gourd Planting

Season for Bottle Gourd Cultivation:- Usually in south East Asia, this is grown as summer and rainy season crop. However, bottle gourd can be grown throughout the year if there is enough irrigation facility.

Land Preparation in Bottle Gourd Cultivation:- The land should be brought to fine tilth stage by thoroughly ploughing. It can be achieved by giving five to six ploughings. Any weeds from previous vegetable crops should be removed. Any deficiency of micro-nutrients in the soil should be covered. To make the soil rich in organic matter, apply 20 to 25 tonnes of well-decomposed farmyard manure (FMY) during the field preparation.

Propagation, Seed Rate and Sowing in Bottle Gourd Cultivation:- Propagation is done by seeds. Seed rate depends on soil type and variety. Generally on an average, seed rate of 3 to 6 kg is required to cover the 1 hectare land. For improving germination, should be soaked for 24 hours in water for better germination .The layout used should be ring and basin. The seeds should be sown directly in the field by dibbling method at distance of 2 meter to 3 meter X 1.0 meter to 1.5 meter. Generally 3 to 4 seeds are sown in a pit at 3.0 cm depth. To prevent from any soil borne disease or seed borne disease, treat the seeds with Carbendazim 2 grams/kg of seeds before sowing in the field.

Bottle Gourd Seeds
Bottle Gourd Seeds

Nursery Raising in Bottle Gourd Cultivation:- In hi-tech horticulture, plant 2 weeks old healthy seedlings of bottle gourd  raised in shade net houses. Raise the seedlings in portrays having 98 cells or in polythene bags. Transplant about 2 week old seedlings in the main field.

Manures and Fertilizers in Bottle Gourd Cultivation:- Application well-decomposed farmyard manure (FMY) of 25 tonnes/ha as basal dose along with along with half dose of ‘N’ of 35 kg and full doses of P2O5 of 25 kg and K2O of 25 kg is good enough to cover the manure and fertilizer requirement in bottle gourd cultivation. The remaining dose of ‘N’ of 35 kg should be applied in several split doses at fortnightly intervals.

Irrigation should be given just before dibbling the seeds in the field and thereafter once a week. However, if it is summer crop, frequent irrigation is needed and there is no need of irrigation in rainy season. Make sure to drain out excess water from the field.

Intercultural Operations in Bottle Gourd Cultivation:- Weeds can be controlled by giving 2 or 3 hoeings during initial stage of plant growth. Weedicides can be used to check the weeds as well. Bottle gourd is very responsive to manures and fertilizers and one can follow similar kind of fertilizer and inter-cultural operations as that of bitter gourd farming or ash gourd farming. Erect pandals when the plants start vining. Carry out weeding and raking of the soil at the time of fertilizer application. Earthing up should be carried during rainy season.

Bottle Gourd Flowering

Training and Pruning in Bottle Gourd Cultivation:- Proper training and pruning is needed in bottle gourd farming as it will have good vegetative growth. Training bottle gourd plants on bamboo like sticks (bowers) will make plant roots to expose and tap more sunlight. Axillary buds of vines should be removed till vines reach the bowers height and when vine reaches bower height, apical bud should be removed at 10 to 15 cm below bower to allow 2 to 3 branches to spread on bower. After formation of 4 to 5 fruits, vines should be pruned again allowing 2 to 3 axillary buds only to grow on primary vines. Remove any yellow and pale coloured older leaves near bottom portion.

Pests and Diseases in Bottle Gourd Cultivation:-  The following are the common pests and diseases found in bottle gourd cultivation.

  • Fruit fly: Apply carbaryl 10 % DP in pit before sowing of seeds to destroy the pupae. In homestead gardens the fruits may be covered with polythene, cloth or paper bags to ensure mechanical protection. In large gardens apply carbaryl 20 to 25 grams or malathion 30 to 40 ml in 15 liters of water containing sugar at fortnightly intervals at flowering and fruit initiation. Spray as coarse droplets on the ventral surface of leaves. Remove and destroy affected and decayed fruits.
  • Epilachna Beetle: Remove and destroy egg masses, grubs and adults occurring on leaves. Spray carbary 20 to 25 grams per 15 liter of water.
  • Red Pumpkin Beetle: Adult beetle eats the leaves, makes hole on foliage and causes damage on roots and leaves. Incorporate carbaryl 10% DP in pits. before sowing the seeds to destroy grubs and pupae.
  • Plant Lice: Apply 2 % fish oil soap. First dissolve soap in hot water and then make up the volume.
  • Downy Mildew: It is severe during rainy season. This can be prevented by spraying mancozeb 50 grams in 15 liter of water.
  • Powdery Mildew: This disease can be controlled by spraying combination of Mancozeb and carbendazim 35 grams per 15 liters of water.

Harvesting in Bottle Gourd Cultivation:- The fruits should be harvested when they are still green and tender. Sharp knife can be used to cut the fruits from the vine. Delay in harvesting causes the fruit to become hard. Harvesting should be done only after 10 days (at least) of insecticide / fungicide application. The fruits should be washed thoroughly in water before sending to local markets

Harvested Round Shaped Bottle Gourd

Yield in Bottle Gourd Cultivation:- Yield depends on the cultivar, soil type and irrigation. However, an average yield of 100 to 120 quintals/ha can be achieved with good field management practices.

For Sheep and Goat Farming : Click here.

For Indian Agriculture : Click Here

The post Bottle Gourd Cultivation Information Guide appeared first on AsiaFarming.com.


Ridge Gourd Cultivation Information Guide

$
0
0

Ridge Gourd Cultivation (Ribbed Gourd) Guide:

Ridge Gourd Flowering

Introduction of Ridge Gourd Cultivation:- Ridge gourd is one of major vegetable crops in Asia. Ridge gourd is also known as “Ribbed Gourd” and scientific name of ridge gourd is “Lufa acutangula”. This vegetable mainly used for culinary purpose and it’s very popular in China, Vietnam, south and east India. Ridge gourd vine requires support for its growth and development. This vegetable belongs to the family of “Cucurbitaceae” and genus of “Luffa” (Loofah). It is an important commercial crop fetching good yields and returns with proper farm management practices. Low investment and high yield makes the commercial success of this crop. The advantage of ridge gourd cultivation is, it can be grown throughout the year where irrigation facility is available. Usually, this plants has creeping nature, hence it requires good support for it vine for high yields and quality. This vegetable has good fiber and very good for digestion. Commercial growers should get quality seeds from known nurseries or seed providers. If you are planning for seed production, fruits should be allowed to fully ripen and then dry out on the vine. The fruit must be harvested at a young stage, if they are grown for cooking purpose. Ridge gourd can be grown in pots, containers, back yards , poly houses and green houses.

Health Benefits of Ridge Gourd:- The following are some of the health benefits of Ridge Gourd.

Health Benefits Of Ridge Gourd
  • Ridge gourd helps in reducing inflammation.
  • Ridge gourd helps weight loss management.
  • Ridge gourd helps in controlling diabetes.
  • Ridge gourd helps reducing body heat.
  • Ridge gourd is good for hair.
  • Ridge gourd also aids in curing piles.
  • Ridge gourd has medicinal properties for healing jaundice.
  • Ridge gourd is also used in skin care treatment against eczema and psoriasis.
  • Ridge gourd has high beta carotene, so it is good for eye health.
  • Ridge gourd helps in reducing skin infections.
  • Ridge gourd is good for digestion due to its fiber content.
  • Ridge gourd helps reducing constipation.
  • Ridge gourd has low calories.
  • Ridge gourd also used in ayurvedic medicine.

Local Names of Ridge Gourd in Other Parts of the World:- Torai (Urdu),पाटे घिराैँला (Nepali), Luffa (German), Cresta calabaza (Spanish), Biloto tikvata (Bulgarian), قرع ريدج (Arabic), 里奇金瓜 (Chinese), Tagaytay lung (Filipino), Cresta zucca (Italian), น้ำเต้าสัน (Vietnamese), Vetakolu (Sinhalese, SriLanka), CreastaTigva (Romanian), リッジひょうたん (Japanese), ននោងជ្រុង (Cambodian),Hřeben Tykev velkoplodá (Czech),Luffa (French),Ридж Тыква (Russian), Ridge kalebass (Swedish), Ridge Sütőtök (Hungarian), Petola segi(Malay), قمقمه! (Persian).

Local Names of Ridge Gourd in India:-  Ridge Gourd / Ribbed Gourd (English), Turai (Hindi), Pirkkankai (Tamil),Peechinga (Malayalam), Beera Kayi (Telugu), Heerakai (Kannada), Jhinga (Bengali), Turia / Sirola (Gujarati), Ghossaley / Gosalen (Konkani), Dodka / Doadakee (Marathi), Janchi / Jahni (Oriya), Kalitori (Punjabi), Peerae (Tulu), Turrel (Kashmiri).

Ridge Gourd Varieties:– There are improved varieties of ridge gourd specific to most of the regions in Asia. However, it is better to find out the high yielding hybrid variety suitable for your local area. Pusa Nasdar, Desi Chaitali, Co-1,Co-2, PKM 1, Phule Sucheta and Kankan Harita are some of the hybrid ridge gourd varieties cultivated in India.

Climate Required for Ridge Gourd Cultivation: Ridge gourd thrives very well in a warm hot climatic conditions. The optimum temperature for ridge gourd cultivation is 24°C–30°C. Very high temperature (more than 39°C) especially in the early stage of growth stage helps produce more male flowers, reducing the yield. Very low temperature also affects growth of vines.

Soil Requirement for Ridge Gourd Cultivation:- Usually, ridge gourd can be grown in wide range of soils. However, well-drained sandy loam soils rich in organic matter are perfect for ridge gourd cultivation. Soils with pH range from 6.0-7.5 is ideal for good yield.

Season for Ridge Gourd Cultivation:- This vegetable can be grown throughout the year with proper irrigation. The best time of planting for rainfed crop is just before onset of monsoon (rainy season).

Land Preparation in Ridge Gourd Cultivation:- Plough the filed 3 to 4 times until it gets the fine tilth stage and remove any weeds from previous crops.  Should dig pits of 30 cm x 30 cm x 30 cm at 2.5 meter x 2 meter spacing and form basins. As the vines need support, bamboo or any support should be provided at each pit.

Seed Rate and Seed Treatment in Ridge Gourd Cultivation:- Generally seed rate depends on the cultivar (variety) and soil type. On an average 5 kg of seed is required to cover the 1 hectare field. To prevent from seed borne diseases and soil born diseases, seeds should be treated with Pseudomonas fluorescens 10 grams / kg of seeds before sowing in the pits.

Propagation and Sowing in Ridge Gourd Cultivation: Propagation is done by seeds. Sowing should be carried out by dibbling method where 3 to 4 seeds should be sown in each pit. Usually it takes 4 to 5 days to start the germination and after 2 weeks, retain only two healthy seedlings to prevent from overcrowding. Layout should be ring and basin. Once the seedlings start creeping, arrange any support like bamboo sticks or rock pillars or any kind wooden support.

Ridge Gourd Seeds
Ridge Gourd Seeds

Irrigation in Ridge Gourd Cultivation:- Irrigation depends on the season and soil moisture holding capacity. However, irrigation should be carried out before dibbling the seeds in pits. The summer crop should be irrigated before sowing and subsequently once in 3 to 4 days. If the crop is cultivated as rainfed, there is no need of irrigation. In water problem areas, drip irrigation would be a great choice for efficient use of water. In this case, drip lines should be arranged along with pits. There are many drip subsidy programs available through local government schemes for small farmers. Contact local horticulture department for these seed and drip subsidy programs.

Manures and Fertilizers in Ridge Gourd Cultivation:- Ridge gourd plants responds very well to manures and fertilizers. If the crop is intended for commercial growing, soil test needs to be carried and nutrient gap in the soil should be filled. During the soil/land preparation, apply 20 to 25 tonnes of well-decomposed farmyard manure like cow-dung along with 50 kg of ‘N’ & 25 kg of ‘P’ per 1 hectare. Half dose of ‘N’ full dose of ‘P’ should be applied at the time of sowing. Remaining half dose of ‘N’ should be applied 1 month after sowing the seeds.

Growing Ridge Gourd in Pots

Intercultural Operations in Ridge Gourd Cultivation:- As part of inter-cultural operation in ridge gourd cultivation or ribbed gourd cultivation, shallow cultivation should be carried out and appropriate bamboo stick support should be provided for growing vines. Manual weeding should be carried out during the initial stages of plant growth to avoid the competence with the main crop for nutrients. Sometimes due to overcrowding of vines, some may tend to fall on the ground and these needs to be checked out. Hoeing should be carried thrice to control weed population. Spraying Ethrel 250 ppm (2.5 ml/10 lit of water) 4 times 2 weeks after sowing at weekly intervals will increase fruit yield.

Pests and Diseases in Ridge Gourd Cultivation:-  The following are the common pests and diseases found in Ridge Gourd cultivation.

  • Beetles, fruit flies and caterpillars are main insect pests found in ridge gourd cultivation.
    • Control measures: Spraying Dichlorvos 76% EC 6.5 ml/10 liter of water or Trichlorofon 50% EC 1.0 ml/l liter of water will check out these pests.
  • Powdery mildew and Down mildew are common diseases found in ridge gourd cultivation.
    • Control measures: To control powdery mildew, spray Dinocap 1 ml/liter of water. or Carbendazim 0.5 g/liter of water. To control down mildew, spray Mancozeb or Chlorothalonil 2 grams/liter of water twice at 10 days interval.

Harvesting in Ridge Gourd Cultivation: The fruits start to form after 55 to 60 days from the day of sowing in pits. Since these vegetables are long, care must be taken to make sure the vegetables are hanging in a downward direction. Usually, when the vines grow long & thick, the developing fruits get entangled in the vines, resulting in fruits getting undesired shape. The full grown tender fruit should be harvested at weekly interval. These vegetables can be harvested with a sharp knife.

Ridge Gourd Kept for Seed Purpose

Yield in Ridge Gourd Cultivation:-  Yield depends on many factors like  cultivar (variety), soil, climate and farm management practices. On an average one can obtain up to 90 quintals from 1 hectare ridge gourd crop.

Marketing in Ridge Gourd Cultivation:- Harvested ridge gourd can be supplied to local markets.

For Bottle Gourd Cultivation : Click here.

For Agriculture in India : Click here.

For Sheep and Goat Farming : Click here.

The post Ridge Gourd Cultivation Information Guide appeared first on AsiaFarming.com.

Garlic Cultivation Information Guide

$
0
0

Garlic Cultivation Guide:

Garlic Cultivation
Garlic Cultivation

Introduction of Garlic Cultivation:- Garlic is one of the popular bulb crops cultivated throughout Asia. Garlic is used as spice and condiment in many dishes. The compound bulb of garlic consists of several small cloves. The botanical name of Garlic is “Allium sativum L.”. India is top consumer of garlic spice. Garlic has an excellent nutritional values and medicinal properties and is a rich source of proteins, phosphorous, potassium, calcium, magnesium & carbohydrates. It is found that Ascorbic acid content is very high in green garlic. The cultivation of garlic is very much successful due its demand in local and international markets. Garlic growers can expect decent profits with good crop management skills like knowledge on improved commercial varieties, climatic conditions, soil and agro-techniques, diseases and pests damaging the crops and their control measures as well as post-harvest management.

Health Benefits of Garlic:- The following are some of the health benefits of Garlic.

Health Benefits of Garlic
  • Garlic prevents from some type of cancers.
  • Garlic helps in body detoxification.
  • Garlic helps in boosting the immune system.
  • Garlic has anti-infection properties.
  • Garlic fights inflammation.
  • Garlic reduces bad cholesterol (LDL) and is good for heart health.
  • Garlic helps in reducing toothache.
  • Garlic works as mosquitoes repellent.
  • Garlic relieves cough, sore throat and nasal congestion.
  • Garlic helps in treatment for hyperthyroid conditions.
  • Garlic regulates blood sugar in diabetic patients.
  • Garlic helps in reducing blood pressure.
  • Garlic prevents Alzheimer’s disease & dementia.
  • Garlic maintains healthy liver.
  • Garlic supports bone health.

Local Names of Garlic in Other Parts of the World:-  Knoblauch (German), Саримсаг (Mongolian), Toon (Somali), Czosnek pospolity (Polish), Hudhra (Albanian), Bijeli luk (Bosnian), Ahos (Cebuano), Küüslauk (Estonian), Skordo (Greek), Greek (Irish), kallik / maneul (Korean), Lasun (Nepali), Alho (Portuguese), Ajo (Spanish), Саримсоқ (Uzbek), Fwm (Arabic), Česnov luk (Bulgarian),Da suan (Chinese), Bawang (Filipino), Aglio (Italian), Hvitløk (Norwegian), Krathiam (Thai), Cay toi (Vietnamese), Krak-swan-hpru (Burmese), Ninniku (Japanese), Usturoi (Romanian), Sudu Luunu (Sinhalese), ខ្ទឹមស  /  Khah Teum (Khah Teum), Česnek (Czech), Ail (French), Chesnok (Russian), Sarımsak (Turkish), Vitlok (Swedish), Fokhagyma (Hungarian), Hvidløg (Danish),  Bawang putih (Malay), sȳr (Persian), 大蒜 (Taiwanese), Часник (Ukrainian).

Local Names of Garlic in India:- Garlic (English), Lehsan / Lasun (Hindi), Poondu / Vellaipoondu (Tamil), Veluthulli / Vellulli (Malayalam), Vellulli / Vellipaaya (Telugu), Bellulli (Kannada), Rasoon / Rashun (Bengali), Lasan (Gujarati), Lahsun / Losan (Konkani), Lasun /  Lusson (Marathi), Rasuna (Oriya), Lassan / Lahsun (Punjabi), Bollulli (Tulu), Ruhan (Kashmiri),Lassun / Leshun (Urudu).

Garlic Varieties:-  There are many improved commercial varieties cultivated across the globe. However, finding suitable commercial cultivar for your area is most important and this information can be found from your local horticulture / agriculture department.

Some of the improved varieties found in India are Godavari, Sweta, Agrifound White, Yamuna Safed, Yamuna Safed 2 and Yamuna Safed 3 and Agrifound Parvati.

Climate Required for Garlic Cultivation:- Garlic can be grown in wide range of climatic conditions. However this crop cannot tolerate too hot or too cold climate as this impacts the development of bulb. Basically it prefers moderate temperature conditions. This crop requires shorter days which is favourable for the formation of bulbs. Garlic can be grown at elevations of 1000 meter s to 1300 meters above mean sea level (msl).

Soil Requirement for Garlic Cultivation:- Garlic crop requires well-drained loamy soil rich in organic meter along with considerable percentage of potash. The quality of bulbs grown in sandy or loose soils will have poor quality and weight. Avoid soils having highly alkaline and saline in nature. The best soil pH suited for its cultivation is 6.0 to 7.0.

Season for Garlic Cultivation:- Garlic can be grown as summer and winter crop.

Land Preparation in Garlic Cultivation:- Land should be brought to fine tilth stage by giving  3 or 4 deep ploughings. In case of commercial cultivation, soil test needs to be performed in order to find out health of the soil. Any micro-nutrient gap should be filled after getting soil test results. To make the soil rich in organic matter, well-decomposed compost or manure should be added .

Propagation, Seed Rate  and Sowing in Garlic Cultivation:-  Garlic Propagation is done through cloves of the garlic bulb. However long slender in the center of the bulb is not used for planting. Quality bulbs should be used in the propagation of garlic crop and bulbs with side growth should be avoided. Healthy and diseases resistant bulbs should be selected from genuine buyers. When it comes to seed rate of garlic, it takes about 150 to 350 kg per hectare land.

Planting Garlic Cloves

The sowing methods used in garlic cultivation are dibbling or furrow planting. In dibbling method, the field should be divided into small area which is convenient to irrigate the crop as part of land preparation. Cloves should be sown at 6 to 7 cm depth by keeping their growing ends upwards. The plant-to-plant distance of 8 cm and the row-to-row distance of 15 cm should be maintained. After dibbling the cloves, cover the area with loose soil.  In furrow planting method, prepare the furrows of 15 cm with cotton drill as part of the land preparation. Cloves should be sown or dropped in these furrows by hand 8 cm to 10 cm apart. Cover the area with loose soil and provide light irrigation for quick germination.

Irrigation in Garlic Cultivation:- Irrigating the crop depends on soil moisture holding capacity and climatic conditions. Usually first irrigation should be carried out immediately after sowing. Subsequent irrigations should be given after every 10 to 12 days. Maintaining constant moisture in the soil is required during the flowering bulb development stage. After maturing the bulbs, irrigations should be reduced. For easy harvesting, last irrigation should be provided just before 3 days of harvest. In case of heavy rains, make sure to drain out water as quickly as possible.

Growing Garlic in Pots

Manures and Fertilizers in Garlic Cultivation:- Garlic crop responds very well to manures and fertilizers (NPK). Add 25 to 30 tonnes of well-rotten farmyard manure as a basal application along with 60 kg of ‘N’, 50 kg of ‘P2O5’ and 50 kg of ‘K2O’. As a top dresser, apply 60 kg of ”N’ after 45 days of sowing.

Intercultural Operations in Garlic Cultivation:- First weeding should be carried out with hand hoe 1 month after sowing. Second weeding should be given 1 month after first weeding. For good quality bulbs, it requires hoeing (loosening the soil) just before the formation of bulbs. Avoid weeding or hoeing later stage as this may damage the stem and impact the quality of bulbs.

Diseases and Insect – Pests in Garlic Cultivation:- Garlic is vulnerable to many diseases and insects pests. Garlic growers should be aware of these pests and disease and their control.

  • Diseases in Garlic Cultivation: The following are common diseases and their control measures.
    • Purple Blotch and Stemphylium blight: This disease can be controlled by Spraying of Mancozeb @ 2.5 grams/ liter of water at 2 weeks intervals.
    • Cercospora Leaf Blight: This disease can be checked out by Spraying of ziram or captan @ 2.0 grams/liter of water or copper oxychloride @ 3.0 g /liter of water at fortnightly intervals.
    • Powdery Mildew: This disease can be controlled by spraying Sulphur fungicides @ 2.0 grams/ liter of water at regular intervals of 2 weeks after disease appearance.
    • Mosaic Disease: This disease can be checked out by spraying of monocrotophos at 0.5 ml /liter of water.
  • Insect-Pests in Garlic Cultivation: The following are common pests and their control measures.
    • Thrips: This is most important insect pest attacks the garlic crop. Application of methyl demeton 25EC 1 ml/litre of water will check the incidence.
    • Stem and Bulb Nematode: This pest can be controlled by pre-planting soil fumigation with dichloro-propene-dichloropropane mixture @ 500 kg/ha.

Mites also attack the garlic crop, appropriate measures should be taken care to prevent these.

Note: Contact your local horticulture / agriculture department for above mentioned diseases and their control. They are the best source for finding the symptoms of diseases and their control. 

Harvest  in Garlic Cultivation:- The duration of garlic crop is 4 to 5 months depending on the cultivar (variety). This crop is ready for harvesting when its tops turn yellowish or brownish and show signs of drying up and bend over. Harvesting the crop at the stage when tops have fallen over gives good quality of bulbs. Bulbs should be taken out along with tops.

Post –Harvest tasks in Garlic Cultivation:- These practices differ from place-to-place. proper curing, sorting and grading, transportation and storage are essential as part of the post harvest tasks.

Yield in Garlic Cultivation:- The yield depends on the variety  and  the region. On an average  100 to 150 quintals/ha can be obtained with good crop management practices.

Marketing in Garlic Cultivation:- Can be transported through local transport to nearest market or can have agent who can purchase in bulk for exporting.

For Ginger Farming:  Click here.

For Indian Agriculture: Click here.

For Sheep and Goat Farming:  Click here.

The post Garlic Cultivation Information Guide appeared first on AsiaFarming.com.

Grape Cultivation Information Guide

$
0
0

Grape Cultivation Guide:

Grape Cultivation
Grape Cultivation

Introduction of Grape Cultivation:-  Grape is one of very popular crops in the world. This crop is grown commercially in most of the countries. Grapes usually grow on the perennial and deciduous woody climbing vine. Grapes can be eaten as fresh (raw) fruits or used for making juice, jelly, jam, vinegar, wine, raisins, grape seed oil and grape seed extracts. Grapes are good source of minerals like calcium, phosphorous, iron and vitamins like B and grapes have an excellent health benefits. Grapes belong to the family of “Vitaceae” and originated in Western Asia and Europe. Grapes occupy 16% of world fruit production. Commercial cultivation of grapes mainly intended for table purpose, export purpose, making wine and making raisins. With proper care and vine management, one can expect decent profits from commercial cultivation of grapes by supplying to local markets and exporting to international markets. Organic grape farming is the best bet, if you are planning for commercial cultivation. The major grape growing countries are Italy, France, Spain, USA, Turkey, Argentina, Iran, Portugal, South Africa and Chile. China occupies number one position in grape production in Asia.

Health Benefits of Grapes:- The following are some of the health benefits of grapes.

Health benefits of Grapes
  • Grapes help relieving migraine.
  • Grapes are helpful in treating Alzheimer’s disease.
  • Grapes prevent indigestion.
  • Grapes fight breast cancer.
  • Grapes prevent eye degeneration.
  • Grapes are good for diabetic patients.
  • Grapes help lowering blood cholesterol.
  • Grapes help healing kidney problems.
  • Grapes relieve asthma.
  • Grapes prevent clots in blood and good for heart health.
  • Grapes are good for bone health.
  • Grapes boost immune power and help fight viral infections.
  • Grapes relieve constipation.
  • Grapes help preventing some type of cancers.
  • Grapes are good for skin and hair health.

Grape Varieties:-  The main categories are divided into grapes with seed and without seed. Table grapes, Raisin Grapes and  Wine Grapes fall under these categories. When it comes to commercial varieties, there are many improved varieties specific to the region. Grapes are usually available in three colours; Green, Red and Black. Selecting a high yielding and disease free cultivar play most important role in profitable commercial farming of grapes. Local horticulture department (or) Agriculture University is the best source to find out the suitable cultivar for your area.

Different Colours of Grapes

Local Names of Gapes in Other Parts of the World:- Traube (German), Usan üzem (Mongolian), fìon-dhearc (Scottish),Canab (Somali), Viinamari (Estonian), Grožđe (Bosnian), Hardhi (Albanian),fíonchaor (Irish), σταφύλι (Greek), Podo (Korean), अङ्गूर /Angur (Nepali), Uva (Portuguese, Spanish), Enab (Arabic), Грозде (Bulgarian), 葡萄 / Pútáo (Chinese), Ubas (Filipino), Uva / Vite euroasiatica (Italian), pú tao (Mandarin), Drue (Norwegian), องุ่น /  Xngùn (Thai), nho (Vietnamese), za-byi’-thí (Burmese), ぶどう / Budo (Japanese), ទំពាំងបាយជូរ (Cambodian), මිදි / Mi∙dhi (Sinhalese), Hrozna (Czezh), Raisin (French), GrozJe (Macedonian), Виноград (Russian), Druva (Swedish), igilebhisi (Zulu), Uzüm (Turkish), Vindrue (Danish), Szőlő (Hungarian), anggur (Malay), angūr (Persian), Phutoo (Taiwanese), Виноград (Ukrainian).

Local Names of Gapes in India:-  Angoor (Hindi, Bengali, Panjabi, Oriya, Assamese, Urdu), Thdrachai (Tamil), Dhraksh (Gujarati), Draksh (Marathi), Dhrakshi (Kannada), Mundiranga (Malayalam), Da’ch (Kashmiri),

Climate Required for Grape Cultivation:- Grapes are grown under both sub-tropical and tropical conditions. However, grape crop prefers hot and dry weather conditions. Temperature, relative humidity, frost conditions and rainfall are the major factors that influence the yield in grape cultivation. Coastal areas are not suitable for grape cultivation as high rainfall and humidity is not suitable. Grape crop tolerates frost during resting stage but is very susceptible during growing period. The optimal temperature for grape cultivation is 15°C to 40°C and climate should be clear for 3 months during the cropping period. Cloudy weather, high humidity, low temperature and rain during flowering and berry development impact the crop growth and yield. Grapes grow well in the regions where annual rainfall does not exceed 900 mm.

Red Table Grapes
Red Table Grapes

Soil Requirement for Grape Cultivation:- Grapes can be grown in wide range of soils. However, Sandy to clayey and loamy soils with good drainage and organic matter are ideal for grape cultivation. Soils having pH value of 6.5 to 7.5 are best for its growth and good yield. Salinity in the soil is the major hindrance that impacts the growth and yield of the crop.

Season for Grape Cultivation:- Grapes can be grown throughout the year where irrigation facility and low-frost conditions, good temperatures are available.

Land Preparation in Grape Cultivation:- Land should be prepared by giving 3 or 4 deep ploughings by a tractor followed by  harrowing it thrice. Make sure all the previous crop weeds are removed. If you are planning for drip irrigation, it is not required to have perfect levelling of land. Generally, the size of the plot will depend on the type of training system used. In case of bower and telephone or “T” trellis the best size could be 60 meter X 80 meter and 90 meter X 120 meter respectively. Any micro nutrient gap should be filled based on the results of soil test. Supplement the soil with appropriate garden compost or well-decomposed farmyard manure (FMY). Soil should have proper drainage to drain-out any excess water.

Propagation in Grape Cultivation:-  The most common way of propagation in grape cultivation is thorough hard-wood cuttings. However, it can be propagated by seed, layering, budding and grafting and budding methods. In some situations, the rootstock are planted in the main field and they are grafted with suitable cultivars.

Spacing and Planting in Grape Cultivation:- Basically, spacing varies with the cultivar (variety) and soil fertility. Under organic farming conditions, a spacing of 2.5 meter  x 1.5 meter , 2.75 meter x 1.50 meter and 3.0 meter x 1.5 meter should be followed. For this model scheme, a spacing of 2.75 meter x 1.50 meter with a plant population of 2450 plants/ha should be considered. Pits of  90 x 90  x 90 cm in size should be dug and filled with soil and well-decomposed farmyard manure (FMY). Usually a FMY of 50 to 60 tonnes/ha is sufficient in grape cultivation. In-order to settle the soil in pits, carry out a light irrigation. Generally, a rectangular system of planting is adopted in grape farming.

Irrigation in Grape Cultivation:- Regular irrigation should be practiced in grape cultivation. In case of drip irrigation is followed, 45 to 50 liters of water in summer;35 to 40 liters of water in winter and 20 to 25 liters of water in rainy season per vine should be applied. In case of flood irrigation is followed, 5-6 days interval during summer; 9-10 days interval during winter; and 18-20 days interval during rainy season should be maintained. In case of heavy rains, make sure to drain out the water as soon as possible.

Manures and Fertilizers in Grape Cultivation:- Well-decomposed farmyard manure (FMY) should be applied at the rate of 50-60 tonnes/ha during land preparation. Balanced nutrition and use of chemical, organic and biofertilisers is essential to get a good yield every year. About 750 to 900 N, 450 to 600 P and 800 to 1000 K Kg/ ha/year should be applied. Biofertilizers like Azatobacter, Phosphate Solubilizing Bacteria(PSB), Effective Microorganism (EM), Neem cake and vermiwash should be used to supplement the nutrient requirement of grape garden.Trichoderma, Azatobacter and PSB are applied @ 25 grams/vine. Neem cake should be applied @ 1.25 tonnes/ha. To improve the quality of fruits, a solution of sugar, humic acid and coconut water should be sprayed at bud development stage.

Intercultural Operations in Grape Cultivation:- Gap filling should be done preferably during one month after planting. For Uniform new growth, basal cut keeping 2/3 buds should be taken 1 month after planting. The weeding should be done twice or thrice depending on the intensity of weeds. The bamboo sticks should be used for vine support and  young growing points should be trained on them. Frequent irrigation along with appropriate fertilizers should be applied as part of the intercultural operation of grape garden.

Pruning and Training in Grape Cultivation:- The grape vines should be trained on a suitable trellis like ‘T’, ‘Y’, ‘H’ or bower and regularly pruned 2 times a year. First annual pruning should be done during the month of April to get the new vegetative growth while second pruning to get the crop should be done during the month of October. While doing April pruning 0 to 2 buds on arm should be kept while doing October pruning 5 to 10 buds on fruiting cane should be kept. The grape vines should be trained first on bamboo support and then on support – trellis. A suitable method of training is adopted. Initial pruning should be done only for training i.e. for developing trunk, arm, fruiting, and canes. Plant hormones can be applied during different stages of growth to increase the fruit set and yield.

Diseases and Insects in Grape Cultivation:- Many pests and diseases attack the grape vines during many stages. Proper plant protection measures should be carried out to control these.

Grape vines are attacked by many pests and diseases. The common pests in grape farming are thrips, flea beetles, leaf hoppers and mealy bugs. The common diseases in grape farming are powdery mildew, anthracnose and downy mildew.

  • Downy mildew/ Powdery mildew : To control this disease, spray Trichoderma, 1% Bordeaux mixture + Dasparni arka + Cow urine
  • Mealy bugs: To control this pest, spray cow dung urine.
  • Anthracnose : Spraying of Solution of acacia leaves will check this disease.
  • Thrips: Spraying of Dasparni arka will control these kinds of pests.

Preparation of Dasparni arka: This can be prepared by adding 25 kg leaves of Neem and 2 kg leaves each of Nirgudi, Kaner, Cotton, Custard apple, Papaya, Castor, Karanj, Gudwel, Drumstick in 200 liters of water. In the solution, 5 to 10 liters of cow urine and 2 kg of green chillies should be added. The solution should be kept for 15-21 days for fermentation. The stock solution is prepared by filtration through muslin cloth. The spraying should be done by adding 5 liters of stock solution in 200 liters of water.

Note: Contact your local horticulture / agriculture department / agriculture university research center for pests and disease symptoms and their control. They are the best source for pest and disease solutions in grape cultivation. 

Harvest in Grape Cultivation:- Harvesting season varies from area to area and variety to variety. Grape is harvested almost all the year round. If not all the varieties, one or the other variety is always available at any given time of the year. Well matured bunches having at least 18° brix should be harvested

Post Harvest in Grape Cultivation:- An about 3 to 4 kg corrugated boxes should be used for packing the grapes. If you are planning to transport long distances, grape guards, pouches should be kept inside the boxes. Pre-cooling and use of grape guards should be used for cold storage and export/international markets.

Yield in Grape Cultivation:- Grape yield depends on the cultivar and soil type and vine management practices. On an average, 25-30 tonnes/ha/year can be obtained for seedless varieties where as is seeded varieties, 45-50 tonnes/ha/year can be obtained. The economic life of grape vine is about 14 to 15 years and harvesting of fruits can be carried out up to an age of 14 to 15 years.

Marketing of Grapes:- As a fresh produce, one can transport to local markets and in other forms like puree and frozen can be exported to international markets.

For Indian Agriculture : Click here.

For Sheep or Goat Farming Info : Click here.

The post Grape Cultivation Information Guide appeared first on AsiaFarming.com.

French Beans Cultivation Information

$
0
0

French Beans Cultivation Guide:

Green Beens Flowering

Introduction of French Beans Cultivation:- French beans or green beans are also known as ‘string beans’ and ‘snap beans”. French bean crop is very profitable cool season legume vegetable grown for its tender pods, shelled green beans and dry beans. French beans belong to the family of “Fabaceae and genus of “Phaseolus”. French beans are grown and consumed throughout the world. These green vegetables can be eaten fresh or  canned, frozen. There are many varieties of French beans grown in all the regions. However, selecting high yielding, disease resistant variety is most important factor for successful commercial cultivation. Selected french bean varieties can be eaten at different stages as immature pods; fresh seeds removed from the pods and dried mature beans. French bean pods can be in many colours from yellow through to green and purple depending on the variety selected. China is number one production country of french or green beans in Asia. There is a very good demand for green beans in local as well as international markets.  French beans can be grown in greenhouse, poly house, back yards and even pots / containers.

Health Benefits of French Beans:- The following are some of the health benefits of french beans.

Health Benefits of French Beans
  • French beans help reduce the risk of cardiovascular disease.
  • French beans help in preventing colon cancer.
  • French beans good for eye health.
  • French beans help in regulating blood sugar levels in diabetics.
  • French beans boost the immune system.
  • French beans boost bone health.
  • French beans prevent gastrointestinal issues due to fiber content.
  • French beans are good source of folic acid.
  • French beans are good source of fiber.
  • French beans help in weight management program.

French Beans Varieties:-  There are two categories of french beans; bush type and pole type. There are so many improved varieties fall under these categories and one of them is dwarf bean variety. One should make sure to select right variety for that specific region.

Local Names of French Beans in Other Parts of the World:- Französisch Bohnen (German), Sperziebonen (Dutch), Франц шош (Mongolian), Fasule frengjisht (Albanian), Faras Beans (Urdu), aeduba (Estonian), φασολάκια (Greek), Pónairí Fraince (Irish), Peulangseueo kong (Korean), Seemi (Nepali), feijão francês (Portuguese), француски пасуљ (Serbian), Habichuela (Spanish), فاصولياء فرنسية   (Arabic), зелен фасул (Bulgarian), Sìjì dòu (Chinese), Pranses beans (Filipino), Fagiolini (Italian), Fransk bønner (Norwegian), ฝรั่งเศสถั่ว (Thai), Đậu vô ve (Vietnamese), サヤマメ (Japanese), Pupiņas (Latvian), Fasole franceză (Romanian), Francouzský fazole (Czezh), Haricots français (French), стручковая фасоль (Russian), Fazuľové struky (Slovak), Franska bönor (Swedish), Taze fasulye (Turkish), Franske bønner (Danish), საფრანგეთის ლობიო (Georgian), Kacang Perancis (Malay),  لوبیا فرانسه  (Persian),  菜豆 (Taiwanese), Квасоля (Ukrainian).

Local Names of French Beans in India:- Bakla / Pharasbeen / Sem (Hindi),  Fansi (Gujarati), Beans / Anne Saango (Konkani), Farasbi (Marathi),  French Beans (Oriya), Fras Bean (Punjabi),  Fraa’Sh Bean (Kashmiri),  Beans (Tamil, Malayalam, Bengali), French Chikkudu  (Telugu), French Beans / Huruli Kayi (Kannada).

Climate Required for French Beans Cultivation:- French bean or green bean is a cool season crop and usually tolerates high temperature conditions when compared to peas. The ideal temperature for french bean cultivation is about 15 °C to 30 °C. French bean crop is sensitive to frost conditions, rainfall and high temperatures. Pole variety bean crop tolerates high rain fall when compared to bushy variety.

Soil Requirement for French Beans Cultivation:- French beans can be cultivated in wide variety of soils from sandy to heavy clay soils. However, this crop thrives best in well drained, loamy and light alluvial soil with pH 5.5 to 6.5. Soil fertility is main factor of achieving higher yields. Adding garden compost or well decomposed farmyard manure (FMY) at the time of land preparation will enrich the soil fertility. Soil micro nutrient deficiency should be taken care based on the result of soil test.

Season for French Beans Cultivation:- French beans can be grown throughout the year provided there is a sufficient irrigation.

Land Preparation in French Beans Cultivation:- Land should be brought to fine tilt stage by giving 3 to 4 ploughings with local tractor. Any weeds from previous crops should be removed and prepared for better germination of the seeds. Adding well decomposed farm yard manure or garden compost in the soil results in good yield. This can be incorporated during last plough.

Propagation and Seed Treatment in French Beans Cultivation:-  Propagation in french bean farming is done by seeds. Seed treatment should be done to control any soil borne / seed borne fungal diseases. Trichoderma 4 grams / kg or Thiram or Carbandazim @ 2 grams / kg of seeds can used to treat the seeds just 1 day before sowing in the field. If the crop is grown for the first time it should be treated with Rhizobium as in cluster beans crop.

French Bean Seeds
French Bean Seeds

Seed Rate, Spacing and Sowing in French Beans Cultivation:- Generally, seed rate depends on the cultivar / variety and soil fertility. On an average, a seed rate of  50 to 60 kg  for bush type and 30 to 35 kg for pole type is required to cover the 1 hectare land. Seeds should be sown at a row spacing of 30-40 cm keeping 15-20 cm distance from plant to plant when followed the flat bed sowing method. In case of raised bed sowing method, seeds should be sown on raised beds having 60-80 cm width and 20-30 cm height at a row spacing of 30-40 cm keeping 15-20 cm distance from plant to plant. The seeds may be sown by dibbling, drilling and broad casting method at a depth of 2 to 3 cm

Irrigation in French Beans Cultivation:- In order to achieve quality pods and higher yields, make sure to have enough moisture in the soil. Irrigation should be given right after sowing, just prior to blooming, during flowering and pod development stage.  On an average, 6 to 7 irrigations should be given during growing season. If it is rainy season crop, no irrigation is required. Sprinkler or drip irrigation can be adopted in areas where water is a major concern.

Inter-crop in French Beans Cultivation:- To get extra income, farmers can choose to grow more than one crop in the same field. Intercropping french beans crop with maize, soy bean, groundnut / peanut crops is a good combination. Crop rotation is also achieved good results when french beans crop is rotated with maize and rice crops.

Manures and Fertilizers in French Beans Cultivation:- Organic fertilizers like farmyard manure of 10 to 15 tonnes per 1 hectare land should be added during land preparation. Chemical fertilizers like; N: P: K of 60:60:40 kg/ha should be applied in different forms like Urea, Single Super Phosphate and Muriate of potash. Nitrogen should be applied in split doses. Full dose of ‘P’ and ‘K’ and half dose ‘N’ should be applied in seed furrows below the seed at planting time. Remaining half dose of ‘N’ should be applied as top dressing at flowering stage.

Intercultural Operations in French Beans Cultivation:- Applying cultural practice to suppress the weeds is safest method. Weeds can be controlled manually or chemically. Shallow cultivation should be carried out without damaging plant roots to keep the bean crop field free from weeds. Herbicides such as dinitomaterial 2 – 3 kg / acre and sodium salt of pentachlorophenol @ 6 kg per acre as pre-emergence treatment have been effective in controlling the weeds. In case of pole type, plants should be supported by bamboo sticks of 2 meter height 2 to 3 weeks after sowing to increases pod yield as well as seed quality.

Diseases and Insects in French Beans Cultivation:-The following are the common pests and diseases and their management in green bean farming.

  • Insect Pests and their Control in French beans plantation:
    • Mites: Plants become etiolated and start dying due to sucking of sap from tender parts.
    • Control: Application of Spray Malathion 0.05% (100 ml Cythion/malathion 50 EC/100 liter) at interval of 10 to 12 days will check this.
    • Blister beetle: Sustain on flower and fruits and reduce the pod formation.
    • Control: Spraying Endosulphon 0.05% (140 ml Thiodon 35 EC) at the flowering stage will check this.
    • Bean bug: Suck sap from tender leaf on both sides. Highly infected leaves turn yellow and fall down.
    • Control: Before flower initiation and pod formation spray Dimethoate 0.03% (100 ml Rogar 30 EC) in 100 liter of water.
  • Pests and their Control in French beans plantation:
    • Anthracnose: Symptoms of this disease will have brown canker on pods.
    • Control Measures: Using disease free seeds and treat seeds with Bavistin 50 WP @ 2 grams / kg seed. In the infected fields, spray Bavistin 50 WP (50 grams/100 liter of water) at 10 days interval.
    • Rhizoctonia Bean Blight: Symptoms are like; On the stem these are red brown shunkened spots just near ground.
    • Control Measures: Treatment of seeds with Bavistin 50 WP @ 2 grams/kg seed and on the appearance of symptoms on plant, spray Bavistin 50 WP @ 50 grams /100 litre of water can check this disease.
    • Angular Leaf Spot: Symptoms of this disease include angular red brown spots on the leaves.
    • Control Measures: Selecting healthy seed varieties and proper crop rotation will check this disease. Spraying Bavistin 50 WP @ 50 grams / 100 liter of water will also control this.
    • Floury Leaf Spot: Symptoms of this disease include white spots on the underneath of leaves.
    • Control Measures: Using healthy and quality seeds with proper crop rotation will check this disease.
    • Fuscos Blight: Symptoms of this disease include; leaves turn pale, red streaks and small translucent spots on the leaves.
    • Control Measures:Using healthy and quality seeds and treatment with 1 gram Streptocycline and 25 grams Hexacarp in 10 liters of water and dip seeds for 4 hours in this solution will check the disease.
    • Common Mosaic: Symptoms of this disease include leaf turned curved due to etiolation and dry down near veins.
    • Control Measures: Selecting disease resistant varieties and Spraying Malathion 0.05% @ 100 ml Malathion 50 EC per 100 liter of water will check this disease.

Note: Contact your local horticulture department center for disease symptoms and their control. They are the best source of pest and disease solutions in french Beans cultivation. 

Harvest in French Beans Cultivation:-  The green pods become ready for harvesting after 50 to 75 days of sowing depending on the variety grown. Green pods should be harvested at full grown stage but immature and tender. Pods are ready for harvest 8-12 days after flowering depending on cultivar. Generally, in bush type varieties, 2 to 3 harvests and in pole types 3-5 harvests can be carried out. If the purpose is dry beans production, wait until large percentage of pods are fully ripe and most of the remainder has turned yellow.

Yield in French Beans Cultivation:-  Yield depends on many factors like variety, soil fertility, irrigation, climate and crop management practices. On an average,  yield of 40 to 50 quintals of green pod per acre  in bush type and 60 to 75 quintals of green pod per acre in pole type can be obtained. When it comes to seed yield, 10-12 quintals / acre in bush type and 12-15 quintals / acre in poly type can be expected.

Marketing of French Beans:- Harvested fresh pods can be packed and transported to local markets.

For Agriculture in India : Click here.

For Sheep or Goat Farming Business:  Click here.

The post French Beans Cultivation Information appeared first on AsiaFarming.com.

Potato Cultivation Information Guide

$
0
0

Potato Cultivation Guide:

Potato Farming Field

Introduction of Potato Cultivation:- Potato is a starchy, tuberous important staple food crop of the world. Potato is also known as poor man’s food. Potatoes are being used for several industrial purposes such as starch production and alcohol. The potato belongs to the family of “solanaceae” and genus of “solanum”. Potatoes are good source of carbohydrates and being used with other food dishes. Potatoes are mostly cross-pollinated by insects such as bumblebees, which can carry pollen from other potato plants. Potato plant is an herbaceous perennial that grows up to 65 cm height, depending on variety, with the leaves dying back after flowering, fruiting and tuber formation. The tubers of potato varieties with white flowers have white skins, while those of varieties with colored flowers tend to have pinkish skins. As potatoes have regular market demand, one can get decent profits with proper crop management practices. There are many improved commercial hybrid potato varieties available in the world. However, selecting quality and disease resistant tubers is the key factor for commercial success of potato crop. Potatoes can be grown in greenhouse, polyhouse, pots, containers and even backyards.

Health Benefits of Potato:- The following are some of the health benefits of potato.

Health Benifits of Potato
Health Benefits of Potato
  • Potatoes are good for weight gain.
  • Potatoes are good source of carbohydrates.
  • Potatoes are good for digestion.
  • Potatoes are food for brain functioning and nervous system health.
  • Potatoes are good for skin health.
  • Potatoes may help in preventing some type of cancer.
  • Potatoes help in controlling high blood pressure.
  • Potatoes are good for heart health.
  • Potatoes help in preventing kidney stones.
  • Potatoes increase immune power.

Potato Varieties:- There are many commercial potato varieties available for each region. Contact your local horticulture department for suitable cultivar.

Local Names of Potato in Other Parts of the World:- Pomme de terre (French), Kartoffel (German), Aardappel (Dutch), Төмс (Mongolian), Ziemniak (Polish), Tattie (Scottish), Aloo (Urdu), Patatja (Albanian), Krompir (Bosnian), Kartul (Estonian), πατάτα (Greek), Prátaí (Irish), 감자 (Korian), Patata (Maltese), Aalu (Nepali), a batata (Portuguese), кромпир (Serbian), Patata (Spanish), Kartoshka (Uzbek), baṭāṭā (Arabic), картоф (Bulgarian), mǎ líng shǔ (Chinese), Patatas (Filipino), Patata (Italian), Kartol (Kurdish), 土豆 (Mandarin), Potet (Norwegian), Kentang (Sundanese), Viazi (Swahili), Taten (Welsh), มันฝรั่ง (Thai), Khoai tây (Vietnamese), alu:(Burmese), じゃがいも (Japanese), Kartupelis (Latvian), Cartof (Romanian), Ala (Sinhalese), Brambor (Czech), ដំឡូង (Cambodian), Компир (Macedonian), Alo (Pashto), Картофель (Russian), Ľuľok zemiakový (Slovak), Potatis (Swedish), Patates (Turkish), Izambane (Zulu),马铃薯 (Cantonese), Kartoffel (Danish), კარტოფილი (Georgian), Burgonya (Hungarian), Ubi Kentang (Malay), Seyeb zemeyeney (Persian), Alookum (Sanskrit), Krompir (Slovenian), Maflengzuu (Taiwanese), Taiwanese (Ukrainian).

Local Names of Potato in India:- Aloo / Batata (Hindi), Bangaala Dumpa / Urlagadda / Alu Gadda (Telugu), Uralaikilangu (Tamil), Aalugadde (Kannada), Batata (Gujarati), Kook / Batato (Konkani), Batate (Marathi), Alu (Oriya), Aloo (Punjabi), Aloo (Bengali), Alu (Assamese), Pataato (Sindhi), Aloo (Manipuri), Aalu (Oriya),  اولُو/ Olu (Kashmiri).

Climate Required for Potato Cultivation:- Generally potato is a cool season crop and tolerates frost moderately. The ideal temperature for its growth during its initial stage is 25°C.However, potato tuber growth reaches a maximum at 21°C and decreases with temperature increase.

Soil Requirement for Potato Cultivation:- Potatoes are being grown in wide range of soils. However, deep, well-drained and friable soils having good organic matter are ideal for its cultivation. Sandy soils with little clay or little organic matter with proper irrigation and fertilizer supply would result in high yield and good quality tubers. Usually, potatoes are more tolerant to low soil pH when compared to other crops. The ideal pH range for potato cultivation is 6.0.to 6.5. It is advised to go for soil testing before starting large scale potato cultivation. Any soil micro-nutrient requirement should be covered based on the soil test results.

Land Preparation in Potato Cultivation:- Growing potatoes involves extensive soil preparation. The soil / land needs to be harrowed for clearing any weeds from previous crops in the field. In most cases, 3 to 4 ploughings, along with frequent harrowing and rolling, should be required to get the soil to fine tilth stage or friable. Supplement the field with 25 tonnes of well-decomposed farmyard manure in last ploughing to enrich the soil fertility.

Growing Potatoes in Greenhouse

Propagation in Potato Cultivation:- Potato crop is usually cultivated by planting tubers. Purity / quality of the varieties and healthy seed tubers are the primary requirement for successful crop cultivation. However, seed tubers are the costliest input in potato cultivation. The tuber seed should be disease free, well sprouted, 35 to 40 grams each in weight. The physiological age of tuber should be two to three months from the harvest of the crop.

Seed Rate, Seed Treatment, Spacing and Planting in Potato Cultivation:- Generally, seed requirement depends on the cultivar and soil type. In potato cultivation, seed required per hectare is 1,300 to 2,000 kg. Planting season depends on region, climatic conditions and variety of potato. Spacing of seeds is not consistent across the regions because of growing conditions and market needs. Usually, in hilly areas where furrow method is followed, a spacing of 60 cm x 30 cm is maintained where as in plains, ridge plantation method is followed and a spacing of 30 cm is maintained. Ridges distance is kept as 45 cm – 60 cm. reducing the in-row spacing to minimize oversized tuber production may lead to higher quality tubers for fresh markets. Generally, the major portion of potatoes is planted from April month to early June. It is advised to plant the potatoes when soil temperature is above 7 °c and below 22 °c. While planting the potatoes, make sure the soil has moisture content but not excessively wet. In dry areas, light irrigation should be provided before planting. If high yields and large tubers are expected, a deeper planting depth is considered. Tubers of seed potatoes should be warmed to 10 °c to 15 °c before handling and cutting to minimize the potential for bruising. Potato seed should be warmed and removed from cold storage 7 to 15 days before planting. Tubers should never be taken from cold storage and planted directly. Whole potato or cuttings of potato can be planted.

Planting Potatoes (Slices)

Irrigation in Potato Cultivation:- Irrigation is among the most important factors determines the yield and quality of potatoes. The irrigation requirement depends on variety of potatoes, relative humidity, solar radiation, day length, length of growing season, and other environmental factors. However, the seasonal requirement for cultivars in all areas will be at least 500 mm of water. As much as 750 to 900 mm of water will be required in some specific production areas depending on soil type, weather conditions, and potato cultivar. Water should be applied to the soil frequently in light volumes to maintain the crop with adequate moisture. Irrigation is required throughout all growth stages of the potato crop particularly during tuber initiation and tuber enlargement. If the crop is not rain fed but irrigated, several methods of irrigation are available. The most common methods of irrigation in potato cultivation are; sprinkler irrigation, furrow irrigation and sub-irrigation. Method of irrigation depends on the geography of the land.

Manures and Fertilizers in Potato Cultivation:- Potato crop requires more nutrients. The requirement of N:P:K ratio should be 120:50:225. Well-decomposed farm yard manure of 25 tonnes/ha (FMY) or equaling garden compost / green manure can be applied in the soil while preparing the land for potato cultivation.

Growing potatoes in Pot

Intercultural Operations in Potato Cultivation:- The Intercultural operations like hand weeding, earthing up should be carried out to control weeds and  to keep the soil loose for proper development of tubers. First weeding should be carried when the plants are about 20 cm high. At the same time, light earthing up should be given to support the plant. Second weeding should be carried after 3 weeks and also earthing up should be done to cover the developing tuber. All these tasks should be performed carefully without damaging root system of potato and developing tubers. Make sure all exposed tubers are covered with soil as part of inter-cultural operations.

Potato Flowering
Potato Flowering

Diseases and Insects in Potato Cultivation:- Though there are many chemical controls for pests and diseases, crop rotation, using disease tolerant varieties and healthy, certified seed tubers are the key factors of avoiding many diseases and pests.  

Bacterial wilt, Septoria leaf spot, Late blight, Early blight, Common scab (will occur in low pH soils), Black scurf/ canker, Viral disease (potato virus X, S, & Y), Potato Spindle Tuber Viroid, Black leg and soft rot, Pink rot and Black heart- disorder  diseases in potato cultivation. Aphids, Potato tuber moth, Jassids/ leaf hoppers,Whitefly and Root-knot nematode are common pests found in potato plantation.

For control measures of these pests and diseases in potato farming, contact any horticulture department or agriculture department of any agriculture universities.

Note: Contact your local department of horticulture for disease symptoms and their control. They are the best source for pest and disease control solutions in potato cultivation. 

Harvest in Potato Cultivation:- Potatoes comes to maturity and ready for harvesting after 3 to 4 months of sowing. Turning the potato plant’s leaves into yellow colour and  easy separation of the tubers from their stolons indicate that the crop has reached maturity level. Harvesting practices depends on the region. Some regions follow manual and some mechanical harvesting. However, care must be taken for not injuring the tubers. Irrigation should be stopped couple of days before harvesting.

Yield in Potato Cultivation:- Yield of potato crop depends on the cultivar, soil, environmental factors. On an average, one can get a yield 25 to 30 tonnes/ha.

Marketing of Potato:- For fresh market purpose, they can be transported to local markets. If the crop is grown on large scale, it is important to establish a marketing strategy to sell the produce in bulk.

For Indian Agriculture : Click here.

For Sheep or Goat Farming Business: Click here.

The post Potato Cultivation Information Guide appeared first on AsiaFarming.com.

Sugarcane Cultivation Information Guide

$
0
0

Sugarcane Cultivation Guide:

Sugarcane Cultivation.

Introduction of Sugarcane Cultivation:- Sugarcane is a tropical and subtropical, perennial grass that forms lateral shoots at the base to produce multiple stems, typically 3 to 4 meters high and about 5 cm in diameter. The stems grow into cane stalk, which when mature contributes about 75% of the entire plant. A mature stalk is typically composed of 11 to 17 % of fiber, 12 to 16 % of soluble sugars, 2 to 3% of non-sugars, and 60 to 70% of water. As sugarcane crop is sensitive to the weather, soil type, irrigation, fertilizers, insects, disease control, cultivars, and the harvest period, care should be taken to follow best crop management practices for higher yield of sugar cane. Sugarcane cultivation is one of the major farming practices in the world. However, the sugarcane crop is highly susceptible to various insect pests, weeds. It requires best crop management practices along with input fertilizers to get maximum yield. Sugarcane can be grown in tropical and sub-tropical areas as well. Sugarcane belongs to bamboo family of plants and is indigenous to India. It is the main source of sugar. It also provides raw material for manufacturing alcohol. The part of sugarcane is also being used as fodder for animals. Sugarcane belongs to the grass family of “Poaceae” and genus of “Saccharum”. As sugar has worldwide demand, one can make decent returns in commercial sugarcane cultivation.

Top 10 Sugarcane Production Countries:- The following are top 10 sugarcane production countries in the world.

1) Brazil.
2) India.
3) China, mainland.
4) Thailand.
5) Pakistan.
6) Mexico.
7) Colombia.
8) Philippines.
9) Indonesia.
10) United States of America.

Health Benefits of Sugarcane:- The following are some of the health benefits of sugarcane juice.

Health Benefits of Sugarcane.
  • Sugarcane juice helps in curing Acne.
  • Sugarcane juice is an instant energy booster.
  • Sugarcane juice prevents bad Breath & tooth decay.
  • Sugarcane is good for bone strength and development of teeth.
  • Sugarcane helps curing febrile disorders.
  • Sugarcane juice is good for Liver.
  • Sugarcane juice acts as a digestive tonic.
  • Sugarcane juice fights cancer.

Industrial use of Sugarcane:- The main objective of sugarcane crop is to produce sugar. However, there are many byproducts which can be made out of sugarcane.

  • Bagasse, molasses, press mud and green top, which are used by various industries like Bagasse based industries mainly produce pulp, paper, particle boards using bagasse as a fuel, cattle feed, medium for cultivation of edible mushroom, production of furfural.
  • Molasses based industries mainly produce potable alcohol for Distillery, Fuel Alcohol, Cattle feed, Acetic Acid, and many Pharmaceutical products.
  • Press mud based industries mainly produce fertilizer wax and compost industries, as animal feed.

Sugarcane Varieties (Cultivars):- There are many improved commercial hybrid varieties of sugar available throughout the world. The following are some of major sugarcane production countries varieties.

  • India: 687, CoPant.84211, CoJ.64, CoLk.8001, Co.1148, CoS.767, CoS.802, CoC.671, CoC.85061, Co.8021, Co.6304, Co.1148, CoJ.79, CoS.767, Co.6304, Co.7527, Co.6907, Co.7805, Co.7219, Co.740, CoM.7125, Co.7527, CoC.671, Co.740, Co.8014, Co.7804, Co.740, Co.8338, Co.6806, Co.7805, Co.8011.
  • Thailand: K 95 -84, 91- 2 -29, K 92 -181.
  • South Africa: N 12, N 14, N 16, N 17, N 19, N 21, N 22, N 23, N 24, N 25, N 26, N 27, N 28, N 29, N 30, N 31, N 32, N 33, N 35, N 36, N 37, N 39, N 40, N 41, CP 66 – 1043 and NCo 376.
  • Brazil: SP-77-5181, RB-85-5453, SP-81-3250, SSSP-71-5181, BR85-5113, BR72-454, BR83-5486, SP-80-1816, RB-85-5113, SP-80-3280, RB-1049.

Sugarcane Names in Other Parts of World:- Zuckerrohr (German), Kallam sheqeri(Albanian), Satang susu (Korian), air tebu (Indonesian, Malay), Kyan (Burmese), Nam (Thai),La canne à sucre (French),Canna da zucchero (Italian),Cana de açúcar(Portuguese), Suikerriet (Chinese),Şeker kamışı(Turkish), Umoba (Zulu),cây mía (Vietnamese).

Local Names of Sugarcane in India:- Ganna (Hindi),Cheraku (Telugu), Usacha (Marathi), Ganne(Punjabi), Karuppan (Tamil), Karumbin (Malayalam), Kabbina (Kannada),  Sherdina (Gujarati), Akhju (Oriya).

Climate Required for Sugarcane Cultivation:- Sugarcane can be grown as tropical and subtropical crop and grows well where temperature ranges between 20°C to 42°C. Sugarcane crop responds well to long period of sunlight, high humidity and Sugarcane requires an average annual rainfall of between 1800 and 2500 mm for best crop growth.  Sugarcane crop can be cultivated all along the year, if assured irrigation water is available. Sugarcane crop also withstands temperature variations of winter 6°C to 8°C and summer 40°C to 42°C.

Soil Requirement for Sugarcane Cultivation:- Sugarcane crop can be grown in wide range of soils as it tolerates most of the soils as long as there is enough moisture content is available in the soil. However, deep rich loamy soils are best for its growth and yield. Black to medium black soils up to 100 cm to 150 cm depth with good water drainage is most suitable for sugarcane crop. Sandy loam soils along the riversides are also good for sugarcane cultivation. The soil pH between 5.0 and 8.0 is ideal for sugarcane cultivation. As the sugarcane crop remains in the field for 12 to 20 months, good fertile soils are most desirable. Waterlogged  soils which have no drainage are not suitable for the cultivation of sugarcane. If the sugarcane is grown on large scale, it is advised to go for soil testing. Any soil nutrient deficiency should be compensated

Land Preparation in Sugarcane Cultivation:- Land preparation is another important task in sugarcane cultivation as this crop stands in the field for more than one year. With the help of tractor, land should be given 2 or 3 deep ploughings. First ploughing should be carried out immediately once the previous crop is harvested. Make sure to leave the land after ploughing for 2 to 3 months for sun expose. Any clods should be crushed and levelled. Second cross-wise ploughing should be carried by another plough and 3-4 harrowing should be given to bring the soil to fine tilth stage. Soil should be levelled with the help of planker for seed bed preparation. Supplement the soil with well-decomposed farmyard manure (FMY) of 30 tonnes/ha.

Propagation, Planting and Spacing in Sugarcane Cultivation:- The propagation in sugarcane cultivation is done through vegetative cuttings of matured cane called “setts”. Selection of disease resistant and quality setts is important for getting high yield in sugarcane cultivation. A few days before the cuttings are collected; the end of the canes should be removed to break the apical dominance of the cane. This is also helpful in promoting the breaking of buds. The cuttings should be taken from upper portion of the cane which will measure the length of 40-42 cm with 2-3 buds. There are some methods of planting in sugarcane cultivation are available. However, furrow method is one of the popular methods followed in sugarcane cultivation. Sugarcane setts should be planted horizontally or at an angle of 45° in furrows @ 15–30 cm depth. Make sure to cover the cane setts with a thin layer of soil. Can setts can be planted directly in the field or grown in local nurseries and transplanted to the field. When it comes to seed rate or planting density in sugarcane cultivation, on an average, 15,000–25,000 cuttings should be required to cover 1 hectare land. Some people may follow pit method of planting where more than two times of yield can be expected when compared to furrow method planting.

Sugarcane Setts Preparation For Planting.

Ratooning in Sugarcane Cultivation:-

  • What is Ratooning: It is a practice of growing a crop from the stubbles of previous crop.
  • What are the advantages of Ratooning: Well, the main benefit of Ratoon is; it saves cost on preparatory tillage and planting material. Apart from this, Ratoon crop matures earlier and gives more or less same yield as regular sugarcane planting. The other benefit of Ratoon is, it gets benefit of residual manure and moisture.
  • What are the disadvantages of Ratooning: Only one Ratoon should be taken because incidence of pests and diseases increases. The deterioration of soil also a major concern.
Sugarcane Planting.
Sugarcane Planting.

Irrigation in Sugarcane Cultivation:- Irrigation is very crucial in sugarcane cultivation as this crop demands abundant water at various stages; sprouting, formative stage, ripening and initiation of sprouting in ratoons. During water scarcity periods, mulching and drip irrigation, alternate furrow irrigation methods should be followed for better utilization of water sources.

In case of tropical Irrigation should be given as follows:

  • Once in 7 days during germination (sprouting) stage which is 1-35 days after planting.
  • Once in 10 days during formative stage (tillering) (36-100 days after planting).
  • Once in 7 days during growth period (101-270 days after planting).
  • Once in 15 days during maturity stage which is 271 days after panting and up to harvest phase.

Over all sugarcane crops requires about 35-40 irrigations throughout its crop growth in tropical areas where as it requires 8-10 irrigations in sub-tropical areas.

Manures and Fertilizers in Sugarcane Cultivation:- The following are the  seasonal plantation manures and fertilizers.

Well-decomposed farmyard manure (FMY) of 30 tonnes/ha should be added as part of the land preparation.

When to Apply N (kg) P (kg) K (kg)
During the time of planting (10% N, 50% P and K). 25 62 62
 6-8 weeks after planting (40% N). 100 Nil Nil
8-12 weeks after planting (10% N). 25 Nil Nil
20-24 weeks after planting (40% N, 50 % P & K). 100 63 63
Total Application. 250 125 125

Intercultural Operations in Sugarcane Cultivation:- Regular and proper intercultural operation in sugarcane cultivation results in higher yields.

  • Weed Control in Sugarcane Cultivation: The sugarcane yield is heavily impacted by weeds in the field. As the sugarcane crop is grown under abundant water and nutrient supply conditions, possibility of weed growth is very high. These weeds also share the nutrients/fertilizers provided to the main crop, hence controlling these weeds are very important. The first hoeing and weeding should be carried 3-4 weeks after planting the cane. Application of pre-emergence weedicides like Atrazine @ 2 kg a.i/ha , followed by 2,4-D spray @ 1 kg a.i/ha can control the weeds to certain extent. The final earthing up should be carried out before monsoon rains and should synchronize with application of the final dose of nitrogen (N). Integrated weed management should be followed to control the weeds as complete weed control cannot be achieved by using any one method. Proper combination of agronomical, cropping, rotational and biological methods with supplemental use of herbicides is the best method of controlling weeds in sugarcane cultivation.
  • Crop Rotation in Sugarcane Cultivation: Crop rotation is very important in sugarcane cultivation to control the weeds and enrich the soil fertility. In areas, where more rainfall is possible, sugarcane crop should be rotated with rice. In areas where low rainfall is expected, sugarcane crop can be rotated with cotton crop. Sugarcane crop can also be rotated with banana and turmeric, ground nut, soy bean and other gram crops. To get any supplemental income, inter-crops like potato, onion can be grown.

Pests and Diseases in Sugarcane Cultivation:- The following are common pests and diseases found in sugarcane cultivation.

Early Shoot Borer in Sugarcane Cultivation:-

  • Symptoms: This borer attacks the crop during the early stage of cane growth, generally before internodes formation. It also attacks the cane stalks in the years of scanty rainfall situation. Borer infestation during the germination (sprouting) phase kills the mother shoots resulting in the drying up of the entire clump.
  • Control Measures: Pest resistant plants should be selected for the crop. Spraying of Gamma BHC, Heptachlor or Telodrin emulsion @ 1 to 3 kg/ha mixed with 1500 liters of water will control this. Spraying should be done at the interval of 2 weeks for the first three months.

Internodes Borer in Sugarcane Cultivation:-

  • Symptoms: This attacks during and after internodes formation and its activity continues till crop harvest. This attack is mostly found in the top five immature internodes of cane. Loss in yield and juice quality will occur at sever stage of this infestation.
  • Control Measures: Avoid waterlogged conditions, lodging and high dose of nitrogen (N).

Top Borer in Sugarcane Cultivation:-

  • Symptoms: Severe yield loss and quality deterioration occurs due to top borer. Depending upon the incidence level yield loss may be up to 25-30%.
  • Control Measures: Water logging conditions causes this to attack, soil should have proper drainage.

Ratoon Stunting Disease in Sugarcane Cultivation:-

  • Symptoms: Symptoms of this disease include the presence of pin head like orange coloured dots of bacteria on the internal soft tissue in the nodal region and stunted growth, thin stalks with short internodes; pale yellowish foliage and rapid tapering of the stem towards the top. The primary cause to spread this disease is through infected setts.
  • Control Measures: Select disease resistant setts for planting in the field.

Scale Insect in Sugarcane Cultivation:-

  • Symptoms: Infested crop losses its vigour, canes shrivel, growth is stunted and the internodal length is reduced drastically. Finally cane starts drying up. Those effected canes when slit open appear brownish red. In the affected crop, the loss in yield y could range from negligible to total crop failure.
  • Control Measures: Appropriate insect controls should be applied.

Pyrilla in Sugarcane Cultivation:-

  • Symptoms: When the infestation is heavy, canes leaves start turning yellowish white and wither away. Due to continuous desapping by large number of hoppers top leaves in the affected canes dry up and lateral buds germinate. Pyrilla is the most destructive foliage-sucking pest of sugarcane. The main reason for this is heavy rainfall followed by 80% humidity, intermittent drought periods, high temperatures, and wind movement favours rapid build up of pyrilla.
  • Control Measures: Don’t go for too much dense crop, avoid water stagnation. Going for plant pest resistant seeds will control this to certain extent.

Red Rot in Sugarcane Cultivation:-

  • Symptoms: Due to this infestation, the spindle leaves start drying. At a later stage, stalks become discolored and hollow. Black fruiting bodies develop on rind and nodes. After splitting open the diseased stalk, a sour smell emanates. The internal tissues are reddened with intermingled transverse white spots.
  • Control Measures: Healthy seed should be used for planting. Pest and disease resistant cultivars (varieties) should be used as planting material. As soon as disease is appeared, the affected clump along with root system should be uprooted and burnt. Ratooning of diseased cane crop should be avoided. Diseased crop should be harvested as early as possible. Crop rotation should be followed in affected fields. Avoid Ratooning of diseased crop and follow the crop rotation in affected fields.

Smut Disease in Sugarcane Cultivation:-

  • Symptoms: Affected plants with smut have slender and thin canes with erect and pointed leaves.
  • Control Measures: Selecting disease resistant seed is important and pre-treatment of seed pieces by dipping in 2.5% organomercurial fungicide helps reduce the incidence of this disease. Affected clump showing smut whip should be removed during tillering phase effectively reduced the disease incidence.

Pineapple Disease in Sugarcane Cultivation:-

  • Symptoms: The main symptoms of this disease are; setts not rooting; central soft portion of set has red discoloration which turns brown-black; cavities in infected internodes; in older canes leaves may be yellowing and plant appears withered; cut stem has a strong smell of pineapple.
  • Control Measures: The best way of preventing this disease is to select disease resistant seed setts and planting them in well-drained soils.

Wilt Disease in Sugarcane Cultivation:-

  • Symptoms: These symptoms usually appear after monsoon. Infected clumps show stunting and yellowing of top leaves.
  • Control Measures: Selecting healthy and quality seed setts are important to avoid these kinds of diseases. Seed setts should be treated with organom­ercurial fungicide before planting in the field. Crop rotation with other crops like rice and cotton should be followed in affected field.

Grassy Shoot Disease in Sugarcane Cultivation:-

  • Symptoms: With affected crop will have large number lean and lanky, pale sprouts in the clump appear like a ‘bunchy grass’.
  • Control Measures: By selecting health seed can control these diseases. Seed setts should be treated with antibiotics like Achromycin, Terra­mycin, Tylan, Erythro­mycin @ 250 ppm.

Leaf Scald Disease in Sugarcane Cultivation:-

  • Symptoms: The main symptoms of this disease is white “pencil line” extending the entire length of leaf lamina, etiolated leaves and leaf tips drying out resulting in a scalded appearance.
  • Control Measures: Treatment of seed cane with hot water to clean the material prior to planting and selecting disease resistant material can help to prevent this.

Eye spot Disease in Sugarcane Cultivation:-

  • Symptoms: The main symptoms of this disease are ; small water-soaked spots on cane leaves; elongated water-soaked spots in shape of an eye and straw coloured lesions with reddish brown center develop from water-soaked lesions.
  • Control Measures: This disease can be controlled by selecting health seed and through the application of appropriate foliar fungicides.

Mosaic Disease in Sugarcane Cultivation:-

  • Symptoms: This disease causes distinct patterns on contrasting greens on leaves; reddening of leaves; leaf necrosis.
  • Control measures: Virus resistant cultivars should be planted.

Note: Contact your local department of agriculture for pests and disease symptoms and their control. They are the best source for pest control solutions in Sugarcane cultivation. 

Harvest in Sugarcane Cultivation:- Sugarcane crop is a long duration crop and should be harvested at right maturity level. Make sure to stop the irrigation 2 weeks before cutting the crop. Manual or Mechanical harvesting can be carried out based on the facility available. While harvesting the crop, the canes should be given slanting cut at ground level by sharp cane cutting knife. All the dry leaves should be removed from the canes and roots. The immature top potion should be cut off along with 3 to 4 internodes. After harvesting, make the bundles of canes and  send them off to crushing machines. The harvested canes should be crushes after 24 hours to avoid reversion of sucrose into glucose.

Harvesting Sugarcane with Machine

Yield in Sugarcane Cultivation:- Yield of the sugarcane depends on the soil type, irrigation and fertilizers input. However, on an average a yield of  100 to 150 tonnes/ha can be obtained.

Marketing of Sugarcane:- Usually, the commercial crop can be transported to local sugar mills.

For Indian Agriculture Guide : Click here.

For Sheep and Goat Farming Business: Click here.

The post Sugarcane Cultivation Information Guide appeared first on AsiaFarming.com.

Chilli Cultivation Information Guide

$
0
0

Chilli Cultivation (Chili Pepper) Guide :

High Yielding Chilli VarietiesHigh Yielding Chilli Varieties.
High Yielding Chilli Varieties.

Introduction of Chilli Cultivation: The chilli is a fruit of plants belongs to the family of “Solanaceae” and genus of “Capsicum”. The chilli is also being termed as “Chili Pepper” in many parts of world. Chilli is one of the most important and the largest produced spice crop in Asia. The fruit is actually called “chilli” and is used as a spice in a variety of cuisines all over the world in different forms as green chillies, dried red chillies as a whole or in the form of powder. Basically, chillies contain capsaicin, which gives a strong burning tangy sensation when eaten and the red colour is because of the presence of pigment capsanthin. Generally, chillies are valued based on their high pungency and colour. Production of chilli is very high in Asian countries due to high consumption. Commercial cultivation of chilli is very much successful and one can expect decent profits in chilli farming due to its market value in local areas and international markets (export market). Most of the people think that chilli is native to India but it is originated from ‘South America” and these were brought to Asia by Portuguese at the end of 15th century. India is the largest producer, consumer and exporter of chilli. Chillies can be grown in open fields, greenhouses, polyhouses, under shade nets, pots, containers, even in back yards. The quality and production would be high if they are grown in controlled environment such as greenhouses. Chillies can also be grown successfully in hydroponic system.

Major Chilli Production Countries:- Major chilli growing countries are India, China, Ethiopia, Myanmar, Mexico, Peru, Vietnam, Pakistan, Ghana, and Bangladesh. India tops among all of these in exporting chillies.

Health Benefits of Chilli:- The following are some of the health benefits of chillies.

Health Benefits of Chillies.
  • Chillies are good source of iron and B-complex group.
  • Chillies protect against cancer.
  • Chillies are good for prostate health.
  • Chillies help in boosting immune power.
  • Chillies help in reducing risk of lung cancer.
  • Chillies keep bacterial infections at bay.
  • Chillies are zero calorie food so aid in weight management.
  • Chillies help in helps in reducing blood sugar levels.
  • Chillies are good for skin health due Vitamin ‘E’ presence.
  • Chillies help digest food faster.

Chilli Cultivars (Varieties):- Green Cayenna, Yellow Cayenne, Red Cayenne, Green Ball, Red Ball, Jalapeno, Birdseye, Habanero are different types chillies cultivated. However, in these types, there are many improved hybrid varieties of chillies are available specific to each area. Find out the suitable cultivar for your region. You can get this information from your local horticulture department.

Main Types of Chillies.

Famous commercial chilli hybrid varieties of India are: MI-1, MI-2, KA-2, Arunalu, MI-Hot, K 1, K 2, CO 2, CO 4, PKM 1, PMK 1,PLR1, KKM, NS 1701,NS 1101 F1,NS 1072,NS 230,NS 238, Pusa Jwala,Manjari,F1 Hybrid, VNR-21-7 ,Hybrid Chilli Trishul, Hybrid Chilli Sachin, Hybrid Chilli Red Devil, Hybrid Chilli Huero, Hybrid Chilli Amba, Hybrid Chilli Agni, Sanke-shwar, Agnirekha, Kankan Kirti, Musahvadi, Phule Mukta, Surkta, Pbiile Sai, Phule Jyoti, Suryamukhi, Jayanti, Parbhani Tejas Byadagi Kaddi, Byadagi Dabbi, G-3, G-4, G-5, Kiran, Musalwadi, Kashmiri double chilli,G-5, Byadagi Dabbi, Sindhur, LCA-206, Co.2, Kashmiri double palti, KDCH-2,Jwala, Aparsna, KDCH-2,LCA-206,S – 1182 of Punjab, Kadaralli of Karnataka, X-235, Jwala, NP-46A, KDCH-1, Jawahar 218 of Madhya Pradesh.

Different Varieties of Chillies.

Chilli Names in other Parts of World Languages:- Chilli (English), Chilischote (German), Poivre de Guine (French), Capsicum Annum L. (Latin), Pimento, Chile (Spanish), Spaanse peper (Dutch), Peperone, Peperoncino (Italian), Pimento (Protuguese), Kovy pyeret,красный перец (Russian), Togarashi (Japanese), الفلفل الحار, Filfil Ahmar (Arabic), Hsiung – yali – chiao (Chinese), khursani (Nepali),улаан чинжүү (Mongolian), Papryczka (Polish), Basbaas (Somali), Tšilli (Estonian), τσίλι (Greek),고추 (Korean), чили (Serbian), Чили (Bulgarian), Sili (Filipino), 辣椒 (Mandarin), Chili (Norwegian), น้ำพริก(Thai),ớt phơi khô (Vietnamese), Nga Yote (Burmese), Latvian (Latvian), ardei iute (Romanian), මිරිස් (Sinhalese), Mah Tehs (Cambodian), Chladný (Czech), чили (Macedonian),acı biber (Turkish),Upelepele (Zulu), ჩილი (Georgian), Chili (Danish), Cili merah (Malay), گردفلفل (Persian), čili (Slovenian), 紅辣椒 (Taiwanese), стручковий перець (Ukrainian).

Local Names of Chilli in India:- Chilli is called with different names in different languages in India. Mirch, (Hindi, Punjab and Urdu), Morich (Bengali), Marcha (Gujarati), Menessina kayi (Kannada), Marstu,Waungum (Kashmir), Mulaku (Malayalam), Mirchi (Marathi), Lauka (Oriya), Miagai (Tamil), Mirapakayi (Telugu), Mirchan (Punjabi),  Jeevisaang (Konkani), Jolokiya (Assamese), Morok (Manipuri), Gaarhaa Mirch (Sindhi), Marach wangun (Kashmiri).

Climate Required for Chilli Cultivation:- Basically chilli is a crop of tropical and sub-tropical region. It thrives best in warm/hot and humid climatic conditions. The ideal temperature for its growth is 20 to 30°C. Temperatures below 15°C will result in  reduced crop yield. Constant moisture in soil during blossom development and fruit formation is very important for good yield. This crop requires an annual rainfall of 25 to 30 inches. Excessive rainfall or flooding will damage the crop.

Red Chilli Growing for Seed.

Soil Requirement for Chilli Cultivation:- Chilli can be grown in wide range of soils. However the sandy – loam, clay loam and loam soils are best suited for its cultivation. The soil should be rich in organic matter, well-drained and well aerated. The ideal soil pH value for best growth of chilli is 5.5 to 6.8. Avoid acidic soils as these are not  suitable for chili cultivation.

Land Preparation for Chilli Cultivation:- Land should be prepared by giving 3 or 4 deep ploughings and followed by harrowing to bring the soil fine tilth stage. Make sure to crush any clods after each ploughing. After bringing the soil to fine tilth stage, level the land with the help of tractor blade. Making raised beds would be useful for rainy season to drain out the water and also helps good aeration. During the land preparation, it is recommended to supplement the soil with well decomposed farm yard like cow-dung of 25 tonnes/ha or any other equivalent compost. Application of manure should be done at least 2 weeks before of sowing. In order to protect the chilli crop from ants and soil borne pests, Heftaf @ 10-15 kg per acre should be applied in last ploughing. Form ridges and furrows at a spacing of 60 cm. Apply 2 kg/ha of Azospirillum and 2 kg / ha of Phosphobacteria by mixing with 20 kg of farmyard manure (FYM). Irrigate the furrows and transplant 40 days old seedlings, with the ball of earth on the ridges.

Season of Sowing in Chilli Cultivation:- Well, chilli can be grown all around the year provided enough irrigation facility is available. In some Asian countries, sowing will take place in January – February, June – July and September – October.

Seed Rate and Seed Treatment in Chilli Cultivation:- Seed rate depends on cultivar and soil type. However, on an average, 1 to 1/2 kg seed required to cover the 1 hectare land. Treat the seeds with Trichoderma viride @ 4 grams / kg of seeds  and cover with sand. Drench the nursery with Copper oxychloride @ 2.5 grams/liter of water at 2 weeks interval against damping off disease. Apply Carbofuran 3 G at 10 grams/sq.meter at sowing.

Chilli Seeds.
Chilli Seeds.

Propagation, Planting and Spacing in Chilli Cultivation:-  Propagation is done by seeds. Chilli is a transplanted crop. Generally, seeds are sown in nursery beds and 40 to 45 days old seedlings are transplanted in the main field. Raised seed beds of 90 cm width and of convenient lengths should be prepared. Add well decomposed organic matter to the seed beds. To sterilize the soil, burn the rice straw on the seed bed which also helps in adding small amount of ‘P’ & ‘K’ to the soil. Once seeds are sown on nursery bed, green leaves can be used as mulch material. Irrigate the seed beds everyday morning. The soil temperature of the chilli seeds must be between 28°C and 32°C for quick and better germination. It can take up to 2 weeks to 5 weeks before first seedlings will pop up. Remove the mulch immediately after the seeds start germinating. Usually chilli seedlings will be ready 5 to 6 weeks after sowing. Irrigation should be restricted on the seed bed 1 week before actual transplantation and irrigate heavily on the previous day of transplanting in the field. Ridges and furrow type of layout is used. When it comes to plant spacing,  for rainfed crops, a distance of 60 cm x 45 cm & for irrigated crops a distance of 60 cm x 60 cm should be maintained.

Growing Chilli in Pots.

Irrigation in Chilli Cultivation:- Generally, chilli crop is grown as rainfed and irrigated crop. If the crop is grown as rainfed one, a well distributed annual rain fall of 80 to 100 cm is required for better growth and yield. Chilli plants are shallow rooted and cannot tolerate drought and flooding but need uniform and constant moisture in the soil. In water scarcity areas, drip irrigation method is advised. However, furrow method can also be adopted when enough water is present. Overhead irrigation should be avoided as this will promote diseases in chilli cultivation. In case of heavy rains, make sure to drain out the soil quickly. If the plants grown on raised beds, there is a good chance of draining of water quickly.

First Irrigation should be carried out after transplanting seedlings from nursery to main field. Subsequent watering should be provided once in 5 to 6 days in summer and once in 10 to 12 days in winter. Again, irrigation depends on soil type and climatic conditions. Flower and fruit drop occurs in chilli cultivation, if the uniform moisture level is not maintained.

Chilli Growing in Greenhouse.

Manures and Fertilizers in Chilli Cultivation:-  Chilli crop responds very well to manures and fertilizers. If the crop is grown on large scale, make sure to conduct soil test to find out the N:P:K values. Based on the results of test, any nutrient gap should be filled. During the land preparation, supplement the field with 20 to 25 tonnes of well decomposed farmyard manure (FMY)/ha. In case of rainfed crop, 25 kg of “P” in full dose, 50 kg “N” in 1/2 dose should be applied at the time transplanting seedlings in the field. Remaining 1/2 dose of ‘N’ should be applied 1 month after transplanting the seedlings. In case of irrigated crop, N:P:K should be applied in the ratio of 100 kg:50 kg: 50 kg/ha. Fertilizers should be applied in 4 equal doses. First applied at the time transplanting remaining doses are applied at fourth, eleventh, and thirteenth week after transplanting the seedlings.

Intercultural Operations in Chilli Cultivation:- Regular and proper intercultural operation in chilli cultivation results in higher yields. Weed control is a very crucial task for getting higher yields in chilli cultivation. As the chilli is a shallow root plant, 2 to 3 shallow hoeing should be given to kill the weeds without damaging the plant roots. Mulching the plants with rice straw will control the weeds and protect the plants from moisture loss. Weedicides also can be applied to control the weeds. Lasso @ 1.5 liter/ha with one hand weeding is an effective way controlling weeds. For higher yields in chilli cultivation one should carry out staking operation. Stake the chilli plants to prevent lodging especially when the plants have good load of fruits. Each plant should be staked before flowering starts.

Purple Chilli.
Purple Chilli.

Mulching in Chilli Cultivation:- Mulching is the best option for weed control, soil moisture conservation and uniform root establishment. Mulching also prevents soil erosion and enriches the soil fertility. Mulching like rice straw of 5 tonnes/ha would be enough to cover the chilli crop.

Pests and Diseases in Chilli Cultivation:- The following are common pests and diseases found in chilli cultivation.

The following are the common pests found in chilli cultivation:

  • Aphids:-
    • Symptoms: Aphids are small, succulent, pear shaped insects. Aphids attack the crop in winter months and at the later stages of the crop. Due to this effect, the quality of pods will be deteriorated.
    • Control Measures: Spraying dimethoate at 0.05% is effective for controlling these insect pests.
  • Thrips:-
    • Symptoms: This insect pest causes curling of leaves and fall down of flowers pre-maturely. This pest will be sever at flowering stage though it can affect the crop its entire life cycle.
    • Control Measures: Crop rotation and weed control can reduce this pest. However, Treatment of seeds with imidacloprid 70% WS @ 12 grams /kg of seed will also control these pests. Applying carbofuran 3% G @ 33 kg /ha (or) phorate 10 % G @ 10 kg/ha will check these.
  • Fruit borer:-
    • Symptoms: The caterpillar eats leaves and later on bores the pod, which results in the deterioration of quality of the fruit.
    • Control Measures: Collect and destroy the damaged fruits and grown up caterpillars. Spraying Bacillus thuringiensis @ 2 grams/liter of water will check this.
  • Broad Mites:-
    • Symptoms: These mites suck the plant juice near the mid vein on the underside of the leaf causing the chilli plant leaves to curl downwards. This causes to develop corky tissues on the fruits.
    • Control Measures: How can we control these?, First and foremost, selecting pest resistant cultivars (varieties) and weed control in the field, crop rotation help reducing the infestation. However, spraying dimethoate @ 0.05% will also check this insect pest.
  • Mealy bug:-
  •  Symptoms: These bugs suck sap from the chilli leaves, tender shoots and the fruits. This pest causes the leaves to become curly and ultimately fruit drops.
  • Control Measures: Spraying the crop with dichlorvos (0.02%) or quinalphos (0.025%) with fish oil rosin soap effectively control these bugs.
  • Root knot nematode:-
    • Symptoms: This insect pest damages the root system by forming the small galls on the roots of the plant. The effected plants become yellow and wilt. Warm weather and light sandy soils are source of these pests.
    • Control Measures: Selecting resistant cultivars, crop rotation and flooded rice field help in reducing nematodes.

The following are the common diseases found in chilli cultivation:

  • Damping Off Disease in Chilli Cultivation:-
  • Symptoms: This is a serious disease of chilli seedlings and mainly occurs in nursery bed. The disease infected seedlings become rot at ground level and then the plants fall over ground.
  • Control Measures: Treat the seeds with Trichoderma viride 4 grams/kg or Pseudomonas fluorescens 10 grams/kg 24 hours before sowing in the bed. Apply Pseudomonas fluorescens as soil application @ 2.5 kg/ha mixed with 50 kg of farm yard manure (FYM). Water logging should be avoided and drench with Copper oxychloride at 2.5 grams/liter of water at 4 liter/sq.meter. The chilli seedlings in the nursery should be sprayed with any fungicides at a regular interval.
  • Leaf Spot Disease in Chilli Cultivation:-
  • Symptoms: Generally infected plant leaves will have small dark, greasy spots and water soaked spots appear on green fruits. Leaf drop off happens in case of severely effected plants.
  • Control Measures: Spraying Agrimycin – 100 k at 200 ppm plus copper oxychloride 0.3 % checks the disease effectively.
  • Anthracnose Disease in Chilli Cultivation:-
  • Symptoms: Usually, dark sunken spots are formed on the fruits and pink or dark coloured dots appear in the centre of the sunken spots. Due to this spots, the fruits rot and start falling. Moist climatic conditions, shade and heavy dew contribute to the occurrence of Anthracnose disease in Chilli cultivation.
  • Control Measures: Use disease free seeds. Remove and burn the attacked plants or branches. Spraying the disease affected crops with Mancozeb (Dithane M-45) @ 2.5 grams/liter of water will control this disease.
  • Powdery mildew in Chilli Cultivation:- This can be controlled by spraying wettable sulphur 3 grams/liter of water or Carbendazim 1 gram/liter of water. Total of 3 sprays are required at 15 days interval from the first appearance of symptom.
  • Leaf Curl Disease in Chilli Cultivation:-
  • Symptoms: This disease causes leaves to become small in size with downward curling. In severely effected plants, the leaves start fall off. This disease usually spreads through insect pests like thrips and aphids.
  • Control Measures: Control Aphids and Thrips as mentioned in pest control measures to check this disease.

Note: Contact your local department of Horticulture for pests and disease symptoms and their control. They are the best source for pest control solutions in Chilli cultivation. 

Hybrid Green Chilli -Ready to Harvest.

Harvest in Chilli Cultivation:-  Maturity of the chilli depends on variety. Usually it takes about 60 to 65 days after flowering for fruits to fully ripen. Harvesting of chilli crop depends on the purpose and market demand. Immature and fully grown green chillies can be harvested for fresh markets and at red stage for canning purpose. For red dry chilli purpose, crop should be harvested at fully ripen stage. The harvesting can continue for several months and harvesting of chilli should be carried out weekly once or as market demands. For dry chilli, it is important to preserve the red colour of matured fruits.

Yield in Chilli Cultivation:- The yield of chilli crop depends on the cultivar (variety), soil type, irrigation and crop management practices.

In case of hybrid commercial varieties the following yield can be achieved in chilli cultivation.

  • Dry Chillies Yield: 2 – 3 tonnes/ha.
  • Green Chillies Yield: 10 -15 tonnes/ha.

The yield would be more in irrigated crop than in rainfed crop.

Marketing of Chilli:- Fresh green chillies can be transported to local markets based on market demand or weekly basis. However, if the crop is grown for red dry chillies, better contact a any chilli powder making company for bulk sale. There are huge profits in dry chilli cultivation as the demand is very for this produce.

For Agriculture in India : Click here.

For Goat or Sheep Farming Business : Click here.

The post Chilli Cultivation Information Guide appeared first on AsiaFarming.com.


Orange Cultivation Information Guide

$
0
0

Orange Cultivation Guide:

Orange Flowering
Orange Flowering.

Introduction of Orange Cultivation:- Orange is one of the top citrus fruits being grown in most of the countries after banana and apple.The most important commercial citrus species are mandarin, sweet orange and acid lime. In this article, we present about growing sweet oranges/mandarin oranges.Oranges have great economic importance due to its wide range of uses and benefits. This fruit is rich in vitamins like C, A, B and phosphorus. Oranges can be consumed fresh or in the form of juice, squash, syrup and jam. Oranges are main source of peel oil, citric acid and cosmetics. These orange products have excellent value in the international market. Orange tree belongs to the family of “Rutaceae” and genus of “Citrus”. There are several different types of sweet oranges grown across Asia and other parts of world. However, one of the most common types is called the “Valencia” orange. This cultivar (variety) comes from Spain and is also grown in Africa and Australia. Mandarin Orange is another variety which is very famous in Indian citrus cultivation.The ‘sweet orange’ is the kind that is most often eaten today in the world. Actually the sweet oranges are grown first in Asia but now grow in many parts of the world. Oranges are round orange-coloured fruits that grow on a tree which can reach up to 10 meters of height. Orange trees have dark green shiny leaves and small white flowers with five petals. The orange tree flowers smell very sweet and attract many bees. Oranges can be grown in pots, containers even in backyards. Commercial cultivation of oranges is very much successful and profitable when proper cultivation practices are followed. Pest and disease management is very important in orange cultivation as these plants are more prone to different pests and diseases.

Major Orange Production Countries:- The top 10 orange production countries are given below.

1. Brazil.
2. USA.
3. China.
4. India.
5. Mexico.
6. Spain.
7. Egypt.
8. Turkey.
9. Italy.
10. South Africa.

Note: In Asia, India is the second producer of oranges next to China and In India, oranges are primarily grown in the states of  Maharashtra, Andhra Pradesh, Telangana, Punjab, Karnataka, Tamil Nadu, Kerala Uttaranchal, Bihar, Orissa, Assam and Gujarat.

Health Benefits of Orange:- The following are some of the health benefits of oranges.

Health Benefits Of Orange
Health Benefits Of Orange.
  • Oranges are good source of vitamin ‘C’.
  • Oranges are good for skin health.
  • Oranges are good for eye health.
  • Oranges prevents cancer.
  • Oranges regulate high blood pressure.
  • Oranges good for heart health.
  • Oranges lower the cholesterol.
  • Oranges reduce the risk of liver cancer.
  • Oranges help in relieving constipation.
  • Oranges promote healthy body tissues.
  • Oranges are good for bone and teeth health.
  • Oranges boost immune health.
  • Oranges are good for digestion.
  • Oranges help in fighting against infections.
  • Oranges are good for kidney health.
Nutrition Facts of Orange
Nutrition Facts of Orange.

Orange Cultivars (Varieties):- There are many improved varieties developed for each region. Find out pest and disease resistant and high yielding cultivar from local horticulture department.

Some Important cultivars grown in India are: Jaffa, Hamlin, Nagpur Santra (mandarin), Coorg Santra, Valencia, Blood Red, Mosambi,Sathukudi (Satgudi), Khasi Santra, Mudkhed, Shringar, Butwal, Dancy, Kara , SZ-IN-COM, Darjeeling Mandarin, Sumithra mandarin, Seedless-182 and Kinnow mandarin.

Orange Names in other Parts of World Languages:-  Sinaasappel (Dutch), Apfelsine (German), Жүрж (Mangolian), Pomarańcza (Polish), òr-mheas (Scottish), oranji (Somali), Portokall (Albanian), Narandža (Bosnian), Apelsinipuu (Apelsinipuu), πορτοκάλι (Greek), oráiste (Irish), 오렌지 (Korean), larinġa (Maltese), Suntalā (Nepali), laranjeira (Portuguese), Поморанџа (Serbian), Naranja (Spanish), Пўртаҳол (Uzbek), برتقال (Arabic), Portokal (Bulgarian), chéngzi (Chinese), Kahel (Filipino), Arancio (Italian), نارنگی        (Kurdish), 桔子 (Mandarin), Appelsin (Norwegian), Jeruk (Sundanese), ส้ม (Thai), Cam (Vietnamese), Narinch (Armenian), Mikan / orenji (Japanese), Apelsīns (Latvian), Portocală (Romanian), දොඩම් (Sinhalese), ក្រូចពោធិ៍សាត់ ( Cambodian), Pomeraňc (Czech), l’orange (French), Портокал (Macedonian), апельсин (Russian), Pomaranč (Slovak), appelsin (Swedish), Portakal (Turkish),iwolintshi (Zulu), Appelsin (Danish), ნარინჯის (Georgian), Narancs (Hungarian), Pokok limau (Malay), porteqāl (Persian), Pomaranča (Slovenian), liwtefng (Taiwanese), Апельсин (Ukrainian).

Local Names of Orange in India:- Narangi / Santra (Hindi), தோடம்பழம் (Tamil), Naaranga / മധുരനാരങ്ങ (Malayalam), Kamala pandu (Telugu), Kittale hannu (Kannada), Santara (Punjabi), Kamala (Oriya), Santre (Marathi), Komola (Assamese), Kamala lebu (Bengali), Sangtar (Kashmiri), Sangtaraa (Urdu), નારંગી / Narangi (Gujarathi).

Climate Required for Orange Cultivation:- Oranges can be grown both in tropical and sub-tropical climatic conditions up to 1,500 meter(above m.s.l.). However, dry climate with a soil temperature around 25 °C would be optimum for plant root growth. When it comes to best crop growth, dry and arid conditions coupled with well defined summer having low rainfall ranging from 75 cm to 250 cm are most favourable conditions. Orange crop is very sensitive to frost conditions and high humid conditions caused to spread many diseases. The other risk involved in the orange cultivation is, during hot summer, hot winds causes the crop to shed the flowers and young fruits. For achieving good yield of the crop, it is necessary to maintain good temperatures throughout its growth period.

Growing Oranges in Pot
Growing Oranges in Pot.

Soil Requirement for Orange Cultivation:- Oranges can be grown in wide variety of soils such as alluvial, sandy loam to loam, red sand soils to black clayey soils.. However, soil properties like soil reaction, soil fertility, drainage, free lime and salt concentrations are some important factors of soil to be used for orange cultivation. Deep and well-drained light loamy soils are the best for orange plantation. Soil pH of 6.0 to 7.5 is the best for orange cultivation. If the crop is planned on large scale or commercial line, one should consider going for soil testing to find out the suitability and fertility of the soil.

Selection of Site and Land Preparation for Orange Cultivation:- Site selection and land preparation is very important in orange cultivation. When this crop is grown commercially, make sure the site is closer to markets and has transport facility. As the flower and fruit drops are common during summer due to hot winds, it is advised to provide windbreaks on the sides from which heavy winds are possible. One can go for growing eucalyptus, Jamun (Plum) and Mulberry trees for windbreaks.

When it comes to land preparation, using tractor, land should be cross ploughed and levelled by crushing any clods. Make sure all the weeds from previous crops are removed.

Planting Season in Orange Cultivation:- In South East Asia, Orange seedlings are mostly transplanted to main field after commencement of monsoon (month of July-August). Budding should preferably be done in last week of January month or first week of February month following the ‘T’ or shield budding method.

Propagation, Planting and Spacing in Orange Cultivation:- Orange trees are propagated by seeds and vegetatively propagated by T-budding. However, Budded plants are the best planting materials for quick growth and high yielding. When it comes to planting Pits size of 75 cm x 75 cm x 75 cm at 7 meter x 7 meter spacing should be dug and filled the pits with top soil and 10 kg of well decomposed farmyard manure (FYM). Budded plants should be placed in the center of the pits and staked. Usually, spacing depends on cultivar, soil type and type of method followed. For high density planting, spacing would be less. Usually for closed spacing accommodating 120 plants per 1 acre has been considered. Irrigation should be carried out immediately after transplanting the material in the field.

Orange Orichard
Orange Orchard.

Irrigation in Orange Cultivation:- Irrigation is critical step in orange cultivation as usually citrus trees require more water when compared to other fruit crops due to recurrent growth and development. Irrigation depends on factors like soil type, climatic conditions and age of plants. Irrigation should be applied at every 5-8 days interval from March to June and at every 9-12 days interval during November-February. Orange plants are sensitive to water stagnation; hence water logging the tree trunk should be avoided. Irrigate the orange orchard after transplanting. A grown-up orange tree requires about 20-25 irrigations in a year, amounting about 1,400 mm of water. It is recommended to go for drip irrigation as it has many advantages. The advantages of drip irrigation system are as given below.

  • Irrigation or amount of water is controlled and can be supplied as per requirement.
  • Drip irrigation makes the water to be applied at the plant root system.
  • As systematic watering, this improves plant growth and quality and yield of the crop.
  • Water wastage is reduced about 60% when compared to flood irrigation.
  • As water is supplied at root system, fertilizers applied at roots are used very efficiently.
  • This reduces the soil erosion and nutrients when compared to flood irrigation.
  • Land levelling work is minimized so the labour requirement.
  • Drip irrigation helps in reducing weeds, pests and diseases.
  • Crops can be grown any time with drip irrigation.

Manures and Fertilizers in Orange Cultivation:- Orange trees respond very well to manures and fertilizers, applying these nutrients at right stages will result in high yields. The following table describes the N: P: K nutrient requirement in orange cultivation.

Age of the Plant in years. N (grams/plant). P (grams/plant). K (grams/plant). Farm yard manure (FYM) in Kg’s.
1 150 50 25 10
2 300 100 50 15
3 450 150 75 20
4 and above 600 200 100 30 (increase 5 kg of FYM every year).

How to apply these? 1/3rd of recommended dose of nitrogen (N) should be applied through organic manures like well decomposed farm yard manures (FYM) and cakes.

  • In case of non-bearing trees: Nitrogen (N) should be applied in split doses during April, August and November; phosphorus in August and November and potassium in November.
  • In case of bearing trees: Nitrogen (N) should be applied in 3 split doses during April, August and November along with 200 grams of phosphorus in 2 split doses in August and November and 100 grams of potassium in November for oranges grown in black clay soil.

Micro-Nutrients: Based on the soil test results, any micro-nutrient deficiencies should be covered. Zinc, copper, manganese, iron, boron and molybdenum micro-nutrients are required for best growth of the plants. Application of these micro-nutrients should be carried through foliar spraying.

Intercultural Operations in Orange Cultivation:- Carrying regular intercultural operations play important role in higher crop yield. As part of this, weed growth should be controlled by mulching. Regular ploughing between tree rows for removing grass weeds. Spading of tree basins should be carried for proper soil aeration and fertilizers absorption. Chemical weedicides are also effective in controlling weeds.

Mulching in Orange Cultivation:- Mulching is another important task for soil moisture conservation and erosion control. Apart from this, mulching also helps in controlling weed growth and turning into organic matter. This also reduces the number of irrigation by preventing water evaporation. Mulch material like paddy husk or dry leaves with thickness of 7 to 8 inch can be used in tree basins.

Inter-crop in Orange Cultivation:- Orange growers can earn some extra income by opting for intercropping. Legumes and any vegetable crops can be grown as inter crops during pre-bearing stage (During Initial 3 year period). However, make sure the inter crops don’t compete with nutrients provided for orange trees. When growing inter crops, it may need extra care, manures, irrigation along with orange orchard maintenance.

Training and Pruning in Orange Cultivation:- Training and pruning task is very important and this directly impacts the fruit quality and crop yield. The trees are trained to a single system and any shoot emerging from the portion below the bud union should be nipped off regularly. In order to allow the growth of a strong trunk, all shoots in the first 50- 60 cm from ground level developed in the early stage should be removed. The centre of the plant should remain open. Branches should be well distributed to all sides. Cross twigs and water suckers are to be removed early. The bearing trees require little or no pruning. All diseased, injured and drooping branches and dead wood are to be removed periodically for initiating citrus greening. Training of plants should be completed in first three years so that plants attain a mechanically strong canopy. The pruning in pre-bearing trees may be done at any time avoiding the peak winter.

Pests and Diseases in Orange Cultivation:- Controlling pests and diseases in orange orchard is very important throughout its growth period.

  • Pests Found in Orange Cultivation: The main pests found in orange cultivation are black fly, citrus psylla, citrus leaf miner, bark eating caterpillar, mealy bugs, citrus aphids, citrus thrips, fruit fly and mites. These pests cause to produce poor quality fruits and results in low crop yield. Spraying with insecticides like monocrotophos, phosalone, dimethoate, phosphamidon, and quinalphos depending upon the type of pest infestation has been found to be effective in most cases of these pests.
  • Diseases Found in Orange Cultivation: The main diseases found in orange cultivation are twig blight, gummosis, damping off, root and collar rot. The affected plants should be sprayed with Ridomil MZ 72, Bavistin, Benomyl etc. depending on the type of infection.

Note: Contact your local Horticulture department for pests and disease symptoms and their control. They are the best source for pest control solutions in orange production. 

Harvest in Orange Cultivation:- Orange crop yield starts from 4th or 5th year depending on the cultivar. The economic life orange tree can be from 20 to 25 years. There may be 2 or 3 crops in a year (summer, rainy season and autumn). Usually, oranges start maturing in 9 to 12 months. Fruits should be harvested when they are fully ripe and attain proper size, attractive colour and acceptable sugar: acid ratio. Mature fruits can be picked in 2 to 3 cycles.

Ready to Harvest Oranges
Ready to Harvest Oranges.

Post harvest in Orange Cultivation:- Oranges (sweet and mandarin) may be treated with etherel for de-greening and development of colour. At low temperature below 25°C low quantity of ethylene can set a change in colour. Oranges should be washed, sorted and graded based on sizes before packing in CFB boxes.

Yield in Orange Cultivation:- Yield of orange crop depends on many factors like, cultivar (variety) being grown, soil type, climatic conditions and orchard management practices. On an average 25 to 30 tonnes/ha can be obtained. When it comes to yield by individual tree, from fourth or fifth year, 40 to 45 fruits per tree can be expected and the crop stabilizes in the 8th year. Average yield for each tree is about 450 to 500 fruits after stabilization.

Marketing of Oranges:- Orange fruits keep well for a long time under ambient conditions and hence can be transported to long distances for marketing. Oranges can be transported to local markets or fruit suppliers can also buy in bulk at the farm. For commercial marketing, contact any fruit processing units or export agents. Market value of oranges depends on the season, quality of fruit. The price of oranges varies from season to season.

For Indian Agriculture Information: Click here.

For Sheep and Goat Farming Info : Click here.

The post Orange Cultivation Information Guide appeared first on AsiaFarming.com.

Pumpkin Cultivation Information Guide

$
0
0

Pumpkin Cultivation  Guide:

Pumpkin Flower
Pumpkin Flower.

Introduction of Pumpkin Cultivation:- Pumpkin is very famous and is one of the most important cucurbitaceous vegetable crops grown across the globe. Technically pumpkin is a fruit and used in culinary items. The ripe pumpkins are used for culinary (cooking) purpose. Pumpkins grown in summer and rainy season have great demand in the market. Pumpkins may be grown in different shapes and sizes. Pumpkins are like other squash and these vegetable are native to North America and famous for thanks giving celebrations. Pumpkins are widely grown for commercial use for using both in food and recreation. Pumpkin and its seeds possess excellent health benefits. They are great source of calcium and phosphorus. When it comes to plant description, pumpkins have larger leaves and sprawling vines with coiled, modified leaves called tendrils and almost square woody stem as opposed to the rounded, less tough stem of winter squash. These vegetables have important feeder roots near the soil surface and usually roots grow to about the length as vines which are called lateral roots. Pumpkin roots may reach up to 1.6 meter deep in the soil. Pumpkins belong to the family of “Cucurbitaceae” and genus of “Cucurbita”. Pumpkins are called “Curcubita pepo” and “Cucurbita maxima” scientifically. When it comes to commercial production of pumpkins, it’s very important to procure quality seeds as seeds extracted from the vegetable crops are used for further sowing. Seed size may vary in size, depending on cultivar and type. Moreover the seed recovery potential from pumpkin fruits is very less and it’s about 1.0 – 1.5%. Growing pumpkins on large scale defiantly yield good profits, when best cultivation practices are put in place. Pumpkins can be grown in containers, pots, backyards, greenhouses and polyhouse. These fruits can also be grown hydroponically. If you are growing the pumpkin for seed crop, then it is entirely different from vegetable crop. In this conversation, let us discuss about vegetable crop.

Major Pumpkin Production Countries:- The top 10 Pumpkin production countries are given below.

1. China.
2. India.
3. Russia.
4. Iran.
5. USA.
6. Mexico.
7. Egypt.
8. Italy.
9. Spain.
10. Indonesia.

Health Benefits of Pumpkin:- The following are some of the health benefits of Pumpkins.

Health Benefits of Pumpkin
Health Benefits of Pumpkin.
  • Pumpkins/Seeds are excellent source of magnesium, zinc, fiber and omega-3 fatty acids.
  • Pumpkins aid weight loss,
  • Pumpkins are good for eye health.
  • Pumpkins may prevent some type cancers.
  • Pumpkins are good for prostate health.
  • Pumpkin seeds are good for heart health.
  • Pumpkins boost immune health.
  • Pumpkin seed extract help in bladder function.
  • Pumpkin extract may reduce cholesterol levels.
  • Pumpkin helps digestion and improves mood and sleep.
  • Pumpkin extract may help in controlling blood sugar levels.
  • Pumpkin extract may protect from infections.

Pumpkin Cultivars (Varieties):- One of the major differences in pumpkin varieties is fruit size and there are three main categories of pumpkins available. However, there are many varieties fall under these categories. If the crop is grown is for seed purpose, growers should keep track of the many new varieties of pumpkins available each year, consider the market, and plant varieties that are best suited to their operations. Carving, Small/Pie type and Giant pumpkin are main types of pumpkins. There are many improved varieties of pumpkins grown around the world. However some of the cultivars of pumpkin are; Autumn Gold, Gost Rider,Amish Pie, Bushkin Frosty, Funny Face, Harvest Moon,Jack-o-Lantern,Small sugar, Big Max, Big Moon,Co.1, Co.2, Arka Suryamukhi, Arka chanada, HR 83-1-1, Ambili, Saras , Suvarna, Soorj, Sugar Treat, Winter Luxury, Baby Bear, Baby Pam, Spooktacular, Long Island Cheese, Lumina, Spirit, Young’s Beauty, Aspen, Big Autumn, Big Tom, Connecticut Field, Atlantic Giant, Big Max, Big Moon, Mammoth Gold, Prizewinner, Ghost Rider, Happy Jack, Hercules/Super Herc/HMX 3692 PMR, Howden Field, Jackpot, Jumpin’ Jack, Magic Lantern PMR, Pankow’s Field. Selecting appropriate pumpkin variety depends on region, soil, climate and demand. Contact your local horticulture department for hybrid/improved commercial variety that suits your region.

Pumpkin Common Names:- Pumpkin (English),  litsanga (SiSwati), fhuri (Tshivenda), ithanga (isiZulu), pampoen (Afrikaans).

Pumpkin Names in other Parts of World Languages:- Pompoen (Dutch), Kürbis (German), Huluu (Mongolian), Dynia (Polish), Peapag (Scottish), کدّو (Urdu), Kungulli (Albanian), Bundeva (Bosnian), Kõrvits (Estonian), κολοκύθα (Greek), Puimcín (Irish), 호박 (Korean), Pharsi (Nepali),Abobora (Portuguese), Tikva (Serbian), Calabaza (Spanish), qovoq (Uzbek), Yaktin (Arabic), Tikva (Bulgarian), 南瓜 (Chinese), Kalabasa (Filipino), Zucca (Italian), Kundir (Kurdish), 南瓜 (Mandarian), Gresskar (Norwegian), Waluh (Sundanese), Fak thong (Thai), Bí ngô (Vietnamese), Gargaj (Armenian), kabocha / かぼちゃ (Japanese), Kirbis (Latvian), Dovleac (Romanian), වට්ටක්කා (Sinhalese), ល្ពៅ (Cambodian), dýně (Czech), Chitroule (French), Tikva (Macedonian), Тыква (Russian), Tekvica (Slovak), Pumpa (Swedish), balkabağ (Turkish), Ithanga (Zulu), Græskar (Danish), გოგრა (Georgian), tök (Hungarian), Labu (Malay), کدو تنبل (Persian), buča (Slovenian), Lamkoef (Taiwanese), Гарбуз (Ukrainian).

Pumpkin in Indian Languages:- Kashiphal (Hindi), Bhopla (Marathi), Gummadi Kaya (Telugu), பரங்கிக்காய் (Tamil),Mathanga (Malayalam), Dudde (Konkani), કોળું (Gujarati), Petha (Punjabi), Mairen (Manipuri), Kumbalakai (Kannada), Paa’rimal (Kashmiri), Kumra (Bengali).

Climate Required for Pumpkin Cultivation:- Pumpkins are warm season crop and it can also withstand cold temperatures. This crop is sensitive to frost and the ideal temperature of 18°C to 30°C is best for its growth. At higher temperatures, male flowers sometimes predominate, resulting in fewer fruit for that period.

Soil Requirement for Pumpkin Cultivation:- Pumpkins can be grown in wide range of soils with proper irrigation facility. However, loam, sandy loam and clay loam soils are best for pumpkin cultivation. Any soil micro-nutrient deficiency should be filled based on the soil test results. The pumpkin yield would be high in the soils having a pH value of 6.0 to 7.0.

rowing Pumpkins in Containers
rowing Pumpkins in Containers.

Land Preparation for Pumpkin Cultivation:- Land should be well prepared by removing the any weeds from previous crops. Land should be given couple of ploughings with local tractor to get the soil to fine tilth stage. To make the soil fertile, add appropriate well-decomposed farm yard manure.

Planting Season for Pumpkin Cultivation:- Pumpkins can be grown round the year where sufficient irrigation is available. However, two crops are common in a year.

Propagation, Planting and Spacing in Pumpkin Cultivation:- Pumpkin plants are propagated by seeds. Usually, pumpkin seeds are directly sown in main filed. Planting on a raised bed promotes drainage, so the roots do not have to deal with constant wetness, which leads to disease problems. The pumpkin seeds can be planted directly in the field. Pumpkins are usually planted in hills. Plant 2 to 3 seeds per hill, about 2.5 cm deep and later thin to one plant per hill for better growth. Usually, spacing varies with variety and vine size. It is advised to plant bush or short-vined varieties of pumpkin at the spacing of 0.5 meter to 1 meter in the row and 1 meter to 1.5 meter between rows.

Pumpkin seeds
Pumpkin seeds.
Pumpkin Seedlings
Pumpkin Seedlings.

Irrigation in Pumpkin Cultivation:- Proper irrigation of any crop ensures the good plant growth and yield. In case of pumpkin cultivation, follow this irrigation schedule.

  • Irrigate immediately after sowing the seeds.
  • During the initial stages of plant growth, irrigate @ 3-4 days interval.
  • During flowering and fruiting stage, irrigation should be provided at alternate day interval.
  • In case of good irrigation facility, furrow method of irrigation is ideal for pumpkin cultivation.
  • In case of limited water facility, one can adopt drip irrigation system.
  • There is no need of irrigation in rainy season.
  • Make sure to have well drainage in case of heavy rains/floods.

Manures and Fertilizers in Pumpkin Cultivation:- Balanced manures and fertilizer application is essential for high yielding. Apply 25 to 50 cartload well-decomposed farmyard manure (FYM) should be added at the time of land/soil preparation. 50 kg of ‘N’, 25 kg of ‘P’/ha should be applied. Half  dose of ‘N’ and full dose of phosphorus should be given at the time of sowing and remaining half of  ‘N’ should be given 1 month after sowing in the field.

Weed Management in Pumpkin Cultivation:- Weed Control is very important task that needs to be performed frequently to ensure healthy plant growth.

  • Pumpkins require frequent weeding so conduct weeding and raking the soil at the time fertilizer application.
  • Carry out the earthing up operations during rainy season.
  • Weeding can be done by hand or hoe.
  • The first weeding should be carried out 2 to 3 weeks after sowing.
  • Generally, a total of 3 to 4 weedings are more than enough in pumpkin cultivation.
  • Herbicides can also be used to control the weeds effectively.

Mulching in Pumpkin Cultivation:- Usually, mulching is done on pumpkin crops grown on  raised beds. Depending on availability, one can use plastic mulch or organic mulch. Mulch can be laid down before or after the transplanting and after sowing.

Trailing in Pumpkin Cultivation:- Pumpkins grow very fast and its vine elongate quickly within 2 weeks after planting/sowing in the field. Generally, pumpkin is grown trailing on the ground, for trailing these, spread dried twigs on the ground.

Pests and Diseases in Pumpkin Cultivation:- Pumpkin crop is attacked by many pests and disease. However, prevention of these pests and diseases are essential for quality and getting high yield in pumpkin cultivation. Proper crop rotation is essential in pumpkins to reduce potential pests and disease problems. Never grow pumpkins on land that has been planted to any other cucurbit crops previously.

The following are the common pests found in pumpkin cultivation.

  • Pumpkin flies: These pests cause sunken brown spots and white maggots develop inside the fruit.
    • Control measures: As the adult flies neither suck nor chew the foliage, they are controlled by baiting.
  • Aphids: These pests cause curling of leaves.
    • Control measures: Apply mercaptothion 15 kg to 30 kg/ha or mevinphos 690 ml/ha , fenthion or dimethoate. Apply one of these  when a pest is noticed, and repeat when necessary.
  • Thrips: These pests cause newly emerging plants become deformed.
    • Control measures: This can be controlled by spraying or wet both sides of the leaf with endosulfan or mercaptothion. Follow crop rotation to prevent this pest.

The following are the common diseases found in pumpkin cultivation.

  • Powdery mildew: This disease causes whitish leaf spots on the lower leaf surface eventually merge on upper surface.
    • Control measures: To control this, apply copper oxychloride/sulphur @ 10 kg/ha to 30 kg/ha.
  • Downy mildew: Symptoms of this disease appear as small yellow, often angular spots on the upper surface of the leaves.
    • Control measures: To control these diseases, spray with bravo, cupravit or dithane as soon as the disease is noticed in the crop.
  • Anthracnose: Symptoms of this disease appear on the leaves, small, yellowish or water spots appear and these rapidly enlarge and turn brown.
    • Control measures: To control this, apply bravo or dithane weekly in time.
  • Cucumber wilt: As result of this disease, plants wilt as a result of rotting of the root system.
    • Control measures: To control this wilt, apply dichlorophen as a pre-plant application. This should be applied as a drench at a rate of 400 ml spray mix per 10 liter container of soil.

Note: Contact your local Horticulture department for pests and disease symptoms and their control. They are the best source for pest control solutions in Pumpkin production. 

Growing Pumpkins in Greenhouse
Growing Pumpkins in Greenhouse.

Harvest in Pumpkin Cultivation:- Maturity of the pumpkins depends on cultivar (variety). These fruits should be harvested depends on market demand. Maturity can be identified by change in fruit colour to orange or pale yellow colour. At this stage, the pumpkin seeds attain maturity with higher vigour and viability.  They can be harvested either in green and mature/ripe stage. Usually, harvesting of pumpkin crop is done by hand; using secateurs or a sharp knife, and the fruit is removed with 5 cm of stalk attached. After harvesting, pumpkins can be stored for few months in well-ventilated rooms.

Yield in Pumpkin Cultivation:- Yield depends on many factors which may include soil type/fertility, cultivar, irrigation, age of plants and plant management practices. However, an average yield may range from 15 to 25 tonnes/ ha.

Marketing of Pumpkins:- Usually, Pumpkins are graded and transported to local markets.

For Indian Agriculture : Click here.

For Commercial Goat or Sheep Farming : Click here.

The post Pumpkin Cultivation Information Guide appeared first on AsiaFarming.com.

Guava Cultivation Information Guide

$
0
0

Asia Farming

Guava Cultivation Details:

Guava Flowering.
Guava Flowering.

Introduction of Guava Cultivation:- Guava fruit is one of the famous tropical fruits grown across Asian countries as well as other parts of world and known as the apple of the tropics. Guava fruits are quite popular in India and south East Asia. It is said to be this fruit is native to Mexico, Central America and South America. Commercial cultivation of Guava is very much successful due to low maintenance and high yields. Guava Plants are hardy and produce good yield even with little care. The Guava plants can be grown under rainfed as well irrigated conditions in both tropical and subtropical regions. Guava fruits are grown for their excellent health benefits. Guava fruits can be consumed as raw (fresh fruits) and used in beverages, candies, ice creams, dried snacks, fruit bars and desserts. There are many improved/hybrid/commercial varieties available to specific region.  Guava belongs to the family of “Myrtaceae” and genus of “Psidium”. When it comes to guava size, they range from as small as an apricot to as large as a grapefruit. Guava fruit varieties (cultivars) feature white, red, pink flesh. Commercial growers generally select cuttings/grafting for propagation as seed propagation is very slow and time consuming for getting the crop. Usually, Guava fruit measures about 5 to 10 cm in length and available in round and oval shapes depending on the species (cultivar). Now a day’s commercial growers are following high-density plantation and ultra high density plantation for higher yields in Guava fruit cultivation. Guava fruits can be grown in pots / containers, back yards, greenhouse and poly houses.

Major Guava Production Countries:- The top 10 Guava production countries in the world are given below.

  1. India.
  2. China.
  3. Thailand.
  4. Pakistan.
  5. Mexico.
  6. Indonesia.
  7. Brazil.
  8. Bangladesh.
  9. Philippines.
  10. Nigeria.

Health Benefits of Guava:- The following are some of the health benefits of Guava fruit and leaves.

Health Benefits Of Guava Fruit.
  • Guava is good source of vitamins and minerals. This fruit is an excellent source of vitamin ‘C’, ‘A’ and antioxidants which helps in boosting immune system.
  • Guava fruit is good source of “potassium”.
  • Guava fruit is low in calories and fat.
  • Guava is rich source of soluble dietary fiber and hence helps in treating constipation.
  • Consuming Guava fruit regularly lowers the risk of cancer.
  • Guava fruits are good for Diabetic patients.
  • Guava fruits help lower the levels of triglyceride’s and bad cholesterol (LDL), hence these fruits are good for heart health.
  • Guava fruits improve eyesight due to vitamin ‘A’ presence.
  • Guava fruits are recommended during pregnancy for folic acid, or vitamin B-9 fulfilment.
  • Guava fruits are good for brain function.
  • Anti-inflammatory action and a powerful antibacterial ability of Guava tree leaves help fighting against infections.
  • Guava fruits aid in weight loss.
  • Guava is good for preventing cough and cold.
  • Guava has anti-ageing properties; hence it is good for skin.

Guava Cultivars (Varieties):- There are many improved varieties including dwarf varieties suitable to each region. Find out with your local horticulture department for proper high yielding variety.

Apple Guava Variety.

Here are some of the commercial cultivars grown in India; Allahabad Safeda, Lucknow 46, 49, Chittidar, Harijha, Arka Amulya, Saharanpur Seedless, Nagpur seedless, Arka Mridula, Hafshi, Banaras, Apple guava, Baptla, Arka Kiran, Lalit and TRY (G)-1.

Red Guava Variety.
Red Guava Variety.

Guava Common Names:- Guava, Guayabo, Goiabeira , Red Guava , Guyava and Kuawa.

Guava Names in other Parts of World Languages:- Goyave (French), Guave (Dutch), Zaytoon (Somali),Guave (German), Gujava (Albanian), Guajaav (Estonian), Nkouáva (Greek), 반석류 (Korian), Ambaa (Nepali), Goiaba (Portuguese),Guayaba (Spanish), Guyyava (Uzbek), جوافة        (Arabic), Гуава (Bulgarian), 番石榴 (Chinese), Bayabas (Filipino), Guaiava (Italian), Guava (Norwegian), quả ổi (Vietnamese), Farang (Thai), Guaba (Japanese), Gvajave (Latvian), ˈgwɑ və (Romanian), Peira (Sinhalese), Trapaek sruk (Cambodian), Guavasläktet (Swedish), Guava (Turkish),Gujávafa (Hungarian), Jambu kampuchia (Malay), گواوا  (Persian), 番石榴属 (Taiwanese), Amroud (Urdu).

Guava in Indian Languages:- Amrud / Paere (Hindi), Perakka (Malayalam), Jama pandu (Telugu), Seebe / Pyarilhannu / Sibe Hannu / Perale (Kannada), Koyyapazham (Tamil), Pijuli (Oriya), Amrud (Punjabi), Payara (Bengali), Peroo (Marathi),  Jamrukh / Jam Phal (Gujarati), Paer / Peron (Konkani).

Climate Required For Guava Cultivation:- Guava can be grown in both tropical and sub-tropical climates. These trees can be grown up to an altitude of 1500 meters above mean sea level (m.s.l). Low night temperatures in winter season ensure the best quality guava fruits. Generally, older Guava plants can tolerate high temperatures and drought conditions. However, high temperature during flowering and fruit development stage can cause fruit drop and lower the yield.  It is susceptible to severe frost as it can kill the young plants. Guava crop can be cultivated under both rain-fed and irrigated conditions. When it comes to rainfall requirement for rain-fed crop, on an average 100 to 125 cm of annual rainfall is more than enough for growing Guava plants.

Guava Growing in Pots.

Soil Requirement for Guava Cultivation:- Being a hardy in nature, Guava plants can be grown in wide range of soils from heavy clay to very light sandy in nature. However, they require well-drained, deep loamy, friable soils for good crop yield. Avoid water logging conditions as it can cause the root rot.  Soil pH of 4.5 to 7.0 is ideal for Guava Plantation. River basins are very well suited for growing Guava fruits. It is advised to go for soil test, if you are planning for commercial cultivation. Any nutrient gaps should be filled based on soil test results.

Land Preparation for Guava Cultivation:- Land should be deeply ploughed, harrowed and levelled before planting. Make sure to bring the soil to fine tilth stage. Remove any weeds from previous crops and land should be prepared in such a way that any excess water should be drained out. If the soil is not fertile, supplementing the land with well decomposed farm yard manure (FMY) is recommended for required nutrients. This organic manure should be added in last plough during land preparation. Dig the pits size of 1 meter x 1 meter x 1 meter and fill the pits with surface soil mixed with farm yard manure (FMY) or 25 kg of garden compost.

Soil Sterilization in Guava Cultivation:- Soil sterilization is also an important task which raises the soil temperature and kills many soil-borne organisms including plant pathogens and pests. This process can be achieved by both physical and chemical means. Usually, physical means include treatments with steam and solar energy where as chemical means include treatments with herbicides and fumigants. However, this can also be achieved by plastic mulch film.

Planting Season for Guava Cultivation:- Planting can be done throughout the year where proper irrigation facilities are available.

Propagation, Planting and Spacing in Guava Cultivation:- Propagation is done by seeds, cuttings, grafting and air layering. Seed propagation takes longer time; hence the most adopted propagation method in Guava cultivation is grafting and air layering.

Field should be prepared before monsoon season starts. Usually the planting should be done before the onset of rains by adopting square planting system. The spacing of plants varies from variety. Commercial growers should adopt a distance of 5 meter – 8 meter. Usually, a spacing of 5 meter x 5 meter or 6 meter x 6 meter is followed. Guava can also be planted in hedge-row system at spacing of 6 meter x 2 meter or 6 meter x 3 meter. For high density and ultra high density planting, the spacing between rows and plants should be less. Generally, in ultra high density plantation, a row-to-row distance of 2 meter and plant-to-plant distance of 1 meter is followed.

High Density Planting (HDP) in Guava Cultivation:- Commercial growers can follow the high density planting method to achieve higher yields in Guava cultivation. Some of the commercial/hybrid varieties do very well under HDP.

High Density Guava Planting.
  • In High density method (HDP), cuttings are planted at 3 meter x 3 meter which will accommodate 555 plants / hectare where as in traditional method of planting (6 meter x 6 meter spacing) it only accommodates 277 plants / hectare.
  • Higher fruit yield of 160 kg/tree can be expected in HDP with spacing of 3 meter x 3 meter where as traditional 6 meter x 6 meter yields only 124 kg/tree.

Ultra High Density Planting (UHDP) in Guava Cultivation:- Well, commercial Guava growers may consider this method for certain hybrid Guava varieties.

Guava Cultivation (Ultra High Density).
  • In this method, a ‘Meadow Orcharding’ system is followed and this system provides very high productivity with superior fruit quality.
  • In this method, plants spaced at 1 meter x 2 meter accommodate 5000 plants/ hectare. Canopy management is feasible in this planting method through topping and hedging.
  • Plants should be topped 2 months of planting in October for emergence of new shoots below cut end.
  • 50% length of each new shoots, pruned again for induction of more shoots.
  • Heading back of all shoots is repeated annually.
  • This planting method ensures dwarf, compact canopy, better fruiting and easy horticultural operations.
  • Production starts from very first year of planting and can obtain up to 55 tonnes per hectare. Usually yield starts from 12 tonnes/ha and attains maximum yield in 4 to 5 years.

Irrigation in Guava Cultivation:- Proper irrigation of any crop ensures the good plant growth and yield in Guava farming.

Guava plants require constant moisture in the soil especially in dry season from December to May. However, Guava crop does not require any water in rainy season. Generally, water requirement and frequency depends on plants age and stage. The first irrigation should be given immediately after planting in the field for root establishment in the soil. Generally, on an average, a guava plant requires 15 to 30 liters per day. The best irrigation method used in Guava cultivation is drip irrigation. Drip irrigation provides efficient way of using water in regions where water is a major problem. Commercial growers can get subsidies on drip systems from local horticulture schemes. If drip system is installed, irrigation can be given on alternate day.

Drip Irrigation Advantages in Guava Cultivation:- There are many advantages of using drip system in Guava field.

  • Saves water and useful especially low watering regions.
  • Ultimately, it enhances plant growth and crop yield.
  • Drip irrigation saves energy and labour cost.
  • Drip Irrigation is most suited for soil having low water holding capacity and undulating terrain.
  • Reduces weed growth as water is not applied out of the plant basin.
  • Drip irrigation improves fertilizer application efficiency.
  • Drip irrigation Improves quality of Guava fruit.
  • Drip irrigation reduces salt concentration in the root zone of the plant.

Inter-crops in Guava Cultivation:- Guava growers can earn extra income by going for intercropping during pre-bearing stage. Legumes like green gram, yellow gram and short duration vegetable crops like tomato, chilli, okra, french beans may be cultivated as inter-crops. Intercropping also enriches the soil fertility by increasing ‘N’ content in it.

Manures and Fertilizers in Guava Cultivation:- Balanced manures and fertilizer application is essential for high yielding of Guava produce. Farm yard manure of 50 Kg and N: P: K of 1 Kg per tree in 2 split doses during March and October should be applied. To increase the fruit yield, spray Urea 1 % + Zinc sulphate 0.5% twice a year during March and October. In case of boron deficiency soils, spray 0.3% borax during flowering and fruit set stage.

Weed Management in Guava Cultivation:- Weed Control is very important task that needs to be carried out frequently to ensure healthy plant growth by utilizing nutrients properly. Proper weed control is necessary for growing healthy plants and getting higher yields. Weed control also checks the losses of fertilizer and moisture from the plant basin. Mulching can be practiced by using plastic mulch, dry leaves or paddy husk. Chemical weedicides can also be used for controlling the weeds. Shallow cultivation between rows can be given to remove weeds. Remove weeds from basins around the Guava trees by hand weeding before manure and fertilizer application followed by mulching with organic materials.

Training and Pruning in Guava Cultivation:- Training of plants in young stage should be carried out to build strong framework and to avoid weak crotches. Fruit bearing trees should be trained as low headed trees to facilitate multiple hand pickings. The open centre of delayed may be adopted for training. The scaffold branches in young Guava plants should be tipped back to encourage secondary branching. The root sucker, water sprouts and cross branches should be removed.

To check the overcrowding and to control the plant height, the terminal shoots on the periphery should be headed back at about 42 cm level in alternate years.  Pruning also takes place during harvesting period as the fruit is plucked along with the shoot on which it is borne.  Pruning is usually should be carried out after harvesting or in spring. Summer pruning is not recommended as it may damage the plant by sun burning.

Pests and Diseases in Guava Cultivation:- The following are the major pests and diseases found in Guava cultivation.

Fruit Fly:

  • Symptoms: During monsoon season, the adult lays eggs on the surface of the fruits. On hatching the maggots enter into the fruits and cause fruit drop. This causes the yield to go down drastically.
  • Control measures: Plucking and burning of all affected Guava fruits are generally recommended to control this. The soil around the Guava tree should be raked during summer months and spray of Malathion 0.05% solution should be applied.

Mealy Bug:

  • Symptoms: Mealy bugs suck sap from young Guava leaves, twigs and flowers. The affected Guava plants dry up and the yield would be reduced.
  • Control Measures: The effected Guava plants should be banded with polyethylene so that the nymphs are prevented from climbing up from the soil surface and spray of 0.1% Metacid is recommended to control this.

Wilt:

  • Symptoms: Guava wilt is caused by fungi. The affected plants show yellowing of leaves followed by drying of leaves and twigs from the tip and finally wilting of the whole Guava tree.
  • Control Measures: To control this, 15 grams of Bavistine should be applied at the basin of each plant after pruning takes place. It is better to grow disease resistant varieties.

Note: Contact your local Horticulture department for pests and disease symptoms and their control. They are the best source for pest control solutions in Guava production. 

Harvest in Guava Cultivation:- Harvesting time depends on variety grown. Hybrid varieties take less time to reach harvesting stage. Usually plants propagated through air layering come to bearing in 2 – 3 years. However, they attain full bearing capacity at the age of 8-10 years. Sickle or fruit plucking machine can be used to pick the fruits from Guava trees.

Yield in Guava Cultivation:- Yield of Guava crop depends on many factors such as, variety, age of the plant, soil type, irrigation, cultivation practices and climate. On an average, One can obtain the crop yields about 25 tonnes/ha.

Marketing of Guavas:- Because of their perishable nature, guava fruits should be sent out immediately after harvesting in the local market. Shelf life of guava can be extended up to 3 weeks by keeping them at low temperature of 5°C and 80 % relative humidity. Usually, Guava fruits are graded based on size and quality. The graded fruits can be packed and transported to local markets.

Bottom Line: Commercial Guava Cultivation is very profitable with low maintenance.

For Orange Cultivation Guide: Click here.

For Agriculture in India : Click here.

The post Guava Cultivation Information Guide appeared first on AsiaFarming.com.

Drip Irrigation Information Guide

$
0
0

Asia Farming

Drip Irrigation:

Drip Irrigation
Drip Irrigation.

Introduction to Drip Irrigation:- What is drip irrigation? Well, drip irrigation is a form of irrigation that saves water and makes use of manure / fertilizer efficiently by allowing water to draw slowly to the roots of plants / trees, either onto the soil surface or directly onto the root area of plant. The drip irrigation works through a network of valves, pipes, tubing, and emitters. It is done through narrow tubes that deliver water directly to the base of the plant / tree. Drip irrigation system may also use devices called “micro-spray heads”. This device sprays water in a small area of field instead of dripping the water from emitters. Generally, this type of spray heads is used on tree and vine crops with wider root zones.

In case of little water availably or recycled water utilization, sub-surface drip irrigation (SDI) uses permanently or temporarily buried dripper line or drip tape located at or below the plant roots. In order to find out suitable drip irrigation system to be installed, One should consider factors like land topography, soil, water, crop and agro-climatic conditions. Drip system can be used in most of the farming methods like commercial greenhouse farming, residential gardens, polyhouse farming, shade net farming, hydroponics and open field farming. Drip irrigation will be more beneficial when compared to sprinkler irrigation system. Drip and subsurface drip irrigation is used when using waste water. Generally, large drip irrigation system consists of some kind of filters to prevent clogging of the small emitter flow path by small water borne particles. Now days, once can get drip systems which minimize the clogging. Currently, drip irrigation for home garden is available in the form of drip kits and these are getting popular for the home owners. This kit consists of a timer, hose and emitter.

Main Components involved in Drip Irrigation:- The following components are used as part of drip irrigation system.

  • Pump
  • Filtration systems like water filter, sand filter (separator), Fertigation systems (mixing liquid fertilizer with the irrigation water is called “Fertigation”).
  • Pressure Controller (Like Pressure Control valve/regulator).
  • Back water flow prevention unit.
  • Large Pipe and Pipe fittings (Main line Pipes).
  • Hydraulic control valves and safety valves.
  • Smaller diameter poly-tube which is referred to as “laterals”.
  • Poly fittings and accessories to make drip connections.
  • Emitters or drippers, micro spray head, in-line dripper or in-line drip tube.

Note: In drip system, pump and valves may be operated manually or automatically.

Advantages of Drip Irrigation:- The following are the advantages of drip irrigation system.

  • Useful in areas where water availability is a major problem.
  • Increase in yield and early maturity of crop can be expected.
  • Reduces Fertilizer/Nutrient loss due to localized application.
  • Makes use of water in highly efficient way.
  • Drip irrigation makes intercultural operations easy.
  • Water distribution is done uniformly and directly to plant root zone.
  • Controls weed growth and soil erosion.
  • Land/fields with irregular shapes can utilize drip system very effectively.
  • Recycled of waste water can be used without any issue.
  • Can save the labour cost when compared to other irrigation methods.
  • Reduces the risk of plant and soil borne diseases.
  • It can be operated at lower pressure which may reduce energy consumption cost.
  • There is no need of levelling the land to be cultivated.
  • Because of uniform distribution of water, the plant root zone can be maintained with constant moisture capacity.
  • Fertigation (Pumping the fertilizer along with irrigated water through drip system) can be done with minimal waste of fertilizers/micro-nutrients.
  • Water output variation can be controlled very easily by operating valves and drippers.
  • Due to drip system, soil type plays minimal role in frequency of irrigation.
  • Ultimately, drip system saves time and money.
Growing Bell Pepper (Capsicum) Using Drip Irrigation
Growing Bell Pepper (Capsicum) Using Drip Irrigation.

Disadvantages of Drip irrigation:- The following disadvantages of drip irrigation system.

  • Cost of drip system can be more when compared to overhead systems. However, one can avail subsidies provided by local government schemes.
  • Drip system cannot be used for frost control, unlike sprinkler system.
  • The drip tube system can have shorter life as they are exposed to sun light.
  • Without proper / sufficient leaching, salts applied with the irrigation water through drip may build up in the root zone of the plant.
  • If the filtration is not done properly, it can result in clogging.
  • If herbicides or top dressed fertilizers need sprinkler irrigation, drip system may not fit into the situation.
  • The PVC pipes may require replacement of the entire tube and can result in increasing maintenance cost.
  • Extreme care is needed while setting up a drip irrigation system such as proper design, installation and quality material.
  • Drip tape causes extra clean-up tasks frequently which can result in increase of maintenance cost.

Drip Irrigation Vs Sprinkler Irrigation:- Drip irrigation is more beneficial when compared to drip irrigation. The following are the main disadvantages of sprinkler system.

  • Sprinkler system results in uneven water application from wind and extreme temperatures.
  • There may be water loss from evaporation during irrigation through sprinklers.
  • Sprinkler system causes wetting of foliage (collection of plant leaves). This leads to increased risk of disease and fungi growth.
  • Improperly maintained sprinkler spray angles near buildings and walkways can damage fixtures.

Cost of Drip irrigation:- Cost of drip irrigation depends on the region/area. Here we are providing rough (ballpark) estimate which will cover from low to high range. However, they may change time to time because of market conditions. Some countries like India is providing up to 90% of subsidy for small farmers who are holding less than 5 acres land. Contact your agriculture department for subsidy information.

Item Details Quantity Low High
Drip Irrigation System Cost
Non-discounted retail pricing for: PVC connector piping/tubing, drip elements, solenoid operated zone valves and timer. Quantity includes typical waste overage, material for repair and local delivery.
125 square feet $53


$80
Drip Irrigation System Labor Cost
Labor estimate to install drip irrigation system. Connect pressure regulator to power supply. Route main tubing. Install drip lines with drip or spray fitting at 1m/3 feet intervals. This Includes planning, equipment and material acquisition, area preparation and protection, set-up and clean-up.
4 hours $105 $260
Drip Irrigation System Materials and Supplies Cost
Cost of connectors, fittings, adhesives and fabrication solvents.
125 square feet $10 $30
Total Cost to Install Drip Irrigation System for 125 square feet $178 $370
Average Cost Per Square Foot  of Drip System $1.424 $2.96
Hydroponic Drip System
Hydroponic Drip System.

Cost of Drip irrigation for Indian Farmers:- Generally, drip Irrigation provides the facility to irrigate the plants at the root zone through emitters fitted on a network of pipes. The emitting devices could be drippers, micro jets, misters, fan jets, micro sprinklers, mini sprinklers, micro sprayers, foggers and emitting pipes, which are designed to discharge water at prescribed rates. Basically, the use of emitters depends on specific requirements that may vary for each crop. Generally, the factors that decide the choice of the emitting system are; water requirement, age of plant, spacing, soil type, water quality. Sometimes micro-tubes are also used as an emitter, though it is inefficient. All types of surface and subsurface irrigation systems are covered under micro irrigation. An indicative list of system components required for installing a drip irrigation system in areas ranging from 0.4 ha to 5 hectares is given in below table. The estimated cost of drip Irrigation system in India is given in Indian Rupees here.


Spacing in meters


Area in Hectares

0.4 1 2 3 4 5
12mx12m 10,700 16,800 25,400 32,700 53,900 71,500
10mx10m 12,200 18,200 27,900 36,100 58,200 77,100
9mx9m 12,500 22,300 35,700 56,000 61,700 81,300
8mx8m 13,000 20,100 31,400 41,700 65,700 86,300
6mx6m 14,400 30,300 51,300 70,300 1,05,900 1,37,500
5mx5m 15,100 32,900 56,700 83,100 1,17,300 1,50,800
4mx4m 16,900 39,400 63,200 1,00,700 1,42,400 1,79,400
3mx3m 17,900 35,700 71,400 96,100 1,30,900 1,58,400
3mx1.5m 19,700 40,100 80,500 1,09,700 1,46,300 1,80,900
2.5mx2.5m 20,000 39,900 81,400 1,11,200 1,99,700 2,39,600
2mx2m 21,400 49,900 86,400 1,22,700 1,65,000 2,23,400
1.5mx1.5m 26,100 55,000 10,9500 1,65,100 2,06,000 2,81,000
1mx1m 26,500 57,600 96,500 1,46,500 2,00,000 2,49,300

Basically, the unit cost of Drip Irrigation system depends on plant spacing and location of the water source. Another fact is that cost of the drip system differs from each state. Accordingly, the States have been categorized into three categories, like Category “A”, “B” and “C”.  States in India where more than 10,000 hectares have been brought under drip irrigation as on 1.4.2004 would come under ‘A’ Category. This would include the States of Andhra Pradesh (AP), Telangana, Gujarat, Karnataka, Kerala, Maharashtra and Tamil Nadu. All the States except those covered under Category ‘A’ and those falling in the Himalayan belt comes under Category ‘B’.  All the North Eastern States, Sikkim, Jammu and Kashmir (J&K), Uttaranchal, HP (Himachal Pradesh), and Darjeeling district of West Bengal comes under Category ‘C’. the cost of drip system in Category ‘B’ States is estimated to be 15 to 16% higher than Category ‘A’ States while for Category ‘C’ States it is estimated to be 25 to 26% higher than Category ‘A’ States. Accordingly, the average unit cost of drip irrigation system for different state categories in India is provided below.

Using Drip Irrigation in Greenhouse -Polyhouse
Using Drip Irrigation in Greenhouse -Polyhouse.
 

State Category


Average Cost, Indian Rupees / ha

A 40, 000
B 46,000 to 47,000
C 50,000 to 5100

Subsidy on Drip irrigation:-The following subsidy information is applicable for Indian farmers/growers. However, you can contact your local horticulture/agriculture departments for current subsidy information on agriculture drip system.

Centrally Sponsored Schemes and State government schemes are available for drip system subsidy in India. This subsidy varies from state to state and extent of the land owned by farmer.

  • Farmers with holding up to 2.5 acres of dry land or 1.5 acres of wet land are defined as Marginal Farmers & eligible up to 90% of subsidy. However, it varies from state to state, contact your local horticulture/agriculture department.
  • Farmers with holding up to 5 acres of dry land or up to 2.5 acres of wet land are defined as Small Farmers & eligible up to 90% of subsidy. However, it varies from state to state; contact your local horticulture/agriculture department.
  • Farmers with land holding above 5 acres of dry land or above 2.5 acres of wet land are defined as Other Farmers & eligible up to 60 to 80% subsidy. However, it varies from state to state; contact your local horticulture/agriculture department.

The following criteria should explain about Farmer’s eligibility.

  • 16% of the total financial target shall be covered by schedule caste farmers.
  • 55% of the total financial target shall be covered by schedule Tribes farmers.
  • Not less than 25% of total financial target shall be covered by BC farmers.
  • Not less than 50% of the total financial target shall be covered by SF/MF farmers;
  • Not exceeding 10% of financial target shall be covered by other farmers (more than 5 acres land holding).
  • Generally, preference is given to Small and Marginal Farmers, SC/ST/BC/Women and differentially abides (PH) farmers.

Note: The above given information may not be accurate but rough estimate, Please contact local horticulture/agriculture technical department for current schemes/subsides/loans and other information.

Bottom line:- Properly designed, installed, and managed, drip irrigation system helps in achieving water conservation and efficiently using fertilizers/manures.

For Agriculture in India: Click here.

The post Drip Irrigation Information Guide appeared first on AsiaFarming.com.

Tilapia Fish Farming Information Guide

$
0
0

Asia Farming

Tilapia Fish Farming:

Tilapia Fish Farming.

Introduction to Tilapia Fish Farming:- Fish is one of the species that is being farmed since centuries. Due to natural resources, fish became the best and cheapest animal protein consumed worldwide. Tilapia are mainly freshwater fish inhabiting shallow streams, ponds, rivers and lakes However, due to over exploitation and pollution, the availability of fish in natural waters has declined considerably and this made to think of alternate methods of growing fish. Due to increasing fish meat consumption and growing demand day by day, artificial or controlled environments gaining popularity for fish production. Fish farmers can choose ponds, tanks or any new water body to take up the fish culture. This can improve the financial position of a farmer and create local employment for skilled as well as non-skilled people. Commercial Tilapia fish farming is becoming popular day by day as demand growing for this fish in Asia. Basically, Tilapia is the second most farmed fish in world. In countries like China, Egypt, Philippines, Brazil, Thailand and Bangladesh Tilapia fish contributed substantially to the Food Security. The world aquaculture production of Tilapia fish is 4.2 million tonnes with an estimated value of around 3 to $ 3.5 billion. India has very limited commercial farming of Tilapia fish. “Oreochromis niloticus” is the scientific name of Tilapia fish.

When it comes to potential of Tilapia fish farming, generally, low-laying areas with water stagnation are suitable for agricultural activities. These type areas can be converted into ponds for raising the fish. Mono sex Tilapia is beneficial as they grow at faster pace and with uniform size. The genetically Improved Farmed Tilapia (GIFT) enhanced market potential as it is scientifically proved to be superior than fresh water carps and would be an ideal fish culture in Asian countries. Tilapia fish is among the easiest and most profitable fish to farm due to their omnivorous diet, mode of reproduction. Tilapia fish farming in tanks or channels are considered safe for the environment, since their waste and disease is contained and not spread to the wild.

Top Tilapia Fish Production Countries:- The following are top production countries of Tilapia fish.

  • China.
  • Egypt.
  • Indonesia.
  • Philippines.
  • Thailand.
  • Vietnam.
  • Taiwan.
  • Colombia.
  • Ecuador.
  • Myanmar.
  • Malaysia.
  • Uganda.
  • Bangladesh.
  • Costa Rica.
  • Nigeria.
  • Zambia.

Common Names of Tilapia Fish:- Nile Tilapia, Blue Tilapia, and Mozambique Tilapia.

Tilapia Fish Health Benefits:- The following are the Tilapia fish health benefits.

  • Tilapia fish is good source of protein.
  • Tilapia fish is good for bone health.
  • Tilapia fish may prevent prostate cancer.
  • Tilapia fish is good for immune system and thyroid function.
  • Tilapia fish is good for brain health.
  • Tilapia fish is good for weight loss:
  • Tilapia fish prevents premature ageing
  • Tilapia is a rich source of omega-3 fatty acids, hence good for heart.

Caution: People who are prone to or having allergies or on any other medication or pregnant, consult your doctor before consuming fish.

Tilapia Fish Description.

Tilapia Fish Farming – Advantages of Tilapia Culture:- The following are benefits and advantages of Tilapia fish farming.

  • The best part of Tilapia fish is the fast growth.
  • Tilapia fish has excellent demand in both local and international markets.
  • Tilapia fish prefers all kinds of supplementary feeds.
  • Tilapia fish can be profitably cultured in seasonal ponds.
  • Tilapia fish can be cultured at high stocking densities in ponds or local waters.
  • Tilapia fish has high disease resistance ability.
  • Tilapia fish can be raised in saline water as well where salinity is between 12 – 16 ppt.
  • Tilapia fish farmers can achieve good profits with proper fish farming business plan. 

Tilapia Fish Farming – Selection of Pond:- Selection of pond plays major role in successful Tilapia fish farming. Select the pond or tank with minimum water depth of 1.5 to 2 meter. Make sure that the water level never falls down below 1 meter. The main criterion to be kept in mind is that the selected pond soil should be water retentive and sufficient water supply is assured. Avoid flood prone areas, industrial areas and chemically impacted soils. If you are selecting old ponds, they can be renovated for fish culture by dewatering, repairing of the embankments and provision of inlet and outlet. In either case of ponds (new or old), the following should be done for the development of the pond.

  • Excavation/Digging of new ponds should be carried out.
  • In case of existing shallow ponds, deepen the shallow ponds.
  • Desilting of existing ponds should be carried out.
  • Impoundment of marginal areas of water bodies should be carried out.
  • Construction of Inlets / Outlets should be carried out.
  • Construction / repairs of embankments should be carried out.
  • Construct/ repair any civil structures, watchmen rooms, water supply arrangements / electricity supply. 
Tilapia Fish Pond with Fence.

Tilapia Fish Farming – Bio Security:- Bio security measures should be in place  to  ensure no escape of the Tilapia fish or biological material from the farm/pond to the other water source . The following important bio security measures should be taken care for safe Tilapia fish culture.

  • Outlet water from fish ponds must be screened and treated before released into drains/canals/rivers during culture practice or subsequent to harvesting in order to prevent escape of fish eggs into natural water bodies.
  • Provide bird scaring device/fencing securing the pond.
  • Make sure that the bund height is high enough to avoid fish escape from the pond.
  • Arrange sluice gates with appropriate mesh size to prevent escape of fish, eggs, and fry.
  • In case of flooding, make sure to secure the pond so that the fish or fry will not escape from the pond to other water source. 

Tilapia Fish Farming – Pond Management:- Pond management plays critical role before and after stocking the fish. Various measures should be carried out as part of pond management. The following are the fish pond management activities.

  • Tilapia Fish Farming – Pre stocking:- In case of new ponds, pre-stocking starts with liming and filling the water.
    • In case of existing ponds, any unwanted weeds and fish should be cleared by manual, mechanical or chemical means.
    • Unwanted and predatory fishes and other animals should be removed by repeated netting or by sun drying the pond bed for couple of days.
Nursery Ponds for Rearing Tilapia Fish.
  • Tilapia Fish Farming – Liming:- The fish ponds which are acidic in nature are less productive than alkaline ponds. However, lime is used to bring the pH to the desired level for better production. Apart from this, lime has other benefits as mentioned below.
    • Lime increases the pH level.
    • Lime acts as buffer and avoids fluctuations of pH.
    • Lime increases the resistance of soil to parasites.
    • Lime toxic effect kills the parasites and lime speeds up organic decomposition.
    • If you are planning to go for commercial fish farming, soil test should be tested. On an average, 225 to 250 kg/ha lime is required to cover the 1 hectare pond. However, actual dose depends on pH of the soil and water.
    • In case of new pond, the pond should be filled with water after liming application.

           The following table shows the lime application in fish ponds.

Lime in kg/ha Soil pH
2000 4.5-5.0
1000 5.1-6.5
500 6.6-7.5
200 7.6-8.5
None 8.6-9.5

Tilapia Fish Farming – Fertilisation:- Fertilization should be carried out depending on the soil quality in the pond. A combination of both organic and inorganic fertilizers may be used for best results. The fertilization schedule has to be prepared and can be modified depending on the growth of the fish. 

  • Tilapia Fish Farming – Organic Application:
    • Organic manure to be applied after a gap of 3 days from the date of liming.
    • Cow-dung @ 5000 kg/ha may be applied.
    • Requirement of nitrogenous and phosphate fertilizers would vary as per the nature of the soil fertility indicated below. 
  • Tilapia Fish Farming – Inorganic Application:
Soil fertility Status  Ammonium Sulphate  Urea
 1. Nitrogen (mg/100 grams soil)

·         High (51-75)

·         Medium (26-50)

·         Low (up to 25)

  70

90

140

  30

40

60

 2. Phosphorus (mg/100 grams soil)   Single super phosphate  Triple super Phosphate
·         High (7-12)

·         Medium (4-6)

·         Low (up to 3)

  40

50

70

  15

20

30

  • Tilapia Fish Farming – Stocking:- The fish pond will be ready for stocking after 2 weeks of application of fertilizers. Tilapia fry (small fish) can be procured from the approved hatcheries.
  • Tilapia Fish Farming – Nursery Rearing:- The Tilapia fry should be reared in nursery ponds at least a month before they come to actual pond.
    • The nursery rearing can be done in nylon meshed hapas suspended in grow out ponds. 50 – 80 fry may be reared in one square meter.
    • Feeding can be done using small floating pellets and the feeding can be reduced from 30% -20% of the body weight as the fish grows and moved into the grow out pond.
    • Special feeds can be bought from the market. The Tilapia fry’s should be fed at least 3 – 4 times a day based on the demand for feed to get good survival and growth.
    • The ‘hapa’ should be cleaned regularly to facilitate water flow.
    • After rearing one month in nursery ponds, Tilapia fry’s can be released into actual growing pond with a stocking density of 3-6 No’s /sq. meter for better development and survival. 
  • Tilapia Fish Farming – Post Stocking:-
    • Tilapia Fish Farming – Supplementary Feeding: Generally, any fish needs much more feed than what is available in the pond or tank. However, Tilapia fish can be fed with artificial feed and floating pelleted feed. A commercial feed with Feed Conversion Rate of 1.25 to 1.5 is ideally preferred.
    • Tilapia Fish Farming – Manuring: Organic Manuring may be applied in monthly installments @ 900-1000 kg/ha and inorganic fertilization may be applied at monthly intervals alternating with organic Manuring. However, the monthly rate of fertilization will depend on pond productivity and the growth of the Tilapia fish. Make sure that excess fertilization does not take place which may result in eutrophication.
    • Tilapia Fish Farming – Monitoring: Periodical monitoring of the fish to be carried out for disease incidence and growth. Records for day to day management of the pond to be kept for inspection.
    • Tilapia Fish Farming – Harvest: Harvesting of the Tilapia fish is generally done at the end of 5 to 6 months, when the fish attains an average weight of 500 to 600 grams in 5-6 months. A production of 8 – 10 tons/ha can be obtained in one crop of 6 months.

Harvesting should be done by partial dewatering and repeated netting. Based on the market demand fish farmers can sell the live fish to market or can be frozen and export to international markets.

Tilapia Fish Farming – Subsidy for Fish Farming:- There many schemes available in Asian countries where small fish farmers can avail the subsidies on seed and feed, equipment of fish farming.

 Bottom Line of Tilapia Fish Farming:- Tilapia fish farming is an excellent business and one can get decent profits provided there are proper fish farming practices are in place.

For Agriculture in India: Click here.

The post Tilapia Fish Farming Information Guide appeared first on AsiaFarming.com.

Cauliflower Cultivation Information Guide

$
0
0

Asia Farming

Cauliflower Cultivation Guide:

Cauliflower Field.
Cauliflower Field.

Introduction of Cauliflower Cultivation:- Cauliflower is one of the most daily consumed important vegetables of commercial crops in the world. Basically cauliflower is grown with seeds and belongs to the family of ” Brassicaceae”. The white part of flower is used for culinary purpose. The stalk and surrounding thick, green leaves are used in vegetable broth or can be fed as fodder for livestock. Scientific name of Cauliflower is “Brassica oleracea var. botrytis L.” and its family name is “Brassicaceae (Cruciferae). Cauliflower is a cruciferous vegetable and belongs to the same family as broccoli, kale, cabbage and collards vegetables. Surrounding the curd are ribbed, coarse green leaves that protect it from sunlight, impeding the development of chlorophyll. The cauliflower flowers are attached to a central stalk. Cauliflower is one of the famous vegetables consumed daily across the world. These wonderful cauliflowers can be grown in greenhouse or polyhouse.

Health Benefits of Cauliflower:- The following are the health benefits of Cauliflower.

Health Benefits of Cauliflower.
  • Regular Consumption of cauliflower reduces certain types of cancer risks.
  • Cauliflower good for pregnant women.
  • Cauliflower aids in weight loss management.
  • Cauliflower promotes heart health.
  • Cauliflower builds healthy immune system.
  • Cauliflower lowers blood cholesterol levels.
  • Cauliflower detoxifies the body system.
  • Cauliflower boosts vitamin ‘K’ and calcium content.
  • Cauliflower is rich source of minerals
  • Cauliflower is good for skin health.

Common Names of Cauliflower:- Cauliflower.

Local Names of Cauliflower in Other Parts of World:- Blumenkohl (German), Bloemkool (Dutch), Blomkool (Afrikaans), Coliflor ( Catalan), Kalafior (Polish), Phool/Gobi  (Urdu), càl-colaig (Scottish), цэцэгт байцаа (Mongolian), lulelakër (Albanian), cvjetača/karfiol (Bosnian), koliplor (Cebuano), Lillkapsas(Estonian), Κουνουπίδι(Greek), Cóilis (Irish), 꽃양배추(Korean), Pastarda (Maltese),काउली/Kauli (Nepali), a couve-flor (Portuguese), карфиол (Serbian), Gulkaram (Uzbek), القرنبيط        (Arabic), цветно зеле (Bulgarian),甘蓝 (Chinese), Kuliplor (Filipino), Cavolfiore (Italian), huā cài (Mandarin), Blomkål (Norwegian), dòk gà-làm (Thai), súp lơ or bông cải (Vietnamese), gàw-bì-pán (Burmese),korifurawā (Japanese), Ziedkāposts (Latvian), මල්ගෝවා (Sinhalese), conopidă (Romanian), ផ្កាខាត់ណា (Cambodian), Květák (Czech), Chou Fleur (French),карфиол (Macedonian), капуста (Russian), blomkål (Swedish), Karnabahar (Turkish), Ukholifulawa (Zulu), blomkål (Danish),qvavilovani kombosto (Georgian), Karfiol (Hungarian), Kubis Bunga (Malay), Gol Kalam (Persian), 花椰菜 (Taiwanese), cvetača (Slovenian).

Local Names of Cauliflower in India:- Phool Gobi/ Gobi (Hindi), Gobi Puvvu/Cauliflower (Telugu), Kovippu/Cauliflower (Tamil), Hu Kosu/ Hookosau (Kannada), Phulkobi (Oriya),  foolcopy (Bengali), ਗੋਭੀ (Punjabi) Phoolkobi (Assamese), fulkobi (Marathi), Koli Flower Fool Kobi (Gujarathi), Coliflower (Malayalam), Ful kobi (Konkani).

Varieties of Cauliflower:- There are many improved/hybrid varieties available for each region. Cauliflowers are available in green, purple, light yellow and white colors. Contact local horticulture department for suitable varieties of cauliflower in your region.

Climate Requirement for Cauliflower Cultivation:-  Cauliflower prefers full sun but will grow in light shade as well. Usually, cauliflower crop thrives well in cool and slightly moist climate and produce best curds. The temperature range of 15°C to 20 °C is required for its optimum growth. When you plant early varieties, they require higher temperature and longer day lengths.

Soil Requirement for Cauliflower Cultivation:- Cauliflower can be grown in wide range of soils. However, deep loamy soils are most suitable for its cultivation and good yield. When it’s grown on large scale, make sure the soil has pH value of 5.0 to 6.0. This vegetable is very sensitive to high acidic value so use application of lime for controlling the acidity. It prefers well drained soils with good organic or well-decomposed farm yard manure.

Land Preparation for Cauliflower Cultivation:- Prepare the field by giving deep ploughing about 20 cm depth by local tractor or any cultivator. Make sure to have three cross-harrowing and 2 planking to make the surface smooth and level to get the soil to fine tilth stage.

Propagation in Cauliflower Cultivation:- Usually, propagation of cauliflower is done through seeds.

Seed Rate, Planting and Spacing in Cauliflower Cultivation:-  Cauliflower seed are sown in nursery beds and seed rate for early crop is 600 to 800 grams and for late crop 400 to 550 grams per 1 hectare land. Cauliflower seedlings are prepared on nursery beds and 4 weeks seedlings are transplanted to main field. Generally, ridges and furrow type of layout is used for cauliflower crop. When it comes to plant spacing, for early crop is 45 cm X 45 cm is maintained where in late crop 60 cm X 60 cm is maintained.

Cauliflower Seeds.
Cauliflower Seeds.

Irrigation in Cauliflower Cultivation:- Irrigation at every stage of plant growth is very important, one should make sure to have proper irrigation facility.  As cauliflower is a shallow-rooted crop and its roots are confined to 40 to 55 cm soil depth, drip irrigation is the most suitable irrigation method for uniform head size and high quality produce. Frequent irrigation is needed in hot/dry climatic conditions. There are many advantages of drip irrigation. To learn more about drip irrigation click here.

Drip Irrigation in Cauliflower Farming.

Manures and Fertilizers in Cauliflower Cultivation:- Balanced nutrients and timely fertilizers will result in excellent yields of any vegetable crop. In cauliflower farming, on an average of 20 to 25 tonnes of well decomposed farm yard manure (FYM) should be applied during land preparation. When it comes to in-organic fertilizers, 60 kg of “N”, 80 kg of “P2O5 and 40 kg of K20 per hectare should be applied before transplanting of cauliflower seedlings in main filed. Generally, fertigation of nitrogen through drip irrigation system in 5 to 6 split doses results in better yield.

Pruning in Cauliflower Cultivation:- Pruning is a task of removing unwanted stems/dead stems or diseased branches for controlling the plant structure   or healthy growth. Practice the standard pruning activities such as removing dead/dries leaves/stems. Burn any diseased branches/plants. Pruning activity in cauliflower farming should be carried out on need base.

Growing Cauliflower in Greenhouse-Polyhouse.

Weed Control in Cauliflower Cultivation:- In any crop, weed control is very important task for getting higher yields. As cauliflower is shallow root crop, practice shallow hoeing. If the crop is grown commercially, one can use plastic mulch for controlling weed growth and conserving moisture content at plant base.

Pests and Diseases in Cauliflower Cultivation:- Control of pests and diseases one of the major tasks in any vegetable farming.

  • Pests: Caterpillars, Cabbage fly, Cutworms, Aphids, Thrips, Flea beetles, Tarnished plant bugs, Slugs and Nematodes are common pests found in Cauliflower Cultivation.
  • Control Measures: Contact local horticulture department for these pest symptoms and preventive methods as they are the best source.
  • Diseases: Clubroot, Grey leaf spot and black leaf spot, Downey mildew, Rhizoctonia, Black leg, Black rot (Bacterial diseases) and fungal diseases (Damping-off).
  • Control Measures: Contact local horticulture department for these diseases symptoms and preventive methods as they are the best source.

Note: Crop rotation and selection of disease resistant seeds are most important factors from preventing most of the pests and diseases that commonly attack any vegetable crops.

Harvest in Cauliflower Cultivation:- Usually, the maturity of cauliflower or harvest time is determined when its curds attain a proper size and before they begin to discolour. Harvest the flowers with sharp sickle and grade/store them based on size before marketing.

Yield in Cauliflower Cultivation:- Well, when we speak about yield, it depends on many factors like, cultivar/variety, soil type, irrigation and other farm management practices. On an average, one can obtain a yield of 20 to 35 t/ha in early season to about 45 to 50 t/ha during mid-season

Marketing of Cauliflower:- Harvested fresh cauliflower can be graded based on size and quality. These vegetables can be transported to local markets or can have an agent who can buy these in bulk  at your farm.

For Cabbage Farming : Click here.

For Indian Agriculture : Click here.


The post Cauliflower Cultivation Information Guide appeared first on AsiaFarming.com.

Apple Cultivation Information Guide

$
0
0

Asia Farming

Apple Cultivation Guide:

Introduction of Apple Cultivation: – Well, apple is one of most commercially grown table and temperate fruit crop in the world after banana, orange and grapes. China tops the apple fruit production in the world. Apple has excellent health benefits, hence it is recommended for daily consumption. Apples were originated in Europe and Western Asia and spread across the world. Seed grown apple trees are large in size when compared to root stock (grafted onto roots). Apple tree belongs to the family of “Rosaceae” and genus of “Malus”. There are more than 8000 varieties/cultivars of apple all over the world. The apple is a deciduous tree which can grow up to 15 to 16 feet tall. The wild apple trees can reach up to 40 feet. However, the size and shape of the apple tree are determined by root stock selection and trimming (Pruning) method. Soil, climate and orchard management practices are common factors that influence the commercial farming of apple fruit. Apples can eaten raw or used as an important ingredient in many desserts like apple pie, apple crumble, apple crisp and apple cake apart from using in beverages (ciders and juices). Organic apple farming is also possible in some of the regions. One can go for high density apple plantation for getting more yields.

Health Benefits of Apple: – The following are the health benefits of apples.

Health Benefits Of Apple.
  • Apples lower cholesterol and good for heart health.
  • Apples are good for skin health and dental health.
  • Apples aid in weight loss.
  • Apples are good for digestive health.
  • Apples boost your immune system.
  • They decrease the risk of diabetes.
  • Apples are good for brain health.
  • Apples may prevent certain types of cancers.
  • Aids in treating Anemia.
  • Apples may prevent Alzheimer’s and Parkinson’s disease.

Common Names of Apple: – Apple.

Top Ten Apple Production Countries: – The following are top ten apple production countries in the world.

  1. China
  2. USA
  3. Turkey
  4. Poland
  5. Iran
  6. Italy
  7. France
  8. India
  9. Russia
  10. Brazil.

Local Names of Apple in Other Parts of World:- Appel (Afrikaans), Appel (Dutch), Apfel (German), Alim (Mangolian), Jabłko (Polish), Aipple (Scottish), Tufaax (Somali), Seb/سیب(Urdu),  Mollë (Albanian), Jabuka ( Bosnian), Mansanas (Cebuano), ÕUN (Estonian), Μήλο (Greek),úll (Irish), 사과 (Korean), Tuffieha (Maltese), स्याउ/syā’u (Nepali), Maçã (Portuguese), Jabuka (Serbian), Manzana (Spanish), Olma (Uzbek), فاябълка ( Bulgarian), píngguǒ (Chinese), Mansanas (Filipino), Mela (Italian), Eple (Norwegian), Chomphu (Thai), Táo tây (Vietnamese), Խնձոր (Armenian), Jabuka (Croatian), Omena (Finnish), תפוח (Hebrew), Ringo/りんご (Japanese), Ābols (Latvian), Măr (Romanian), ඇපල් (Sinhalese), Afal (Welsh), ប៉ោម (Cambodian), Jablko (Czech), Pomme(French),  Sev (Hindi, India), Jabolka (Macedonian), Яблоко (Russian), Jablko (Slovak), äppel(Swedish), Elma (Turkish), Píngguǒ (Cantonese), æble(Danish), Vashli (Georgian), Alma (Hungarian), Epal (Malay), Sīb (Persian), Jabolko (Slovenian), Phoxngkor (Taiwanese), Yabluko (Ukrainian), تفاح     (Arabic).

Varieties of Apple: – There are more than 8000 varieties grown across the globe. However, the most famous varieties of apple are; Cortland, Golden Delicious, Empire, Fuji, Red Delicious, Pink Lady, Gala, McIntosh, Ida Red, Macoun, Winesap and Northern Spy.

Main Apple Varieties.

Climate Requirement for Apple Cultivation: – Climate (Temperature and sunshine) is the main factor that affects development of apple fruits. Usually, apple trees require certain minimum chilling period for optimum growth and quality fruiting. It is recommend having 1000 chilling hours at below 7°C for best growth and yield. These conditions depend on the cultivar. However, extreme cold temperature will damage the apple crop. Abundant sunshine is required in growing apples since it is responsible for good fruit colour development. Apples can be cultivated at 1500 to 2600 meter above mean sea level (msl). Apple orchard requires on an average 20°C to 25°C during growing period along with 100 to 130 cm evenly distributed annual rainfall. Heavy rain fall or fog during fruit maturity will result in improper apple fruit development. Avoid growing apples in areas where heavy winds are expected.

Soil Requirement for Apple Cultivation: – Apples can be grown in most of the soils. However, the best suitable soils are well-drained deep loamy soils rich in organic matter having pH value 5.5 to 6.5 with good aeration. Commercial apple growers should go for soil test and based on test results, any micro-nutrient gaps in soil should be incorporated.

Land Preparation for Apple Cultivation: – Land should be well-drained and deep with proper layout proposed for commercial farming of apple. Level the proposed layout by giving deep ploughings and remove any weeds from previous crops. If you are planning for commercial cultivation of apple on large scale, it is advised to for soil test to find out the soil fertility and suitability. Along with organic matter, any deficient micro nutrients should be supplemented as part of  soil preparation.

Propagation in Apple Cultivation: – Usually, propagation of apple tree is done through the budding and tongue grafting methods. Commercial growers should be careful in selecting the planting material. Planting material should only from the registered/genuine nurseries. When these nursery grown plants are ready for transplantation in main filed, proper care should be taken during transportation.

Planting Apple Cultivation: – When it comes to planting season, apple trees are generally planted in Jan and Feb months. The system of planting is followed in apple cultivation is square or hexagonal. In case of valleys, contour planting of method is followed on the slopes. Planting pollinator in between main plantation is required for proper apple fruit setting. For planting, dig the pits of size 1 meter x 1 meter x 1 meter. Mixture of well decomposed farm yard manure (FMY) of 35 kg and 500 grams of single super phosphate and 50 grams of malathion dust should be incorporated in each pit. Carry out irrigation immediately after planting is done.

Spacing in Apple Cultivation: – Spacing between plants depends on variety and method of planting followed. Generally, 1 hectare land can accommodate in the range between 250 and 1200. There are four types plant density can be followed. The Ultra high density (UHD) planting method accommodates more than 1200 plants per hectare and High density planting method (HD) accommodates 500 to 1200 plants per hectare. When moderate density is followed, this will accommodate around 250 to 500 plants per hectare land where in low density planting method the number plants are less than 250 per hectare.              

Irrigation in Apple Cultivation: – The apple plantation requires 115 cm to 120 cm of water per year. This amount can be scheduled in about 20 irrigations. Irrigation should be carried out immediately after planting is done. In case of heavy floods or rains, make sure to drain out the water quickly. Generally, in summer or hot days, provide irrigation at an interval of 7 to 9 days and winter season at an interval of 4 weeks. There is no need of irrigation in rainy season. The critical stage of irrigation is after fruit set. Minimum of 8 to 9 irrigation are required during this critical period. Drip irrigation can be followed in apple orchard as drip system has many advantages. In some countries like India, Government subsidy schemes are available on drip irrigation system.

Manures and Fertilizers in Apple Cultivation: – Timely application of organic and in-organic fertilizers result in good fruit set in apple plantation. Apple trees respond very well these nutrients. When it comes to manures to be used in orchard, well decomposed farm yard manure of 8 to10 kg/year/tree should be applied along with other fertilizers. The N: P: K of 70:35:70 grams/year per tree should be applied for optimal fertility requirement. Each year, these manures and fertilizers should be increased based on tree age. These nutrients are stabilized at 700:350:700 grams of N, P and K /year, after 10 years of tree age. Any deficiency of zinc, boron, manganese and calcium should be corrected with the application of appropriate chemicals through foliage spray.

Growing Bonsai Apple Tree.

Training and Pruning in Apple Cultivation: – Training and pruning are essential tasks needed for setting proper orchard framework. This also results in good plant growth and high productivity. Generally depending on growth habit and vigour of the rootstock, the apple plants are trained. The modified central leader system is followed for training to receive abundant sunshine/light which is critical for proper fruit set and colour. Spindle bush system can also be follow for high density planting (HDP) under mid hill conditions.

Weed Control in Apple Cultivation: – Give frequent shallow cultivation between rows and use mulch material at plant base to supress the weed growth. Weeds can also be controlled by chemical means. Apply glyphosate @ 800 to 850 ml./ha.as post emergence herbicide to suppress the weed growth for four to 5 months.

Mulch in Apple Cultivation: – Mulching provides the way of conserving moisture at plant base and also checks the weed growth surrounding of apple trees. Plastic mulch or any other natural mulch material like hay, dry leaves or dry grass can be used.

Inter-crop in Apple Cultivation: – Inter crop provides the best way to earn some extra income by using the space between in the plants. However, this is good for only some initial years. During 2 to 3 years, inter crops like green beans, green gram, black gram or sunflower can be cultivated. The fertilizer and irrigation requirement is separate from main crop. The other advantage of inter crop is, this can improve soil texture and fertility.

Growth Regulators in Apple Cultivation: – To induce good flowering and fruit colorization, growth hormones are required especially in heavy bearing in apple trees. Carry out fruit thinning is required task in pollinizing varieties for regulating adequate cross-pollination. carbaryl or Sevin @ 750-1000 ppm can be used to serve the purpose.

Pests and Diseases in Apple Cultivation: – Controlling of pests and diseases in any crop is one of the major tasks for good yield and quality.

  • Pests: The most common pests found in apple orchard are Scales, Aphids, and Thrips.
  • Control Measures: These pests can be prevented from selecting pest resistant rootstocks for commercial apple cultivation. One can also follow proper intercultural operations along with spraying with chloropyriphos, fenitrothion, carbaryl for effective control of these pests.
  • Diseases: The most common diseases found in apple farming are sclerotius blight, collar rot, apple scab, cankers and crown gall.
  • Control Measures: Selecting disease resistant and quality rootstocks can prevent most of these diseases. However, destroying infected apple plants and using chemicals like carbendazim, mancozeb other fungicides found to be effective in controlling these diseases.

Note: Your local horticulture department is good source for finding suitable solutions for controlling pests and diseases in apple gardens.

Harvest in Apple Cultivation: – Apple orchards start bearing fruits from 7th or 8th year. However, it all depends on the cultivar selected. Usually, the economic life of an apple tree is more than 35 years. When it comes fruit yield, fruit yield increases from 8th year to 18 year and thereafter remains stable (constant) for 30 to 35 years. Some varieties even produce apples after 35 years based on agro climatic conditions and variety chosen. Make sure to pick the fruits before they are fully ripe.

Ready to Harvest Apples.

Post-Harvest Tasks in Apple Cultivation: – Pre-cooling, grading, storage, packing, transportation and marketing are the post-harvest tasks to be followed in apple cultivation.

Yield in Apple Cultivation: – Yield of apple crop depends on factors like cooling, sunlight (agro-climatic conditions), soil and cultivar. On an average 10 to 15 tonnes per hectare can be obtained.

For Orange Cultivation: Click here.

For Indian Agriculture : Click here.

The post Apple Cultivation Information Guide appeared first on AsiaFarming.com.


Cassava Farming Information Guide

$
0
0

Asia Farming

Cassava Farming Guide:

Introduction of Cassava Farming:- Cassava (yuca) is a starchy tuberous root of tropical perennial trees and used as food in tropical countries. The cassava plant is native to South America. The cassava crop was grown as alternative to rice, potato or corn (maize) in olden days. Nigeria in Africa is top production country of cassava in the world and Thailand is top producer of cassava in Asia. Cassava is an excellent commercial crop from which, food items, glucose, solvents, alcohol, animal feed, fertilizers, energy and others are produced.

The cassava tubers and leaves are the essential parts of cassava being used. Usually, cassava root is about one mm thick and brown colour on the outside. Generally, commercial cultivars are large in diameter and length. Cassava root flesh can be in yellow or white. Cassava is good source of starch and calcium, phosphorus, vitamin ‘C’. One can achieve desired profits in commercial farming of cassava with good cultivar and proper farm management practices.

Generally, cassava crop is long term crop which may take 6 months to more than 2 years depending requirement stage. As cassava has lots of commercial uses, one can zero on the commercial farming of cassava. Let us discuss more in next paragraphs about cassava farming from planting to harvesting including health benefits of cassava.

Health Benefits of Cassava:- The following are the health benefits of cassava.

Cassava Health Benefits.
  • Cassava helps in weight management.
  • Cassava is good for digestive system and may increase the apatite.
  • Cassava prevents cancer cells growth.
  • Cassava helps in treating diarrhea.
  • Cassava is good for eye health.
  • Cassava cures fever and headaches.
  • Cassava may treat rheumatic diseases.
  • Cassava heals wounds quickly.
  • Cassava helps in clearing up worms.
  • Cassava boosts immune power.
  • Cassava is good for brain and nerve health.
  • Cassava helps in lowering blood pressure.
  • Cassava is good for skin and hair health.

Scientific Name of Cassava:-  Manihot esculenta.

Family Name of Cassava:-  Euphorbiaceae.

Common Names of Cassava:- Cassava, Mutumbula , Muthupula, Unjumbula.

Top 10 Cassava Production Countries:- The following are top 10 Cassava production countries in the world.

  1. Nigeria
  2. Indonesia
  3. Thailand
  4. Congo
  5. Ghana
  6. Brazil
  7. Angola
  8. Mozambique
  9. Vietnam
  10. India.

Local Names of Cassava in Other Parts of World:-  Maniok (German), Cassave (Dutch), Moxog (Somali), Maniok jadalny (Polish),ات کٹ (Urdu), Maniok (Bosnian), Kamoteng Kahoy (Cebuano), Mandi’o (Estonian), Casabhaigh (Irish), 카사바  (Korean), Tarul (Nepali), Mandioca (Portuguese), тропска биљка(Serbian), Yuca (Spanish), كاسافا        (Arabic),Маниока (Bulgarian), 木薯 (Chinese), Kamoteng kahoy (Filipino), Manihot esculenta (Italian), Maniok (Norwegian),มันสำปะหลัง (Thai), Sắn(Vietnamese),キャッサバ (Japanese), Manioka (Latvian), Manyokka (Sinhalese), Tapioca (Czech), Manioc (French), Sakarkand (Hindi),маниока (Macedonian), Маниок (Russian), Maniok (Slovak), Maniok (Swedish), Manyok /Mandioko (Turkish), 木薯 (Cantonese), Kassava (Danish), Ubi kayu (Malay),مانیوک          (Persian), 樹薯 (Taiwanese).

Varieties of Cassava:- Sweet and bitter are two main types of cassava out which sweet one is commonly cultivated variety due to its higher yields. There are many hybrid varieties developed for commercial purpose and available to specific to region. The common improved varieties are Golden Yellow, Katabang, Macan and Brasil.

Climate Requirement for Cassava Farming:- Cassava is a tropical short-day plant and requires a warm, humid climate. Temperature plays major role in cassava production. Cassava crop is very sensitive to frost and advised to grow in frost-free regions. The best cassava yield can be expected between 25 °C and 30 °C. When it comes to water requirement, cassava crop yields best when abundant water is provided. Though it can stand prolonged periods of drought, it requires minimum well-distributed rain fall from 600 mm (minimum) to 4000 mm (maximum).

Soil Requirement for Cassava Farming:- Cassava can be cultivated in most of the soils. However, deep sandy loam soils are best fit to grow the tubers. In very rich (fertile) soils, vegetative growth can be more than tuber growth. Well drained and fertile soil is good enough for getting higher yields in cassava farming. For controlling the soil acidic levels add 40 to 50 kg of lime/ha. The best soil pH for cassava is 5.5 to 6.5.

Land Preparation for Cassava Farming:- Land should be prepared in such a way that all the weeds should be removed and bring the soil to fine tilth stage. Use tractor for deep ploughing and make sure to give couple of ploughings for better friable soil. If the cassava crop is grown commercially, make sure to go for soil test to find out the micro-nutrient deficiency.

It is recommended to fulfill the nutrient requirement by applying necessary fertilizers during land preparation. Organic matter such as cow dung should also take care of fertility of soil issues. Make sure to prepare the land with drainage system.

Propagation in Cassava Farming:- Propagation of cassava is done through from stem cuttings.

Cassava Plantation.
Cassava Plantation.

Planting and Spacing Cassava Farming:- Cassava can be planted all around the year, However, make sure to have soil has good moisture for 6 months after planting the stem cuttings. The care must be taken while planting cassava plants to make sure the stem to be planted must be from a matured plant of a year old which has 30 cm long with 5-6 nodes from the bottom stem. Make hills in the range of 70 to 75 cm apart as part of land preparation. Make sure to dig a hole about 18 to 20 cm deep in each hill where the cuttings (stems) are to be planted. Make sure to plant the crop in morning or late evening times when whether is cool. There are three types of planting methods one can follow depending on the season.

Cassava stems with ¾ cuttings length should be planted in the soil. The remaining ¼ should be covered with fine/top soil.

  1. Horizontal: This method of planting is preferred during summer so that the plant will be kept moist.
  2. Vertical: This method of planting is preferred during rainy days so that it will not rot if constantly wet.
  3. Slanting: This method of planting is preferred between the two seasons mentioned.

Irrigation in Cassava Farming:- Cassava is drought tolerant crop. However, it yields more when proper irrigation is provided and constant moisture in maintained throughout its growth.

Manures and Fertilizers in Cassava Farming:- Cassava crop responds very well to organic manures and fertilizers. Cow dung or any other animal manure will be good for cassava farming. The N: P: K ratio in cassava farming is 60:90:120 kg/ha any other nutrient deficiencies like Calcium, S, Zn, and B should be incorporated.

Weed Control in Cassava Farming:- Controlling weeds are one of the major tasks in any crop for healthy growth plants and good yield or production. Weeds can be controlled by chemical or mechanical means. However, mulching is another natural process of controlling weeds. Mulch material like hay or plastic mulch can be used in cassava farming to control or prevent the weed growth at cassava plant base. Go for weeding when cassava crop is about 30 cm tall. Technically, after 4 weeks for planting. Weeding should be carried out after 1 or 2 months after the first weeding task. Earthing should be carried as well at the same time of weeding.

Inter-Crop in Cassava Farming:- To get an extra income, farmers can go for any short duration crops during initial years of cassava farming. Green gram or black gram or any other vegetable crops are ideal for inter cropping in cassava cultivation. If this options is considered, make sure to supply additional fertilizers/manures along with irrigation for inter crops.

Pests and Diseases in Cassava Farming:- Controlling of pests and diseases in any crop is one of the major tasks for good yield and quality.

  • Pests: The most common pests found in cassava farming are locusts, beetles, ants and aphids. However, rats, goats and wild pigs are dangerous in cassava farming.
    • Control Measures: Contact your local agriculture department or horticulture department for better solutions in cassava farming.
  • Diseases: The most common diseases found in cassava farming are mosaic disease, bacterial blight, anthracnose and root rot.
    • Control Measures: Local horticulture department is best source of solution provider in cassava farming.

Note: Your local horticulture department or any research oriented agriculture university is good source for finding suitable solutions for controlling pests and diseases in cassava farming.

Harvest in Cassava Farming:- Usually, cassava crop will mature in 1 year after planting in the field. Manual pull is recommended to harvest the crop. Once the crop is harvested, make sure to wash well and dry. Actually, cassava can be marketed as fresh or dried.

Cassava Tubers.
Cassava Tubers.

Yield in Cassava Farming:- Well, yield depends on many factors and one can expect the yield based on cultivar, irrigation, climatic conditions, and farming practices. On an average one can obtain Yield of 20 to 25 tonnes /ha and above can be obtained with good agronomic practices and management.

Bottom Line in Cassava Farming:- Always choose sweet cassava as others are poisonous. The poison in cassava disappears during cooking, so, cooking cassava as suman is a safe way of eating cassava. Chopping, soaking in water, heating up to 60°C, and exposing in the sun may remove poisonous in cassava tubers. One can get huge profits in commercial farming of cassava with proper care and management.

For Indian Agriculture: Click here.

For Sheep or Goat Farming Business: Click here.

The post Cassava Farming Information Guide appeared first on AsiaFarming.com.

Aloe Vera Cultivation Information Guide

$
0
0

Asia Farming

Aloe Vera Cultivation Guide:

Introduction of Aloe Vera Cultivation:- As use of herbals and other medicinal plants are increasing, the demand for these kind of crops growing in local and international markets. One of the miracle plants in medicinal group is Aloe Vera. Aloe Vera is a succulent plant which is mostly grown in hot and dry climates with little annual rainfall. Literally, Aloe Vera can be grown in desert and drought regions and most parts of the world due to its wide adaptability. Due to many uses and health benefits of Aloe Vera, this crop is grown commercially across the world. Aloe Vera plant is indigenous to African and Mediterranean regions. Aloe Vera is also known as Aloe, Indian Aloe and in some parts of Asia it’s called as Knvar pathu and Ghrit Kumari.

This wonder medicinal plant has many commercial cosmetic uses. Many cosmetic products are being made from Aloe Vera such as face creams, shampoo, moisturizing creams and shaving creams apart from using it in health industry. This is being used largely in herbal world for curing some diseases. Aloe Vera plants can also be used for decorative purposes. These plants can be grown indoors, in containers and pots.

When it comes to Aloe Vera plant description, it is a stemless having thick and fleshy green leaves which can grow up to 50 to 90 cm tall. Usually, Aloe Vera flowers are produced in summer season on a spike up to 80 cm tall. One can obtain decent profits in Aloe Vera cultivation with proper crop management practices.

Aloe Vera Plantation.

Health Benefits of Aloe Vera:- The following are the health benefits of Aloe Vera.

Health Benefits Of Aloe Vera.
  • Aloe Vera aids in relieving from constipation.
  • Aloe Vera helps externally to cure acne, burns, scars and bug bites.
  • Aloe Vera juice aids in digestion.
  • Aloe Vera helps in certain skin treatments such as wrinkles and dry skins.
  • Aloe Vera helps in detoxifying the body.
  • Aloe Vera may reduce the stress level.
  • Aloe Vera helps lowering the blood cholesterol.
  • Aloe Vera boosts the immune power.
  • Aloe Vera stabilizes blood sugar levels.
  • Aloe Vera helps in high blood pressure cases.
  • Aloe Vera may prevent from kidney disease or kidney stones.
  • Aloe Vera helps in curing gum disease and maintains healthy teeth.
  • Aloe Vera is heart healthy.
  • Aloe Vera helps in skin disease cases.
  • Aloe Vera helps in arthritis pain.

Scientific Name of Aloe Vera:-  Aloe Barbadensis Miller.

Family Name of Aloe Vera:-  Asphodelaceae.

Common Names of Aloe Vera:- Indian Aloe, Chinese Aloe,  True Aloe, Barbados Aloe, Burn Aloe and First Aid Plant.

Local Names of Aloe Vera in India:- Gheekumari (Hindi),  Khorpad (Marathi), Kathalai (Tamil), Chotthu kathalai (Malayalam),  Kalabanda (Telugu), Ghrita Kumari (Bengali).

Varieties of Aloe Vera:- Kokoerbom aloe, Gold Tooth, Orange Aloe, Red Aloe, Dorian Black and Yellow Teeth are some of the commonly grown varieties (cultivars) of Aloe Vera in the world.

Climate Requirement for Aloe Vera Cultivation:- Dry and hot climatic conditions are best suited for its cultivation. This crop can even grow in areas where the annual rainfall is below average of the region.

Soil Requirement for Aloe Vera Cultivation: – Aloe Vera can be grown in most of the medium fertile soils ranging from marginal to sub-marginal.However, black cotton soils (heavy soils) are best for high yield of Aloe Vera. Commercial farming of Aloe Vera is suitable in well-drained loamy or sandy loam soils with pH value up to 8.0. However, Aloe Vera crop can tolerate high pH soils as well. One should go for soil test, if the crop is grown on large scale and any nutrient deficiencies gaps should be filled based on soil test results.

Land Preparation for Aloe Vera Cultivation: – As Aloe Vera is a shallow rooted crop; it is not required deep plough during land preparation. One or two ploughing should be given followed by harrowing based on soil type and climate. Make sure to level the land after ploughing. Make beds or suitable plot sizes considering good slop for water drainage and irrigation. Any organic matter like well rotten farm yard manure (FMY) of 10 to 15 tonnes per hectare can be supplemented for better crop growth and yield. This FMY also results in better moisture holding capacity and improves soil texture.

Growing Aloe Vera in Pot.

Propagation and Planting Material in Aloe Vera Cultivation:- Propagation of Aloe Vera crop is done through suckers. Consider to select the planting material of four months old suckers having about four leaves and having 20 cm length for commercial cultivation of Aloe Vera.

Planting and Spacing Aloe Vera Cultivation: – Planting can be done through the year if there is irrigation facility. However, planting right during rainy season (from July to August in India) would be best bet. Plant density of 10,000 to 10,500 suckers is required to cover 1 acre land or 25,000 suckers per 1 hectare land. Dig the pits of 14 to 15 cm deep and plant the suckers at 60 cm x 60 cm apart. Soil around root zone should be pressed firmly so that there won’t be any water stagnation.

Irrigation in Aloe Vera Cultivation:- Aloe Vera grows well with little rainfall. It does not need any irrigation in rainy season. Irrigate immediately after suckers are planted. However, during highly drought and summer conditions one can supply irrigation once in 2 weeks.

Manures and Fertilizers in Aloe Vera Cultivation:- Aloe Vera crop responds very well to organic fertilizer as well as chemical fertilizers. 10 to 15 tonnes of well decomposed manure should be added as part of land preparation. The N: P: K of 50 kg: 25 kg: 25 kg per 1 hectare filed should be applied for proper growth and yield of the crop. Especially these fertilizers help cultivation in lighter soils.

Intercultural Operations in Aloe Vera Cultivation:- It is one of the best crop management practices to keep the filed weed free. This also helps in saving manures, fertilizers and irrigation. 2 to 3 hand weedings should be carried followed by light hoeing in a year. Carry out the first weeding and hoeing should be carried within a 4 weeks after planting the suckers. Subsequent years require 1 or 2 weedings with light hoeing to keep the weed growth in control. Destroy any diseased plants. Dried stakes should be removed regularly.

Pests and Diseases in Aloe Vera Cultivation:- The good thing about Aloe Vera crop is there are no major pests and diseases reported. However, Black brown leaf spots, Mealy bug, and anthecnose are possible in some regions. In case of termite problem, light irrigation can be applied. Black brown spots can be controlled by any sulphur containing insecticides.

Note: Your local horticulture department or any research oriented agriculture university is good source for finding suitable solutions for controlling pests and diseases in Aloe Vera Cultivation.

Harvest in Aloe Vera Cultivation:- Usually, the commercial harvesting of Aloe Vera can be taken from second year of planting. Harvesting can be done with sharp sickle. Make sure to viscous gel from the cut end dries up before packing and marketing also make sure only fully developed mature leaves are harvested for juice extraction.

Yield in Aloe Vera Cultivation:- Well, yield of any crop depends in cultivar, soil type and fertility, plant age and other crop management practices. One can obtain an average of 15 to 20 tonnes of fresh Aloe leaves from second year of planting.

Bottom Line in Aloe Vera Cultivation:- Though, Aloe Vera products have high demand in market, one should pre-arrange the marketing facility before starting the commercial cultivation.

For Indian Agriculture : Click here.

For Goat or Sheep Farming Business: Click here.

The post Aloe Vera Cultivation Information Guide appeared first on AsiaFarming.com.

Beetroot Cultivation Information Guide

$
0
0

Asia Farming

Beetroot Cultivation Guide:

Introduction of Beetroot Cultivation:- Beetroot is one of the hardy and cool season vegetable crops grown throughout the world. The beetroot vegetable is indigenous to Asia and Europe. Beetroot is grown all over the world in temperate regions and the leaves of beetroot plant are heart shaped. The stem of beetroot plant is short and plate. The beetroot is a true biennial, producing thick root system and a rosette of leaves during the 1st year and flowers and seeds the 2nd year. Beetroot has wonderful health benefits and one can obtain good profits in 3 to 4 months with proper vegetable crop management practices. Beets can be grown indoors and containers, polyhouse and greenhouse.

Scientific Name of Beetroot:- Beta vulgaris.

Family Name of Beetroot:- Chenopodiaceae.

Common Names of Beetroot:- Common beet, Beetroot, Table beet, Garden beet, Red beet, or Golden beet.

Local Names of Beetroot in Various Countries:- Beetroot (English), Rode biet (Dutch), Rote Bete (German), улаан манжин (Mongolian), Burak (Polish), Biotais (Scottish), Baytaraaf (Somali),چقندر (Urdu), Panxhar (Albanian), Cvekla (Bosnian), Punapeet (Estonian), παντζάρι (Greek), 근대의 뿌리 (Korean), Pitravi (Maltese), Chukander (Nepali), Beterraba (Beterraba), цвекле (Serbian), Remolacha (Spanish),الشمندر     (Arabic), цвекло (Bulgarian), 甜菜根 (Chinese), Remolacha (Filipino), Barbabietola (Italian), Chawanar (Kurdish), Hóngtóu cài (Mandarin), Rødbete (Norwegian), Pak gaat deang (Thai), rể củ cải (Vietnamese), ճակնդեղ (Armenian), Cikla (Croatian), テーブルビート(Japanese), Biete (Latvian), Sfeclă (Romanian), බීට් අලය (Sinhalese), Tini (Swahili), Řepa červená (Czech), Betterave (French), Chukander (Hndi,India), Cveklo (Macedonian), свекла (Russian), Repa obyčajná (Slovak), Beta (Swedish), Kırmızı Pancar (Turkish), Rødbede (Danish), ჭარ­ხა­ლი (Georgian), Cékla (Hungarian), Ubi Bit (Malay), چغند (Persian), Navadna pesa (Slovenian), 甜菜的根 (Taiwanese), Буряк (Ukrainian).

Health Benefits of Beetroot:- The following are some of the health benefits of beetroot.

Health Benefits of Beetroot.
  • Beetroot is excellent source of vitamins and minerals.
  • Beetroot is heart healthy and can reduce stroke and blood pressure.
  • Beetroot is wonderful antioxidant.
  • Beetroot helps in controlling blood cholesterol.
  • Beetroot helps in controlling blood sugar levels.
  • Beetroot is excellent anti-ageing produce.
  • Beetroot helps in weight management.
  • Beet is good for brain health.
  • Beetroot is good for skin and hair health.
  • Beetroot helps in detoxifying blood.

Cultivars (Varieties) of Beetroot:- Crimson Globe (Comes to harvest in 2 to 3 months), Detroit Dark Red (Comes to harvest in 2 to 3 months)  and  Red Ball are most grown varieties. Find out with local horticulture department for improved/hybrid varieties specific to your region.

Climate Requirement for Beetroot Cultivation:- Basically beetroot is a hardy and cool weather crop which can even tolerate some freezing climatic conditions. The ideal temperature for beetroot crop is about 18 to 25 °C. It does not thrive well in extreme hot and extreme cold weathers. Spring and autumn are the best seasons for its production.

Soil Requirement for Beetroot Cultivation:- Beetroot vegetable can be grown in any friable soils. However, it thrives best on deep and well-drained, loose, loamy to sandy soils. Avoid heavy clay soils for growing this vegetable. The best suited soil pH for beetroot cultivation is 6.0 to 7.0. Acidic soils should be avoided or limed to raise the soil pH. In case of commercial cultivation of beetroot, go for soil test before planning for it.            

Land Preparation for Beetroot Cultivation:- Give couple of ploughings to bring the soil to fine tilth stage and cross harrowing to make sure to have friable and levelled soil for preparing ridges and furrows. Ridges and furrows should be formed at 30 cm apart. If the Beetroot crop is grown on large scale, soil test should be done for finding soil fertility or strength. Supplement any micro-nutrients in soil based on soil test results. Apply 20 to 25 tonnes of well decomposed farm yard manure (FMY) like cow dung or any livestock manure for good yield of produce.                                              

Propagation in Beetroot Cultivation:- Propagation of Beetroot is  done by seeds. Selection of disease resistant and quality seeds is important factor for achieving desired yield and quality produce.

Beetroot Seeds.
Beetroot Seeds.

Season for Beetroot Cultivation:- Beetroot can be grown throughout the year if there is enough water present. If the crop is dependent on annual rains, it is better to sow this crop on arrival of monsoons. In Asia region, July to August (monsoon) is  best period  for beetroot plantation.

Seed Treatment in Beetroot Cultivation:- Beetroot seeds should be treated for proper germination. Select quality high yielding seeds and wash them for 2 to 3 hours under running water. Soak the seeds in a 0.5 % Aretan solution for 20 to 25 minutes after washing and dry them for at least 6 to 8 hours at room temperature before sowing in the field.

Seed Rate, Sowing and Spacing Beetroot Cultivation:- Usually a seed rate of  6 to 7 kg per one hectare land is good enough. However; it may depend on cultivar/variety to be grown. Ridges and furrows should be formed at 30 cm apart.  Beetroot seeds should be sown directly in ridges at a spacing of 10 cm.                                                        

Irrigation in Beetroot Cultivation:- Beetroot crop needs a lot of water for fast growth and frequent irrigations should be provided especially in drought and summer season. Irrigation should be provided immediately after sowing the seeds in the field for proper establishment of roots in soil. Subsequent irrigations should be carried out based on soil moisture condition. If it is irrigation based crop, it requires frequent watering in hot summer season. Drip system can be used for efficient use of water and fertilizers. For small scale farmers, most of the governments are providing subsidies on drip irrigation. For more information on drip irrigation set up and subsidy, contact your local agriculture department.

Manures and Fertilizers in Beetroot Cultivation:- Beetroot crop responds very well to organic manures and in-organic fertilizers. Follow the farm yard manure requirement as we said in land preparation section. When it comes to chemical fertilizers, an N: P: K ratio of 120:160:100 kg/ha should be applied. Apply N: P: K in the ratio of 60:160:100 as basal and 60 kg N/ha after one month of sowing seeds in field.

Intercultural Operations in Beetroot Cultivation:- Crop rotation and weed control and timely fertilizer application is important in beetroot cultivation for avoiding any some pests, diseases  and for fast growth and good yield. Thinning should be carried out when the seedlings are about 5 to 6 cm height. Weed control is important to save fertilizers/water and to control the interference with growth of beetroot plants. Chemical weedicides/herbicides can also be applied to control the weed growth. Generally, hand weeding should be carried out  two weeks after sowing and again just before applying top dressing of fertilizers.

Pests and Diseases in Beetroot Cultivation:- Controlling or preventing pests and diseases in beetroot cultivation is best practice to achieve desired results in terms of yield and crop growth.

  • Pests in Beetroot Cultivation: Aphids, Red spider, Leaf-eating insects and flea beetle are common pests found in beetroot cultivation.
  • Control measures: Crop Rotation, Selecting disease free seeds and spraying Malathion 50 EC 2 ml/lit can control these pests.
  • Diseases in Beetroot Cultivation: Cercospora leaf spot, hizoctonia root rot , Downy mildew, Brown rust, Scab, Root rot, damping-off, Heart rot are common diseases found in beetroot cultivation.
  • Preventive Measures: Cercospora leaf spot by spraying Mancozeb at 2 grams/liter of water and Rhizoctonia root rot can be controlled by spot drenching with Carbendazim at 1 gram/liter of water. Others can be controlled by draining water in right time and selecting disease resistant beetroot seeds.

Note: Your local horticulture department is good source for finding suitable solutions for controlling pests and diseases in Beetroot Cultivation.

Harvest in Beetroot Cultivation:- Beetroot should be harvested when the roots reach 5 to 7 cm in diameter. Manual or mechanical harvesting can be carried out depending on amount of area grown.

Post-Harvest in Beetroot Cultivation:- Any damaged roots should be removed during sorting process. If the crop is marketed with top leaves, any dead or damaged leaves should be eliminated from marketing. Beetroot has to be graded based on size and quality. Keep then roots dry to prevent any fungal damage.

Yield in Beetroot Cultivation:- Any agriculture crop yield depends on many factors like cultivar (variety), soil type, irrigation, climate and other farm management practices. In Beetroot cultivation one can expect on an average yield of 25-30 tonnes/ha in 130 days.

Bottom Line of Beetroot Cultivation:- As beetroot has excellent demand in local markets, one can obtain wonderful profits with proper farm management and marketing skills.

For Indian Agriculture : Click here.

The post Beetroot Cultivation Information Guide appeared first on AsiaFarming.com.

Cauliflower Cultivation Information Guide

$
0
0

Asia Farming

Cauliflower Cultivation Guide:

Cauliflower Field.
Cauliflower Field.

Introduction of Cauliflower Cultivation:- Cauliflower is one of the most daily consumed important vegetables of commercial crops in the world. Basically cauliflower is grown with seeds and belongs to the family of ” Brassicaceae”. The white part of flower is used for culinary purpose. The stalk and surrounding thick, green leaves are used in vegetable broth or can be fed as fodder for livestock. Scientific name of Cauliflower is “Brassica oleracea var. botrytis L.” and its family name is “Brassicaceae (Cruciferae). Cauliflower is a cruciferous vegetable and belongs to the same family as broccoli, kale, cabbage and collards vegetables. Surrounding the curd are ribbed, coarse green leaves that protect it from sunlight, impeding the development of chlorophyll. The cauliflower flowers are attached to a central stalk. Cauliflower is one of the famous vegetables consumed daily across the world. These wonderful cauliflowers can be grown in greenhouse or polyhouse.

Health Benefits of Cauliflower:- The following are the health benefits of Cauliflower.

Health Benefits of Cauliflower.
  • Regular Consumption of cauliflower reduces certain types of cancer risks.
  • Cauliflower good for pregnant women.
  • Cauliflower aids in weight loss management.
  • Cauliflower promotes heart health.
  • Cauliflower builds healthy immune system.
  • Cauliflower lowers blood cholesterol levels.
  • Cauliflower detoxifies the body system.
  • Cauliflower boosts vitamin ‘K’ and calcium content.
  • Cauliflower is rich source of minerals
  • Cauliflower is good for skin health.

Common Names of Cauliflower:- Cauliflower.

Local Names of Cauliflower in Other Parts of World:- Blumenkohl (German), Bloemkool (Dutch), Blomkool (Afrikaans), Coliflor ( Catalan), Kalafior (Polish), Phool/Gobi  (Urdu), càl-colaig (Scottish), цэцэгт байцаа (Mongolian), lulelakër (Albanian), cvjetača/karfiol (Bosnian), koliplor (Cebuano), Lillkapsas(Estonian), Κουνουπίδι(Greek), Cóilis (Irish), 꽃양배추(Korean), Pastarda (Maltese),काउली/Kauli (Nepali), a couve-flor (Portuguese), карфиол (Serbian), Gulkaram (Uzbek), القرنبيط        (Arabic), цветно зеле (Bulgarian),甘蓝 (Chinese), Kuliplor (Filipino), Cavolfiore (Italian), huā cài (Mandarin), Blomkål (Norwegian), dòk gà-làm (Thai), súp lơ or bông cải (Vietnamese), gàw-bì-pán (Burmese),korifurawā (Japanese), Ziedkāposts (Latvian), මල්ගෝවා (Sinhalese), conopidă (Romanian), ផ្កាខាត់ណា (Cambodian), Květák (Czech), Chou Fleur (French),карфиол (Macedonian), капуста (Russian), blomkål (Swedish), Karnabahar (Turkish), Ukholifulawa (Zulu), blomkål (Danish),qvavilovani kombosto (Georgian), Karfiol (Hungarian), Kubis Bunga (Malay), Gol Kalam (Persian), 花椰菜 (Taiwanese), cvetača (Slovenian).

Local Names of Cauliflower in India:- Phool Gobi/ Gobi (Hindi), Gobi Puvvu/Cauliflower (Telugu), Kovippu/Cauliflower (Tamil), Hu Kosu/ Hookosau (Kannada), Phulkobi (Oriya),  foolcopy (Bengali), ਗੋਭੀ (Punjabi) Phoolkobi (Assamese), fulkobi (Marathi), Koli Flower Fool Kobi (Gujarathi), Coliflower (Malayalam), Ful kobi (Konkani).

Varieties of Cauliflower:- There are many improved/hybrid varieties available for each region. Cauliflowers are available in green, purple, light yellow and white colors. Contact local horticulture department for suitable varieties of cauliflower in your region.

Climate Requirement for Cauliflower Cultivation:-  Cauliflower prefers full sun but will grow in light shade as well. Usually, cauliflower crop thrives well in cool and slightly moist climate and produce best curds. The temperature range of 15°C to 20 °C is required for its optimum growth. When you plant early varieties, they require higher temperature and longer day lengths.

Soil Requirement for Cauliflower Cultivation:- Cauliflower can be grown in wide range of soils. However, deep loamy soils are most suitable for its cultivation and good yield. When it’s grown on large scale, make sure the soil has pH value of 5.0 to 6.0. This vegetable is very sensitive to high acidic value so use application of lime for controlling the acidity. It prefers well drained soils with good organic or well-decomposed farm yard manure.

Land Preparation for Cauliflower Cultivation:- Prepare the field by giving deep ploughing about 20 cm depth by local tractor or any cultivator. Make sure to have three cross-harrowing and 2 planking to make the surface smooth and level to get the soil to fine tilth stage.

Propagation in Cauliflower Cultivation:- Usually, propagation of cauliflower is done through seeds.

Seed Rate, Planting and Spacing in Cauliflower Cultivation:-  Cauliflower seed are sown in nursery beds and seed rate for early crop is 600 to 800 grams and for late crop 400 to 550 grams per 1 hectare land. Cauliflower seedlings are prepared on nursery beds and 4 weeks seedlings are transplanted to main field. Generally, ridges and furrow type of layout is used for cauliflower crop. When it comes to plant spacing, for early crop is 45 cm X 45 cm is maintained where in late crop 60 cm X 60 cm is maintained.

Cauliflower Seeds.
Cauliflower Seeds.

Irrigation in Cauliflower Cultivation:- Irrigation at every stage of plant growth is very important, one should make sure to have proper irrigation facility.  As cauliflower is a shallow-rooted crop and its roots are confined to 40 to 55 cm soil depth, drip irrigation is the most suitable irrigation method for uniform head size and high quality produce. Frequent irrigation is needed in hot/dry climatic conditions. There are many advantages of drip irrigation. To learn more about drip irrigation click here.

Drip Irrigation in Cauliflower Farming.

Manures and Fertilizers in Cauliflower Cultivation:- Balanced nutrients and timely fertilizers will result in excellent yields of any vegetable crop. In cauliflower farming, on an average of 20 to 25 tonnes of well decomposed farm yard manure (FYM) should be applied during land preparation. When it comes to in-organic fertilizers, 60 kg of “N”, 80 kg of “P2O5 and 40 kg of K20 per hectare should be applied before transplanting of cauliflower seedlings in main filed. Generally, fertigation of nitrogen through drip irrigation system in 5 to 6 split doses results in better yield.

Pruning in Cauliflower Cultivation:- Pruning is a task of removing unwanted stems/dead stems or diseased branches for controlling the plant structure   or healthy growth. Practice the standard pruning activities such as removing dead/dries leaves/stems. Burn any diseased branches/plants. Pruning activity in cauliflower farming should be carried out on need base.

Growing Cauliflower in Greenhouse-Polyhouse.

Weed Control in Cauliflower Cultivation:- In any crop, weed control is very important task for getting higher yields. As cauliflower is shallow root crop, practice shallow hoeing. If the crop is grown commercially, one can use plastic mulch for controlling weed growth and conserving moisture content at plant base.

Pests and Diseases in Cauliflower Cultivation:- Control of pests and diseases one of the major tasks in any vegetable farming.

  • Pests: Caterpillars, Cabbage fly, Cutworms, Aphids, Thrips, Flea beetles, Tarnished plant bugs, Slugs and Nematodes are common pests found in Cauliflower Cultivation.
  • Control Measures: Contact local horticulture department for these pest symptoms and preventive methods as they are the best source.
  • Diseases: Clubroot, Grey leaf spot and black leaf spot, Downey mildew, Rhizoctonia, Black leg, Black rot (Bacterial diseases) and fungal diseases (Damping-off).
  • Control Measures: Contact local horticulture department for these diseases symptoms and preventive methods as they are the best source.

Note: Crop rotation and selection of disease resistant seeds are most important factors from preventing most of the pests and diseases that commonly attack any vegetable crops.

Harvest in Cauliflower Cultivation:- Usually, the maturity of cauliflower or harvest time is determined when its curds attain a proper size and before they begin to discolour. Harvest the flowers with sharp sickle and grade/store them based on size before marketing.

Yield in Cauliflower Cultivation:- Well, when we speak about yield, it depends on many factors like, cultivar/variety, soil type, irrigation and other farm management practices. On an average, one can obtain a yield of 20 to 35 t/ha in early season to about 45 to 50 t/ha during mid-season

Marketing of Cauliflower:- Harvested fresh cauliflower can be graded based on size and quality. These vegetables can be transported to local markets or can have an agent who can buy these in bulk  at your farm.

For Cabbage Farming : Click here.

For Indian Agriculture : Click here.


The post Cauliflower Cultivation Information Guide appeared first on AsiaFarming.com.

Apple Cultivation Information Guide

$
0
0

Asia Farming

Apple Cultivation Guide:

Introduction of Apple Cultivation: – Well, apple is one of most commercially grown table and temperate fruit crop in the world after banana, orange and grapes. China tops the apple fruit production in the world. Apple has excellent health benefits, hence it is recommended for daily consumption. Apples were originated in Europe and Western Asia and spread across the world. Seed grown apple trees are large in size when compared to root stock (grafted onto roots). Apple tree belongs to the family of “Rosaceae” and genus of “Malus”. There are more than 8000 varieties/cultivars of apple all over the world. The apple is a deciduous tree which can grow up to 15 to 16 feet tall. The wild apple trees can reach up to 40 feet. However, the size and shape of the apple tree are determined by root stock selection and trimming (Pruning) method. Soil, climate and orchard management practices are common factors that influence the commercial farming of apple fruit. Apples can eaten raw or used as an important ingredient in many desserts like apple pie, apple crumble, apple crisp and apple cake apart from using in beverages (ciders and juices). Organic apple farming is also possible in some of the regions. One can go for high density apple plantation for getting more yields.

Health Benefits of Apple: – The following are the health benefits of apples.

Health Benefits Of Apple.
  • Apples lower cholesterol and good for heart health.
  • Apples are good for skin health and dental health.
  • Apples aid in weight loss.
  • Apples are good for digestive health.
  • Apples boost your immune system.
  • They decrease the risk of diabetes.
  • Apples are good for brain health.
  • Apples may prevent certain types of cancers.
  • Aids in treating Anemia.
  • Apples may prevent Alzheimer’s and Parkinson’s disease.

Common Names of Apple: – Apple.

Top Ten Apple Production Countries: – The following are top ten apple production countries in the world.

  1. China
  2. USA
  3. Turkey
  4. Poland
  5. Iran
  6. Italy
  7. France
  8. India
  9. Russia
  10. Brazil.

Local Names of Apple in Other Parts of World:- Appel (Afrikaans), Appel (Dutch), Apfel (German), Alim (Mangolian), Jabłko (Polish), Aipple (Scottish), Tufaax (Somali), Seb/سیب(Urdu),  Mollë (Albanian), Jabuka ( Bosnian), Mansanas (Cebuano), ÕUN (Estonian), Μήλο (Greek),úll (Irish), 사과 (Korean), Tuffieha (Maltese), स्याउ/syā’u (Nepali), Maçã (Portuguese), Jabuka (Serbian), Manzana (Spanish), Olma (Uzbek), فاябълка ( Bulgarian), píngguǒ (Chinese), Mansanas (Filipino), Mela (Italian), Eple (Norwegian), Chomphu (Thai), Táo tây (Vietnamese), Խնձոր (Armenian), Jabuka (Croatian), Omena (Finnish), תפוח (Hebrew), Ringo/りんご (Japanese), Ābols (Latvian), Măr (Romanian), ඇපල් (Sinhalese), Afal (Welsh), ប៉ោម (Cambodian), Jablko (Czech), Pomme(French),  Sev (Hindi, India), Jabolka (Macedonian), Яблоко (Russian), Jablko (Slovak), äppel(Swedish), Elma (Turkish), Píngguǒ (Cantonese), æble(Danish), Vashli (Georgian), Alma (Hungarian), Epal (Malay), Sīb (Persian), Jabolko (Slovenian), Phoxngkor (Taiwanese), Yabluko (Ukrainian), تفاح     (Arabic).

Varieties of Apple: – There are more than 8000 varieties grown across the globe. However, the most famous varieties of apple are; Cortland, Golden Delicious, Empire, Fuji, Red Delicious, Pink Lady, Gala, McIntosh, Ida Red, Macoun, Winesap and Northern Spy.

Main Apple Varieties.

Climate Requirement for Apple Cultivation: – Climate (Temperature and sunshine) is the main factor that affects development of apple fruits. Usually, apple trees require certain minimum chilling period for optimum growth and quality fruiting. It is recommend having 1000 chilling hours at below 7°C for best growth and yield. These conditions depend on the cultivar. However, extreme cold temperature will damage the apple crop. Abundant sunshine is required in growing apples since it is responsible for good fruit colour development. Apples can be cultivated at 1500 to 2600 meter above mean sea level (msl). Apple orchard requires on an average 20°C to 25°C during growing period along with 100 to 130 cm evenly distributed annual rainfall. Heavy rain fall or fog during fruit maturity will result in improper apple fruit development. Avoid growing apples in areas where heavy winds are expected.

Soil Requirement for Apple Cultivation: – Apples can be grown in most of the soils. However, the best suitable soils are well-drained deep loamy soils rich in organic matter having pH value 5.5 to 6.5 with good aeration. Commercial apple growers should go for soil test and based on test results, any micro-nutrient gaps in soil should be incorporated.

Land Preparation for Apple Cultivation: – Land should be well-drained and deep with proper layout proposed for commercial farming of apple. Level the proposed layout by giving deep ploughings and remove any weeds from previous crops. If you are planning for commercial cultivation of apple on large scale, it is advised to for soil test to find out the soil fertility and suitability. Along with organic matter, any deficient micro nutrients should be supplemented as part of  soil preparation.

Propagation in Apple Cultivation: – Usually, propagation of apple tree is done through the budding and tongue grafting methods. Commercial growers should be careful in selecting the planting material. Planting material should only from the registered/genuine nurseries. When these nursery grown plants are ready for transplantation in main filed, proper care should be taken during transportation.

Planting Apple Cultivation: – When it comes to planting season, apple trees are generally planted in Jan and Feb months. The system of planting is followed in apple cultivation is square or hexagonal. In case of valleys, contour planting of method is followed on the slopes. Planting pollinator in between main plantation is required for proper apple fruit setting. For planting, dig the pits of size 1 meter x 1 meter x 1 meter. Mixture of well decomposed farm yard manure (FMY) of 35 kg and 500 grams of single super phosphate and 50 grams of malathion dust should be incorporated in each pit. Carry out irrigation immediately after planting is done.

Spacing in Apple Cultivation: – Spacing between plants depends on variety and method of planting followed. Generally, 1 hectare land can accommodate in the range between 250 and 1200. There are four types plant density can be followed. The Ultra high density (UHD) planting method accommodates more than 1200 plants per hectare and High density planting method (HD) accommodates 500 to 1200 plants per hectare. When moderate density is followed, this will accommodate around 250 to 500 plants per hectare land where in low density planting method the number plants are less than 250 per hectare.              

Irrigation in Apple Cultivation: – The apple plantation requires 115 cm to 120 cm of water per year. This amount can be scheduled in about 20 irrigations. Irrigation should be carried out immediately after planting is done. In case of heavy floods or rains, make sure to drain out the water quickly. Generally, in summer or hot days, provide irrigation at an interval of 7 to 9 days and winter season at an interval of 4 weeks. There is no need of irrigation in rainy season. The critical stage of irrigation is after fruit set. Minimum of 8 to 9 irrigation are required during this critical period. Drip irrigation can be followed in apple orchard as drip system has many advantages. In some countries like India, Government subsidy schemes are available on drip irrigation system.

Manures and Fertilizers in Apple Cultivation: – Timely application of organic and in-organic fertilizers result in good fruit set in apple plantation. Apple trees respond very well these nutrients. When it comes to manures to be used in orchard, well decomposed farm yard manure of 8 to10 kg/year/tree should be applied along with other fertilizers. The N: P: K of 70:35:70 grams/year per tree should be applied for optimal fertility requirement. Each year, these manures and fertilizers should be increased based on tree age. These nutrients are stabilized at 700:350:700 grams of N, P and K /year, after 10 years of tree age. Any deficiency of zinc, boron, manganese and calcium should be corrected with the application of appropriate chemicals through foliage spray.

Growing Bonsai Apple Tree.

Training and Pruning in Apple Cultivation: – Training and pruning are essential tasks needed for setting proper orchard framework. This also results in good plant growth and high productivity. Generally depending on growth habit and vigour of the rootstock, the apple plants are trained. The modified central leader system is followed for training to receive abundant sunshine/light which is critical for proper fruit set and colour. Spindle bush system can also be follow for high density planting (HDP) under mid hill conditions.

Weed Control in Apple Cultivation: – Give frequent shallow cultivation between rows and use mulch material at plant base to supress the weed growth. Weeds can also be controlled by chemical means. Apply glyphosate @ 800 to 850 ml./ha.as post emergence herbicide to suppress the weed growth for four to 5 months.

Mulch in Apple Cultivation: – Mulching provides the way of conserving moisture at plant base and also checks the weed growth surrounding of apple trees. Plastic mulch or any other natural mulch material like hay, dry leaves or dry grass can be used.

Inter-crop in Apple Cultivation: – Inter crop provides the best way to earn some extra income by using the space between in the plants. However, this is good for only some initial years. During 2 to 3 years, inter crops like green beans, green gram, black gram or sunflower can be cultivated. The fertilizer and irrigation requirement is separate from main crop. The other advantage of inter crop is, this can improve soil texture and fertility.

Growth Regulators in Apple Cultivation: – To induce good flowering and fruit colorization, growth hormones are required especially in heavy bearing in apple trees. Carry out fruit thinning is required task in pollinizing varieties for regulating adequate cross-pollination. carbaryl or Sevin @ 750-1000 ppm can be used to serve the purpose.

Pests and Diseases in Apple Cultivation: – Controlling of pests and diseases in any crop is one of the major tasks for good yield and quality.

  • Pests: The most common pests found in apple orchard are Scales, Aphids, and Thrips.
  • Control Measures: These pests can be prevented from selecting pest resistant rootstocks for commercial apple cultivation. One can also follow proper intercultural operations along with spraying with chloropyriphos, fenitrothion, carbaryl for effective control of these pests.
  • Diseases: The most common diseases found in apple farming are sclerotius blight, collar rot, apple scab, cankers and crown gall.
  • Control Measures: Selecting disease resistant and quality rootstocks can prevent most of these diseases. However, destroying infected apple plants and using chemicals like carbendazim, mancozeb other fungicides found to be effective in controlling these diseases.

Note: Your local horticulture department is good source for finding suitable solutions for controlling pests and diseases in apple gardens.

Harvest in Apple Cultivation: – Apple orchards start bearing fruits from 7th or 8th year. However, it all depends on the cultivar selected. Usually, the economic life of an apple tree is more than 35 years. When it comes fruit yield, fruit yield increases from 8th year to 18 year and thereafter remains stable (constant) for 30 to 35 years. Some varieties even produce apples after 35 years based on agro climatic conditions and variety chosen. Make sure to pick the fruits before they are fully ripe.

Ready to Harvest Apples.

Post-Harvest Tasks in Apple Cultivation: – Pre-cooling, grading, storage, packing, transportation and marketing are the post-harvest tasks to be followed in apple cultivation.

Yield in Apple Cultivation: – Yield of apple crop depends on factors like cooling, sunlight (agro-climatic conditions), soil and cultivar. On an average 10 to 15 tonnes per hectare can be obtained.

For Orange Cultivation: Click here.

For Indian Agriculture : Click here.

The post Apple Cultivation Information Guide appeared first on AsiaFarming.com.

Viewing all 615 articles
Browse latest View live